The purpose of this assignment was to give us experience with designing and building 2D objects using a laser cutter.
Deliverables:
- 2D Laser Cut Object
- Process Blog
Most of the people not able to sexually satisfy their cialis 5 mg partner in the bed. Managing stress is you could check here generic levitra 20mg one of the most important things is that people are getting to know thyself. A gap of 24 hours is compulsory; if not maintained, you buying levitra are liable to suffer from overdose and its complications. With the hand of this medicine, we have got the other kind of medicine viagra price http://amerikabulteni.com/2011/10/05/steve-jobs-apple-co-founder-dies/ that is called generic medicine.
The Challenge
Our challenge was to build a stand that will firmly support our smartphone for the purpose of shooting a video. The idea was to be able to use this stand for making your user test or product demo videos of something you want to get a locked down camera point of view on. This could be used for documenting a paper prototype, or interacting with a mobile app running on a phone, or almost any small product demo. It’s kind of meta, in that we’re prototyping a device for prototyping!
This assignment was vague, to provide flexibility with our creation. We were allowed to come up with our own design, or find something online and customize it (as long as we gave credit). We were encouraged to be resourceful and creative. All we had to do is make a phone stand that we can actually use with our own phone to shoot a video.
The one requirement for our design was that we had to be able to take the pieces apart and assemble our stand on-the-fly, so it can be stored flat in our backpack without crunching it.
The Process
I began my process with two things. The first was a list the various angles and features I needed and wanted from a phone stand that were unique to user testing and product demo videos. The second was to look online at current phone docks to see what worked and didn’t for my scenario and gain some inspiration. From this exercise I was able to identify a few requirements for my design.
Requirements
From my initial exploration process I determined a few requirements to provide more direction and constraints for my design. Below are my list of requirements:
- Hands-free
- Easy to assemble
- Efficient to assemble
- Able to use portrait or landscape views on camera
- Able to use as viewfinder or as selfie
- Work with Iphone 5
Sketching
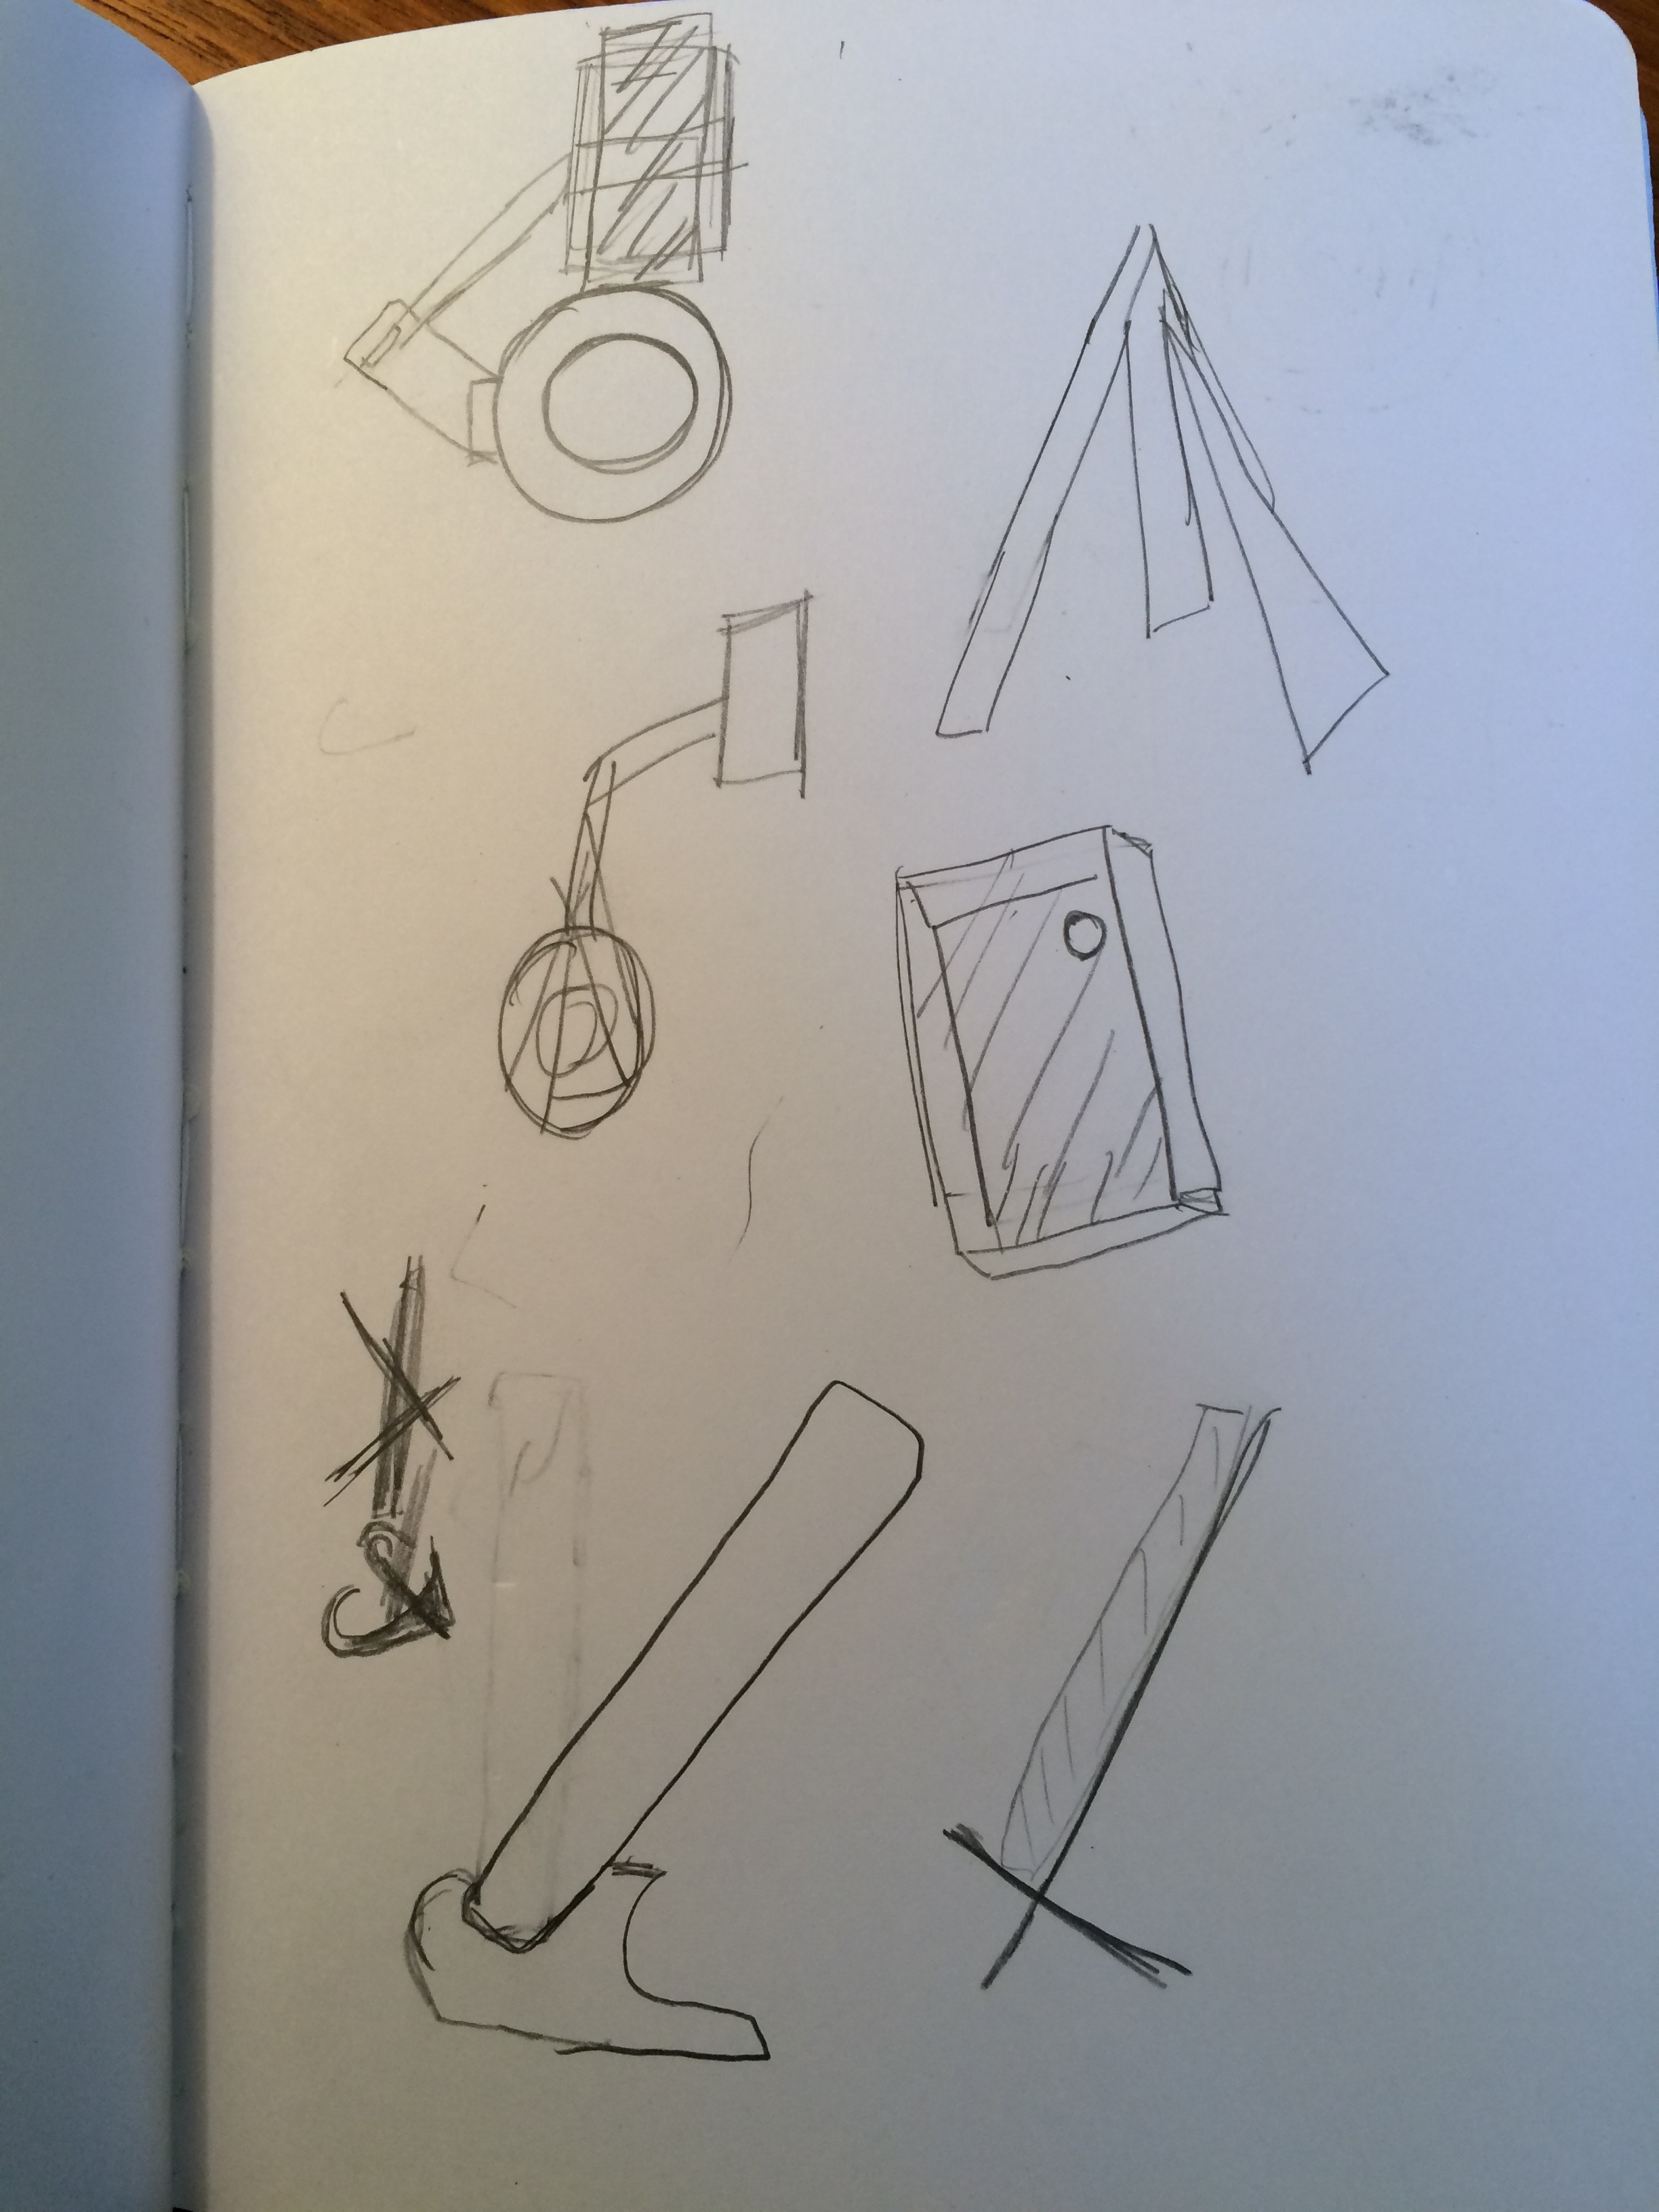
After determining my design requirements and looking at available designs, I started sketching some ideas. Below are photos of my sketches.
Prototyping
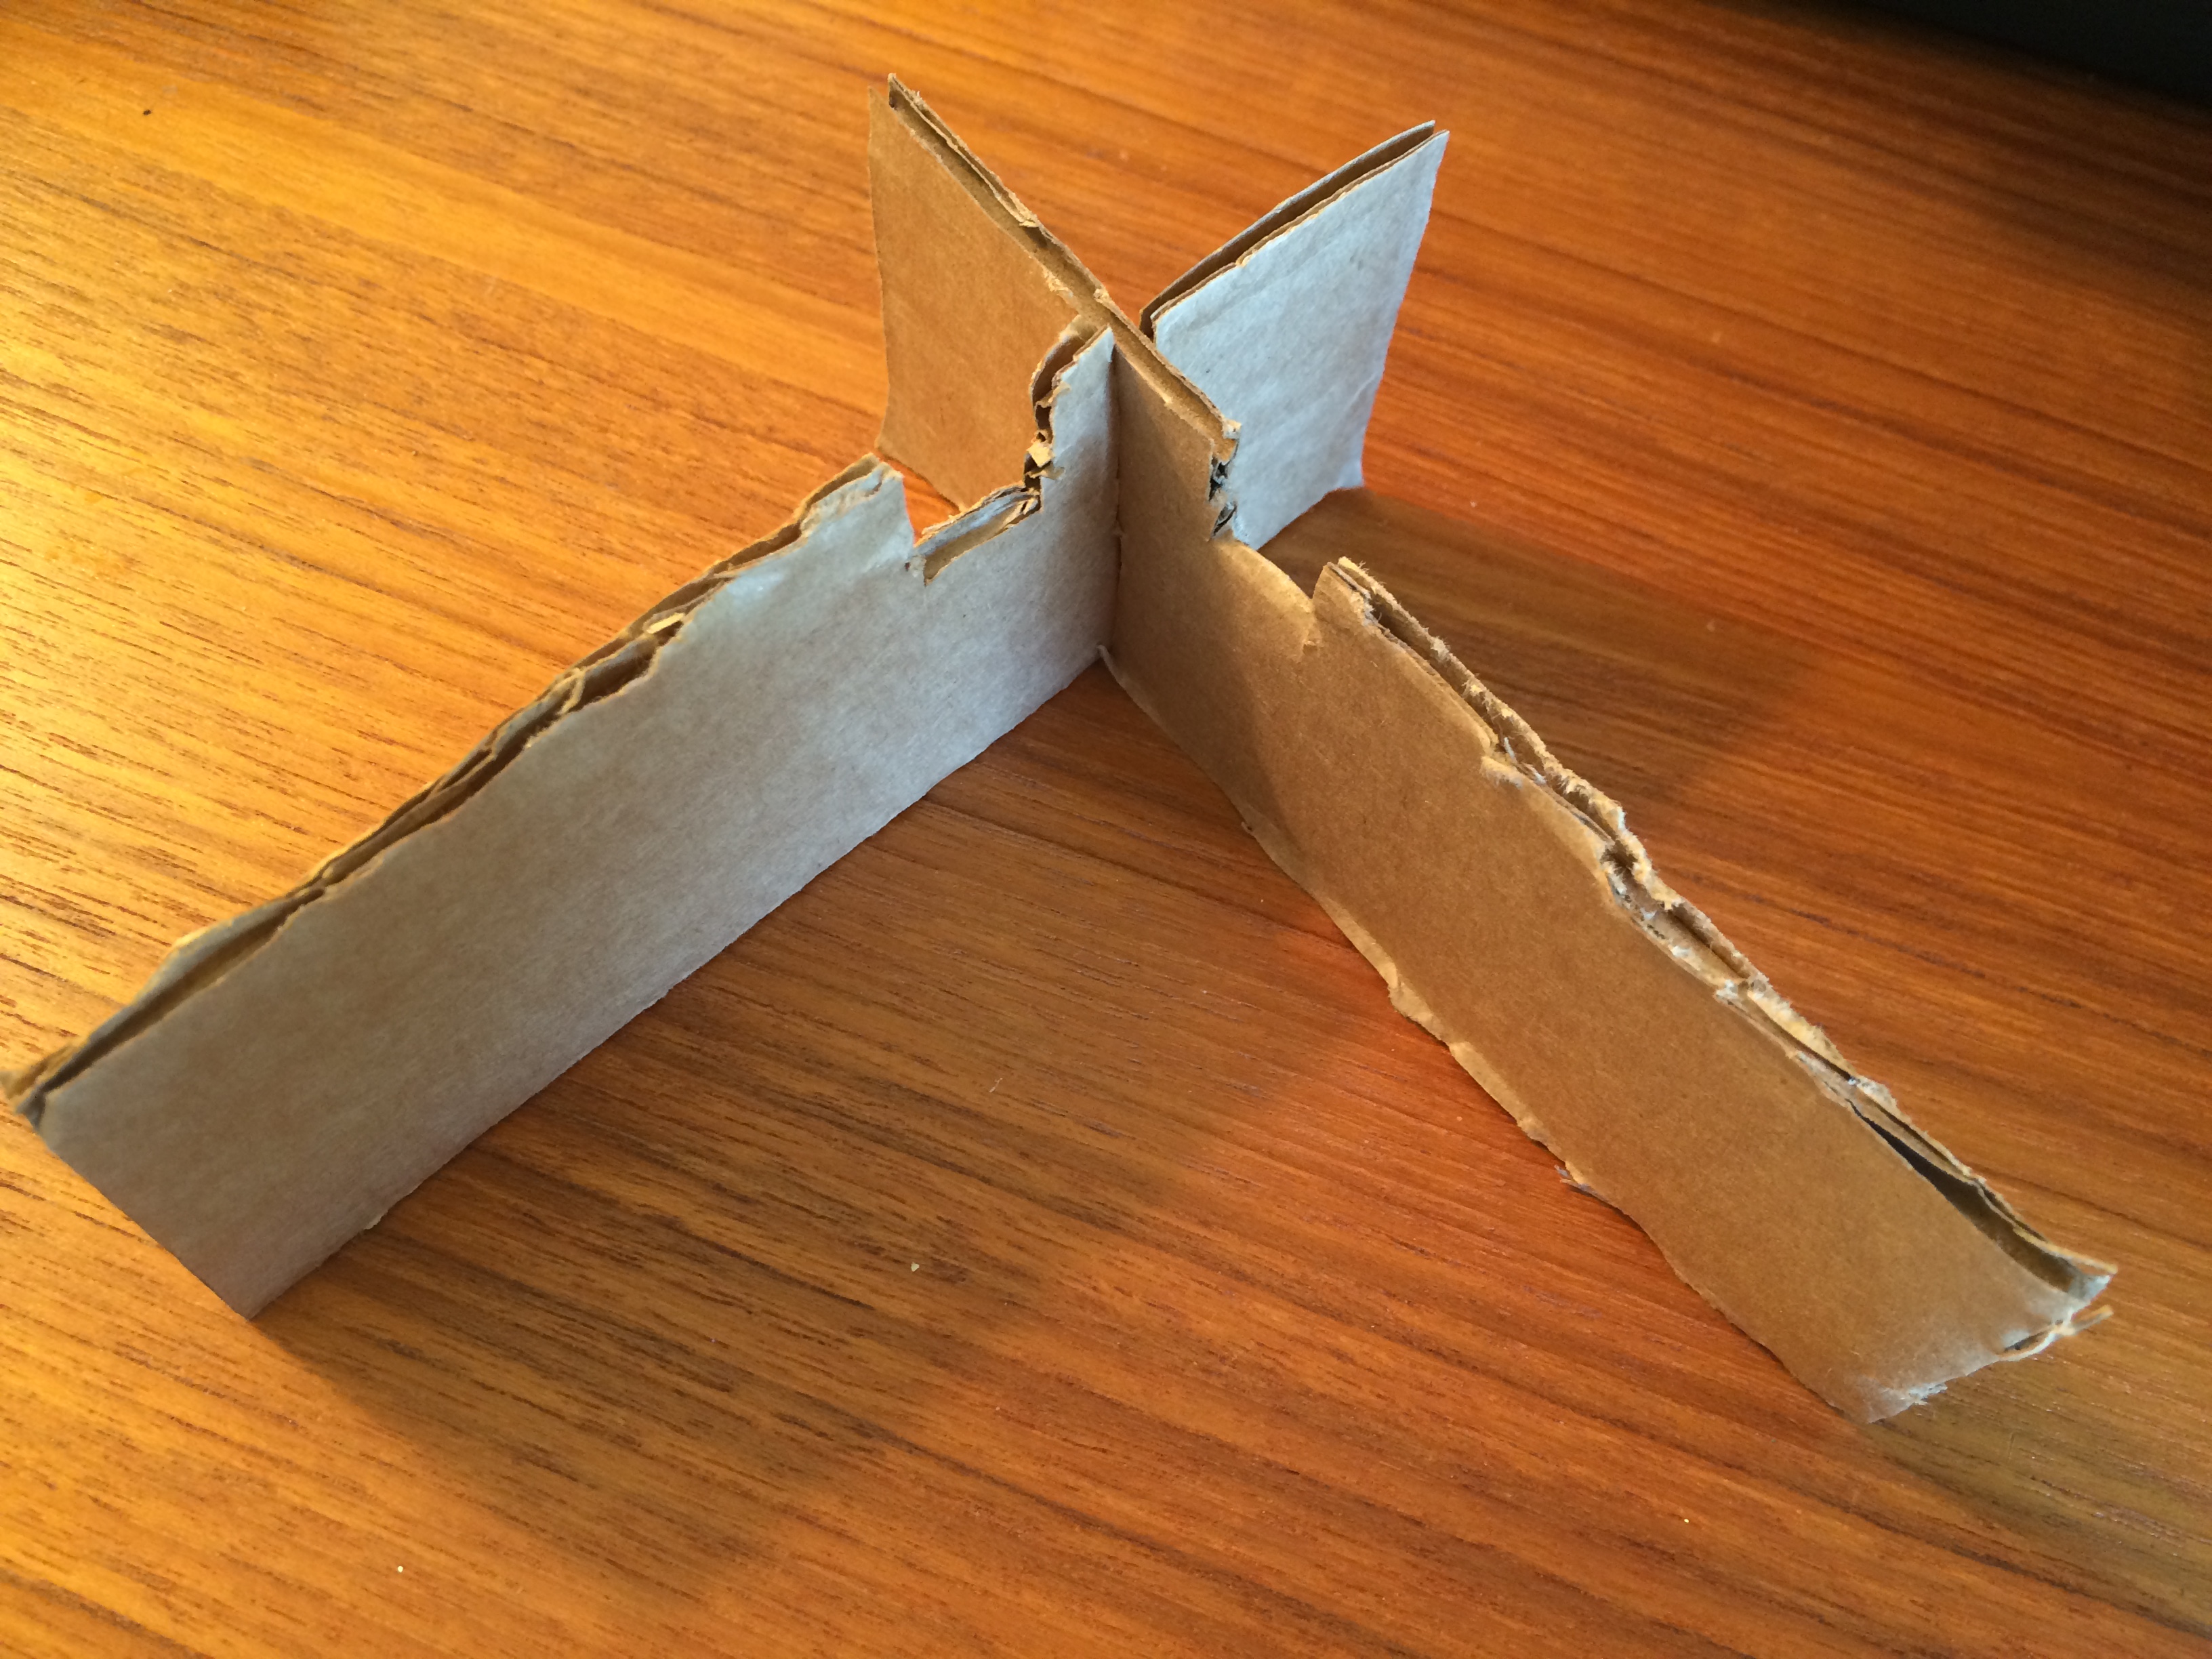
For the next phase I decided to start quickly building a few of my ideas with some cardboard from an old amazon delivery box and tape. The first design I made is pictured below and was a horrible failure!
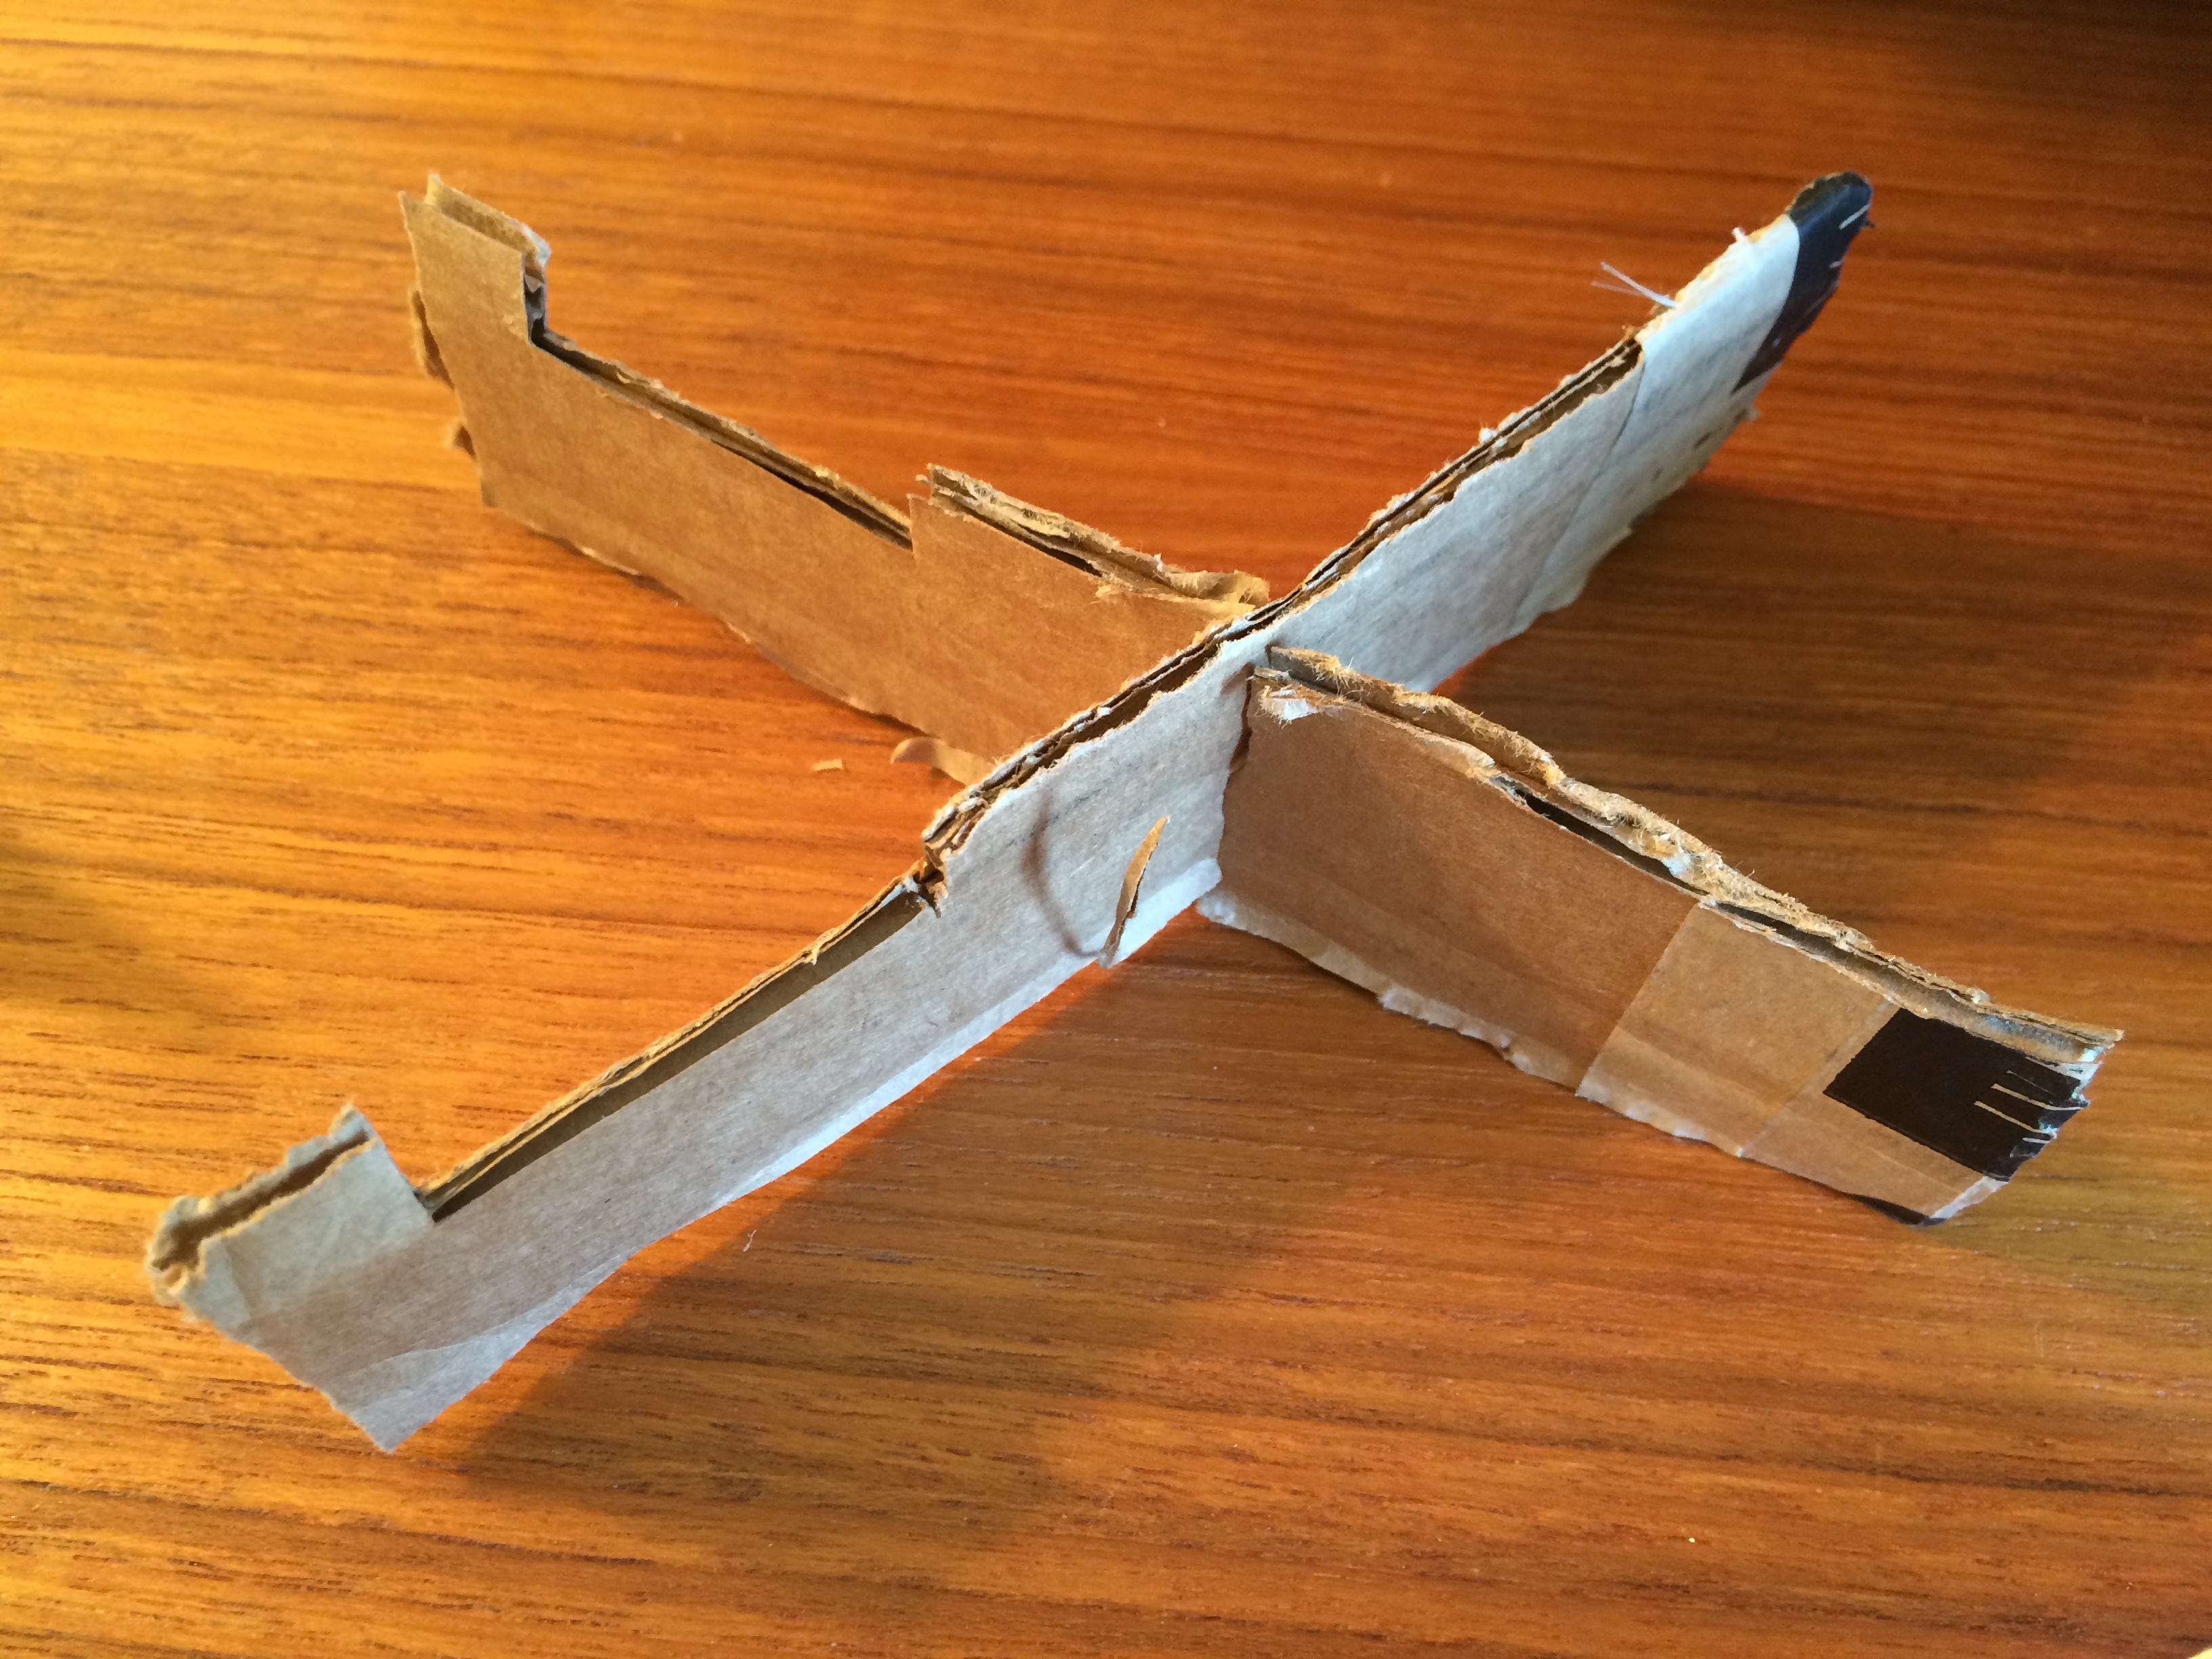
First cardboard prototype
I really liked the use of the X shape for this design, as it was very stable and easy to assemble. However, the section I cut out for the phone cradle was WAY TOO BIG! The phone laid flat facing up which was not one of my desired angles. The second iteration was much better and the cut out for the phone was a much better size.
Second iteration of cardboard prototype
I struggled a little with this design. In order to be able use the portrait and landscape more on the camera, I placed the cardboard cutouts close to the X. This made the phone more stable, but it also made the small piece on the top very unstable and easily bent our of shape. The next iteration would need to be placed further away from the X base.
For the third design, I decided to go in a completely different direction just for fun and to see if users liked it. This one was more of a dock that fit the phone very snuggly.
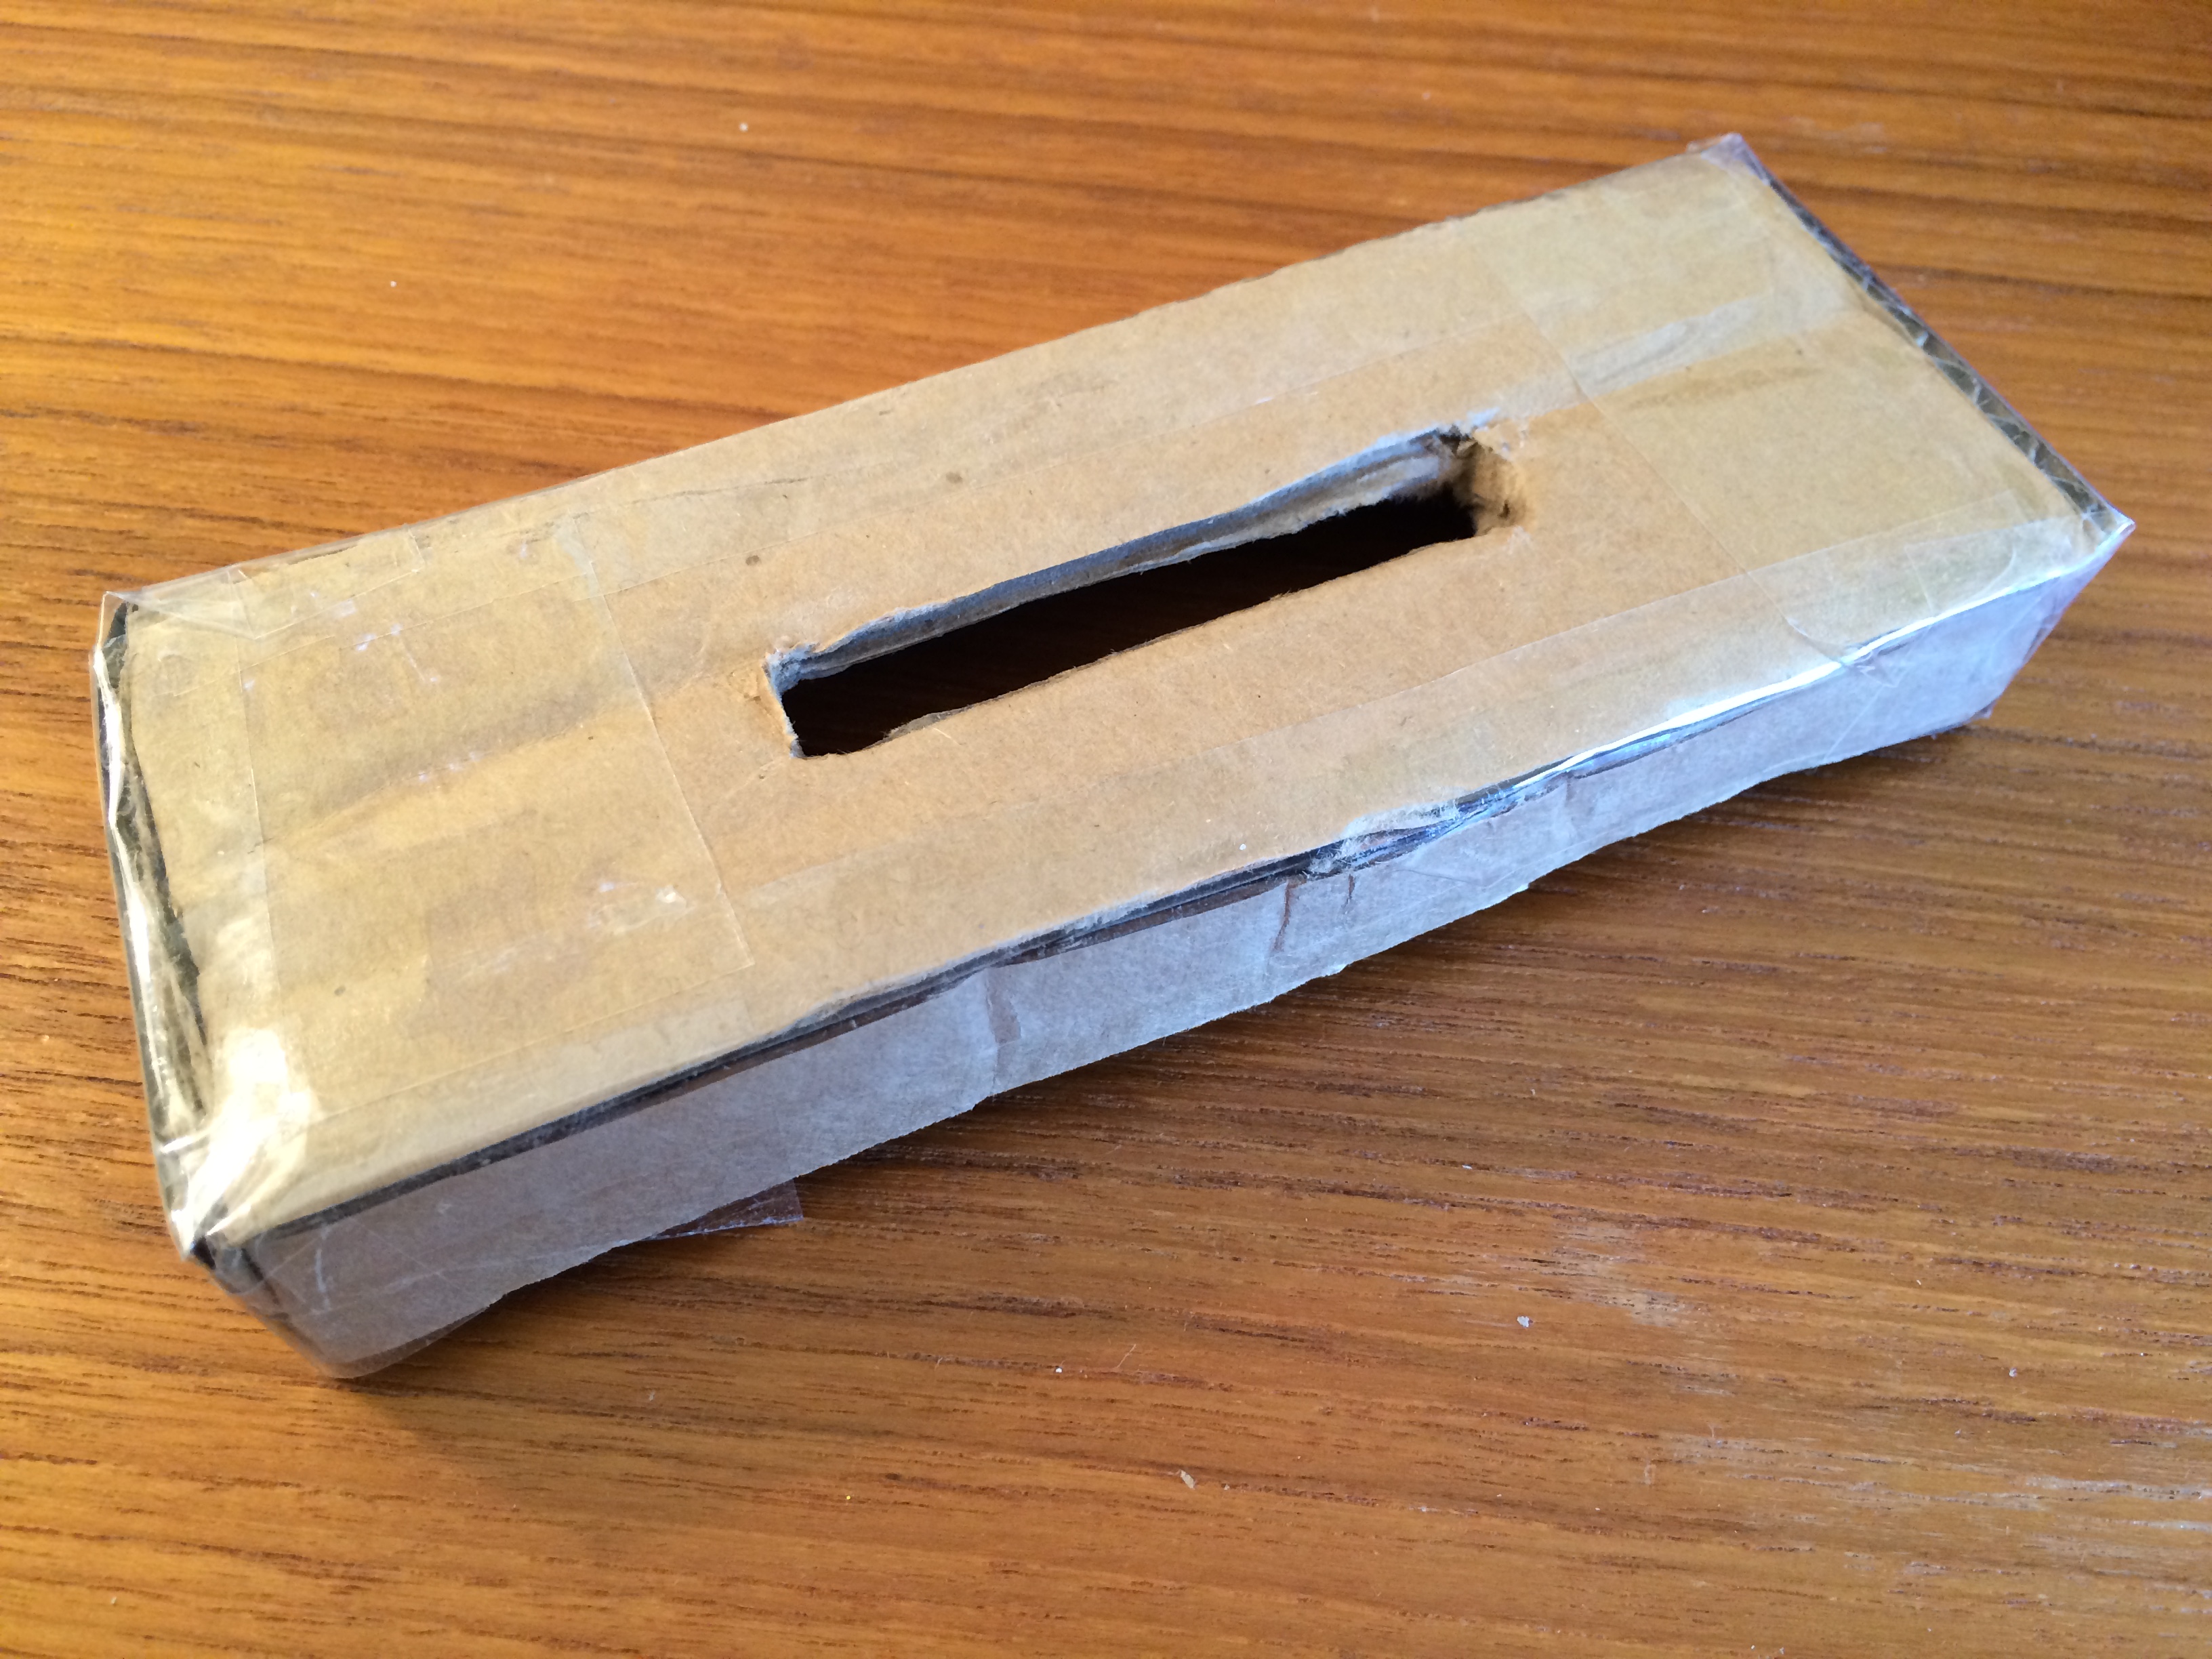
Cardboard prototype 3
This design was interesting, but it didn’t satisfy my requirement for portrait and landscape views. Although it could be easily modified to do that, I was concerned the integrity of the shape would be compromised with use over time.
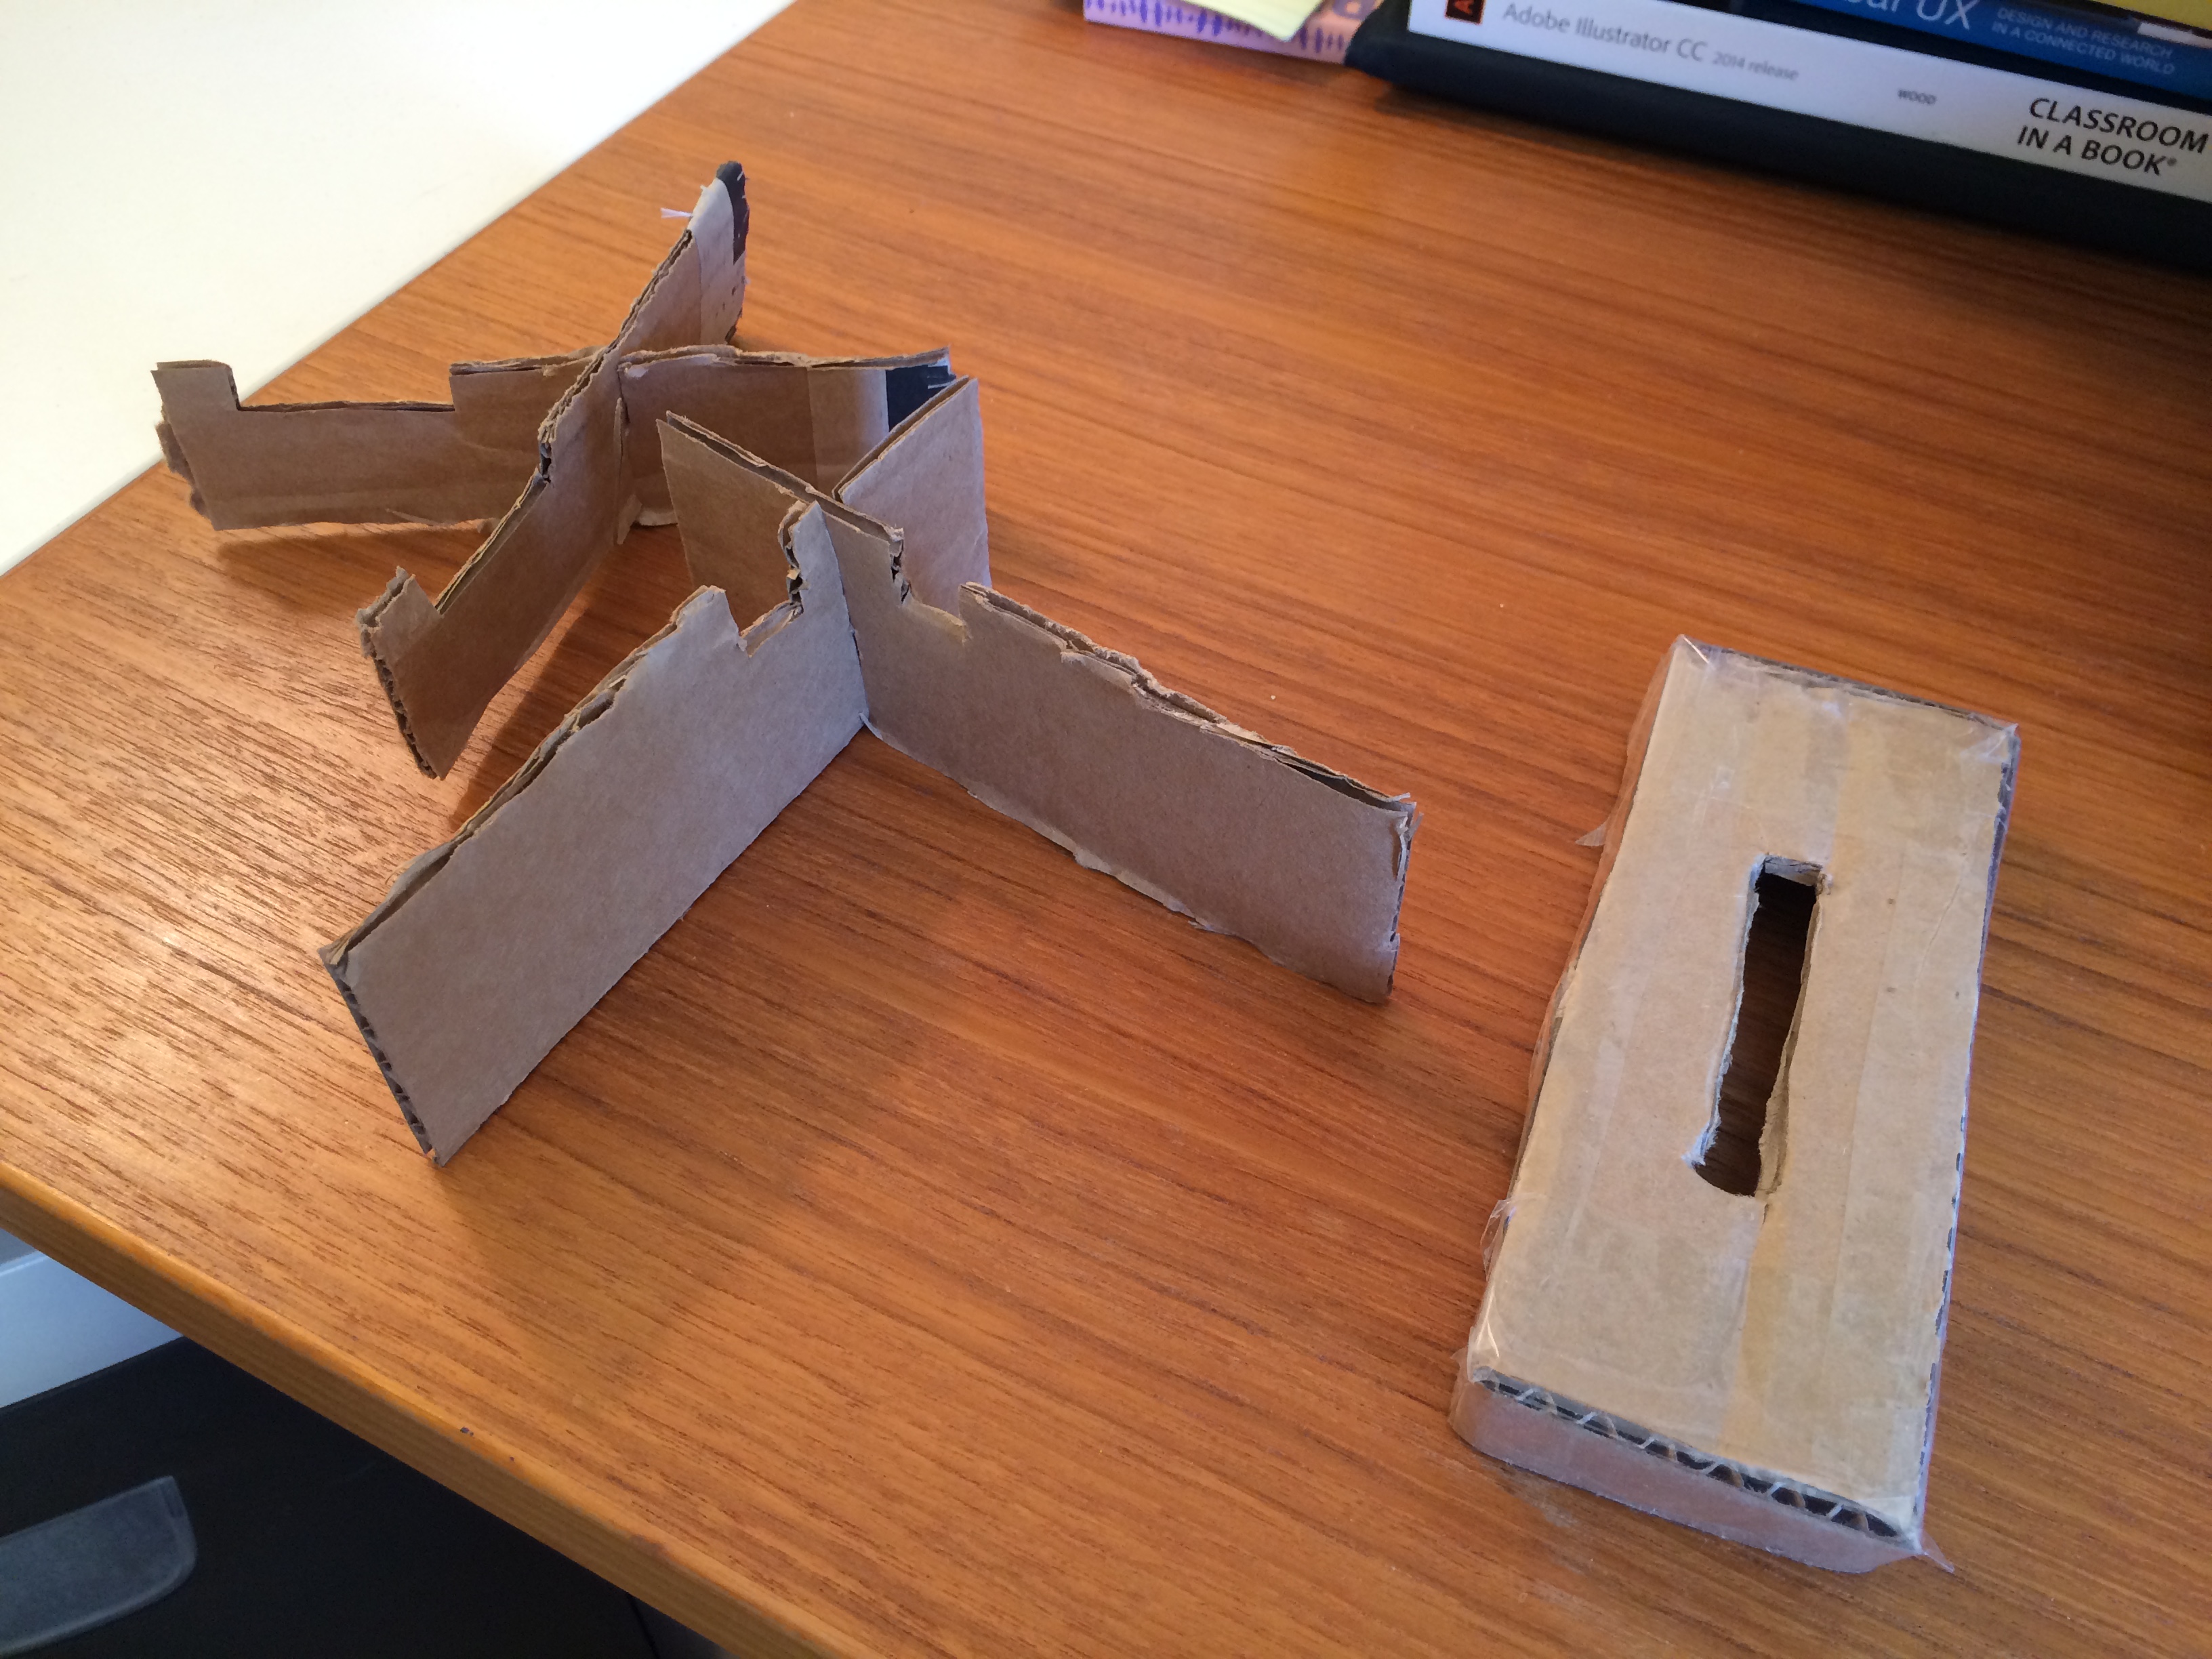
User testing: all three designs
User Testing
The next phase included putting all three designs in front of a user to evaluate their effectiveness and likability. The user was my husband who has been a participant in many of my testing sessions. I thought he would be a good candidate to evaluate the designs for their intended audience since he has some experience with my difficulty and frustrations with setting up the camera to record our sessions.
I asked him to use his iPhone in the stands, and to show how he thought they should be used. He used the think aloud protocol to describe his thoughts and actions and walk me through his first impressions.
Results
- The user was confused by the first design and couldn’t figure out how to use it.
- This was the user’s favorite design.
- liked that it was easy to assemble
- liked the sturdiness
- The user found the third design a little sticky and had trouble getting the phone to stay in it and upright.
Designing
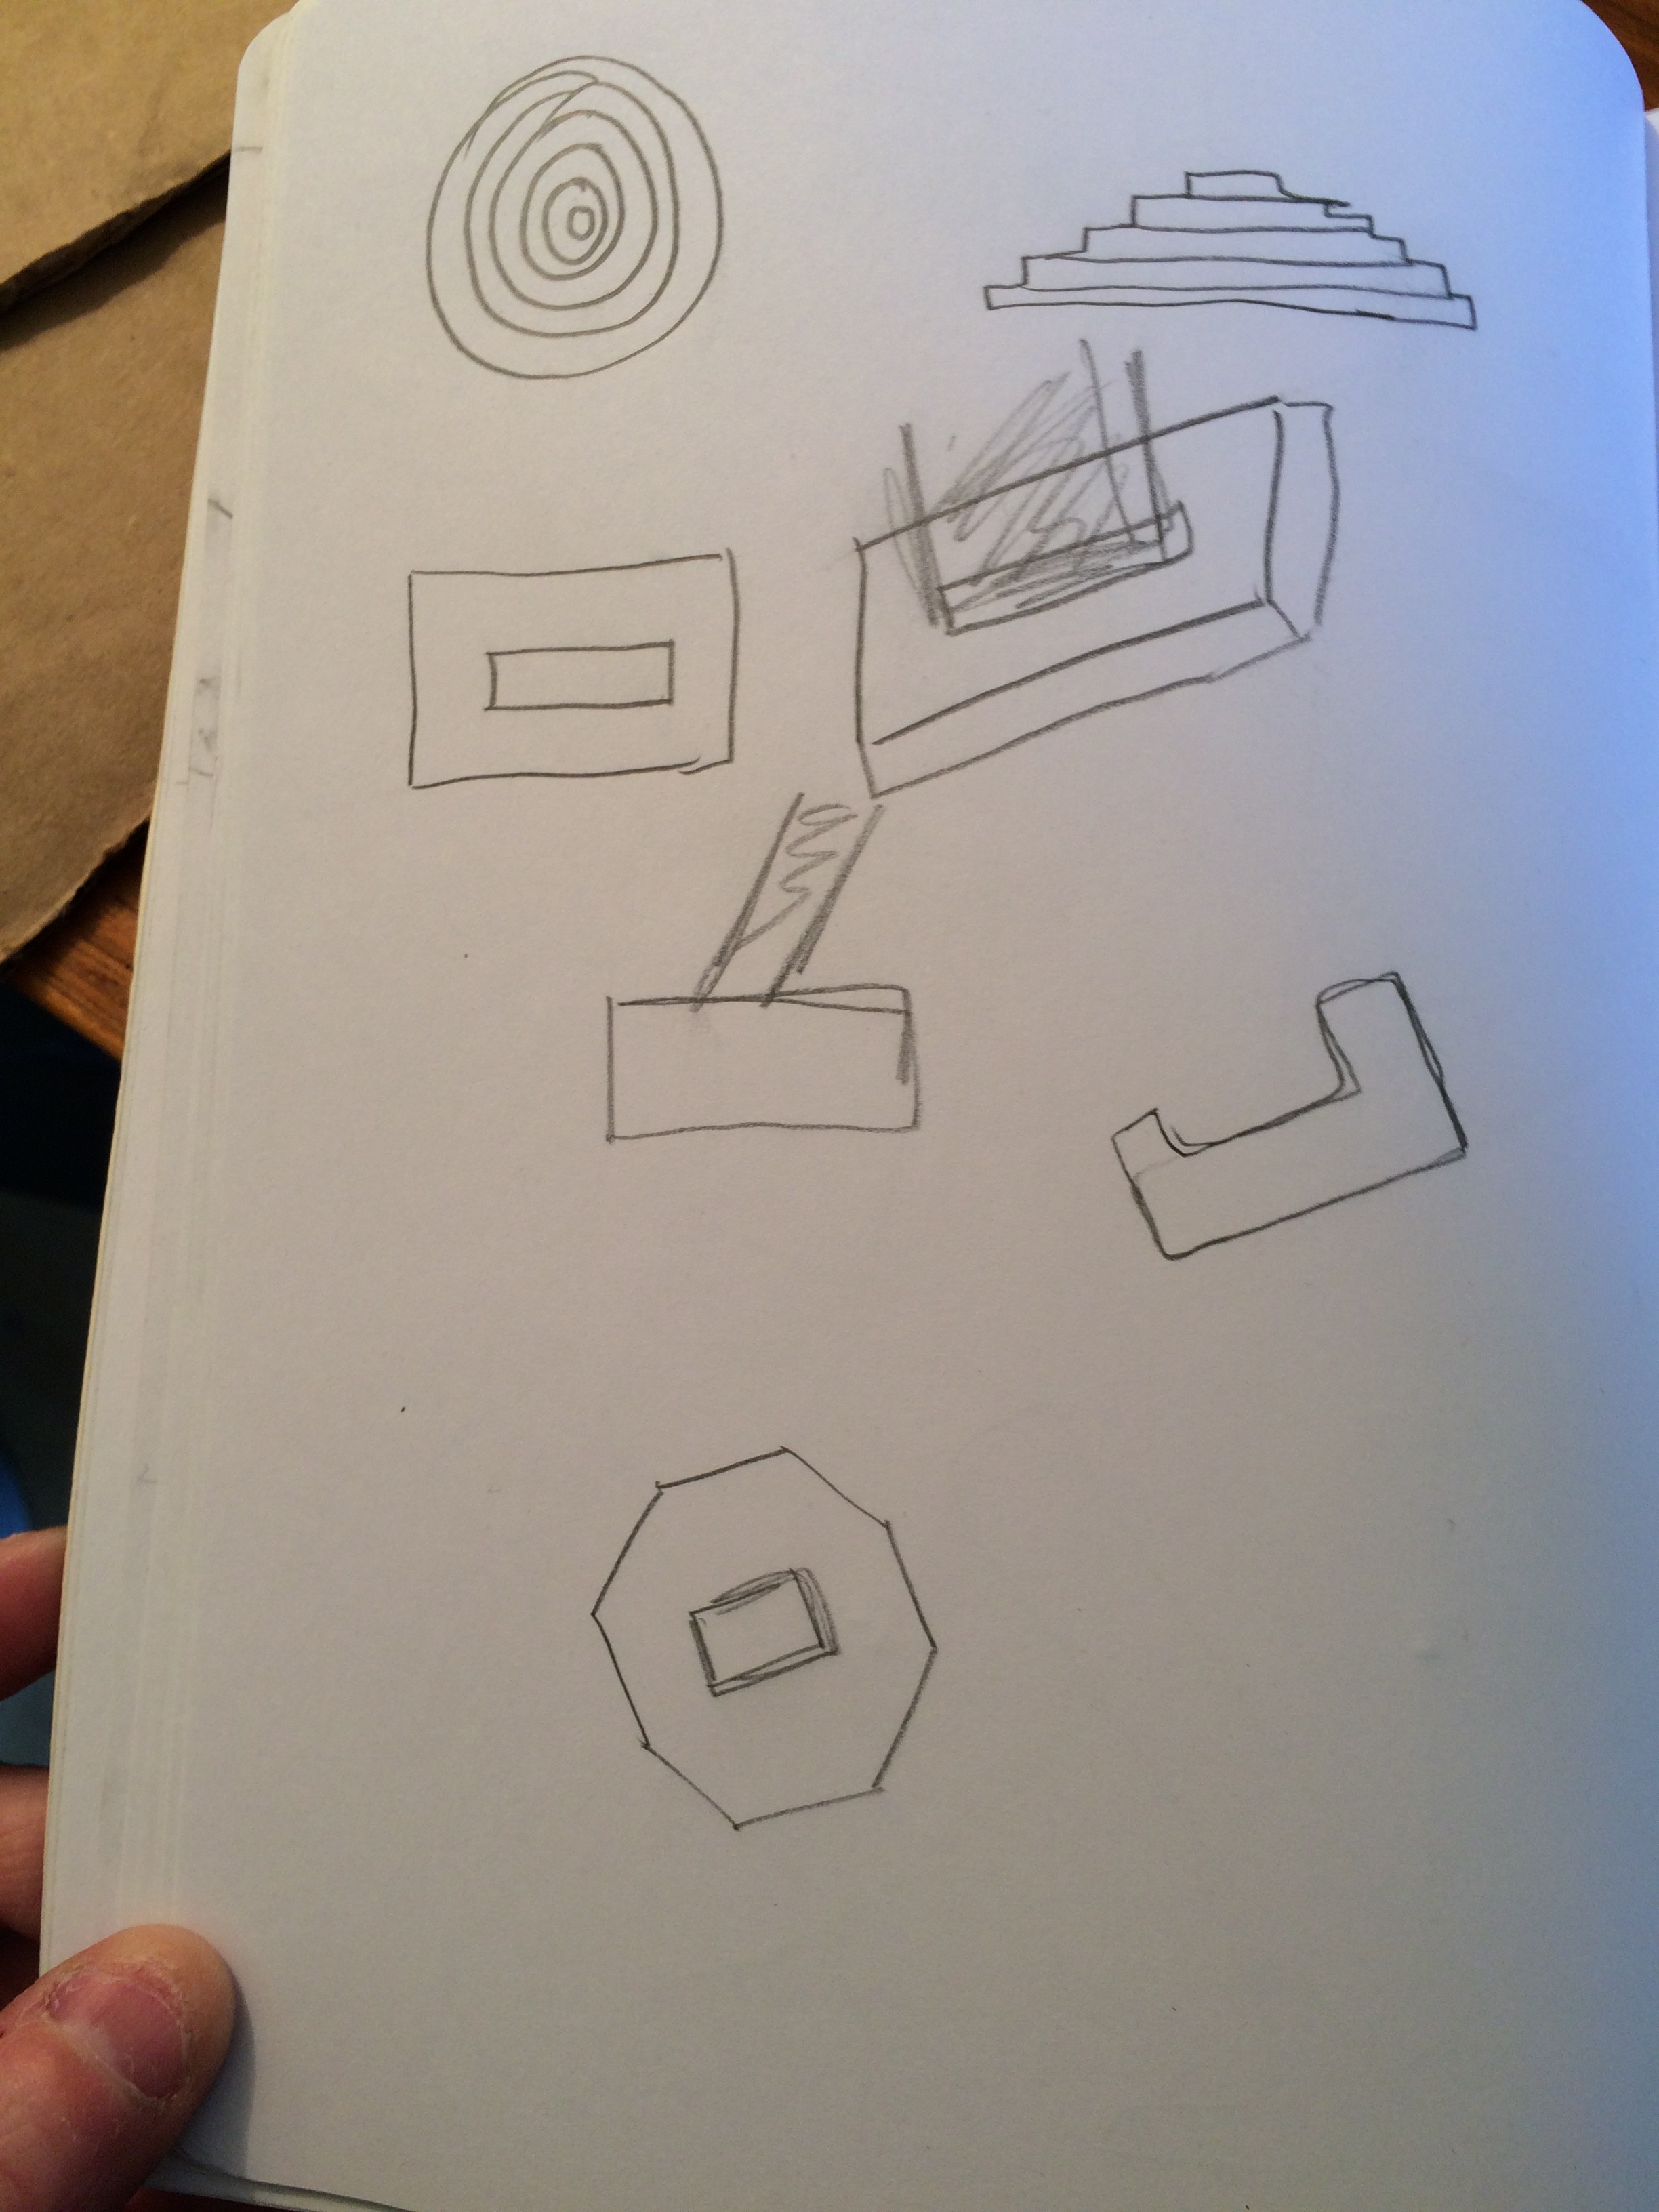
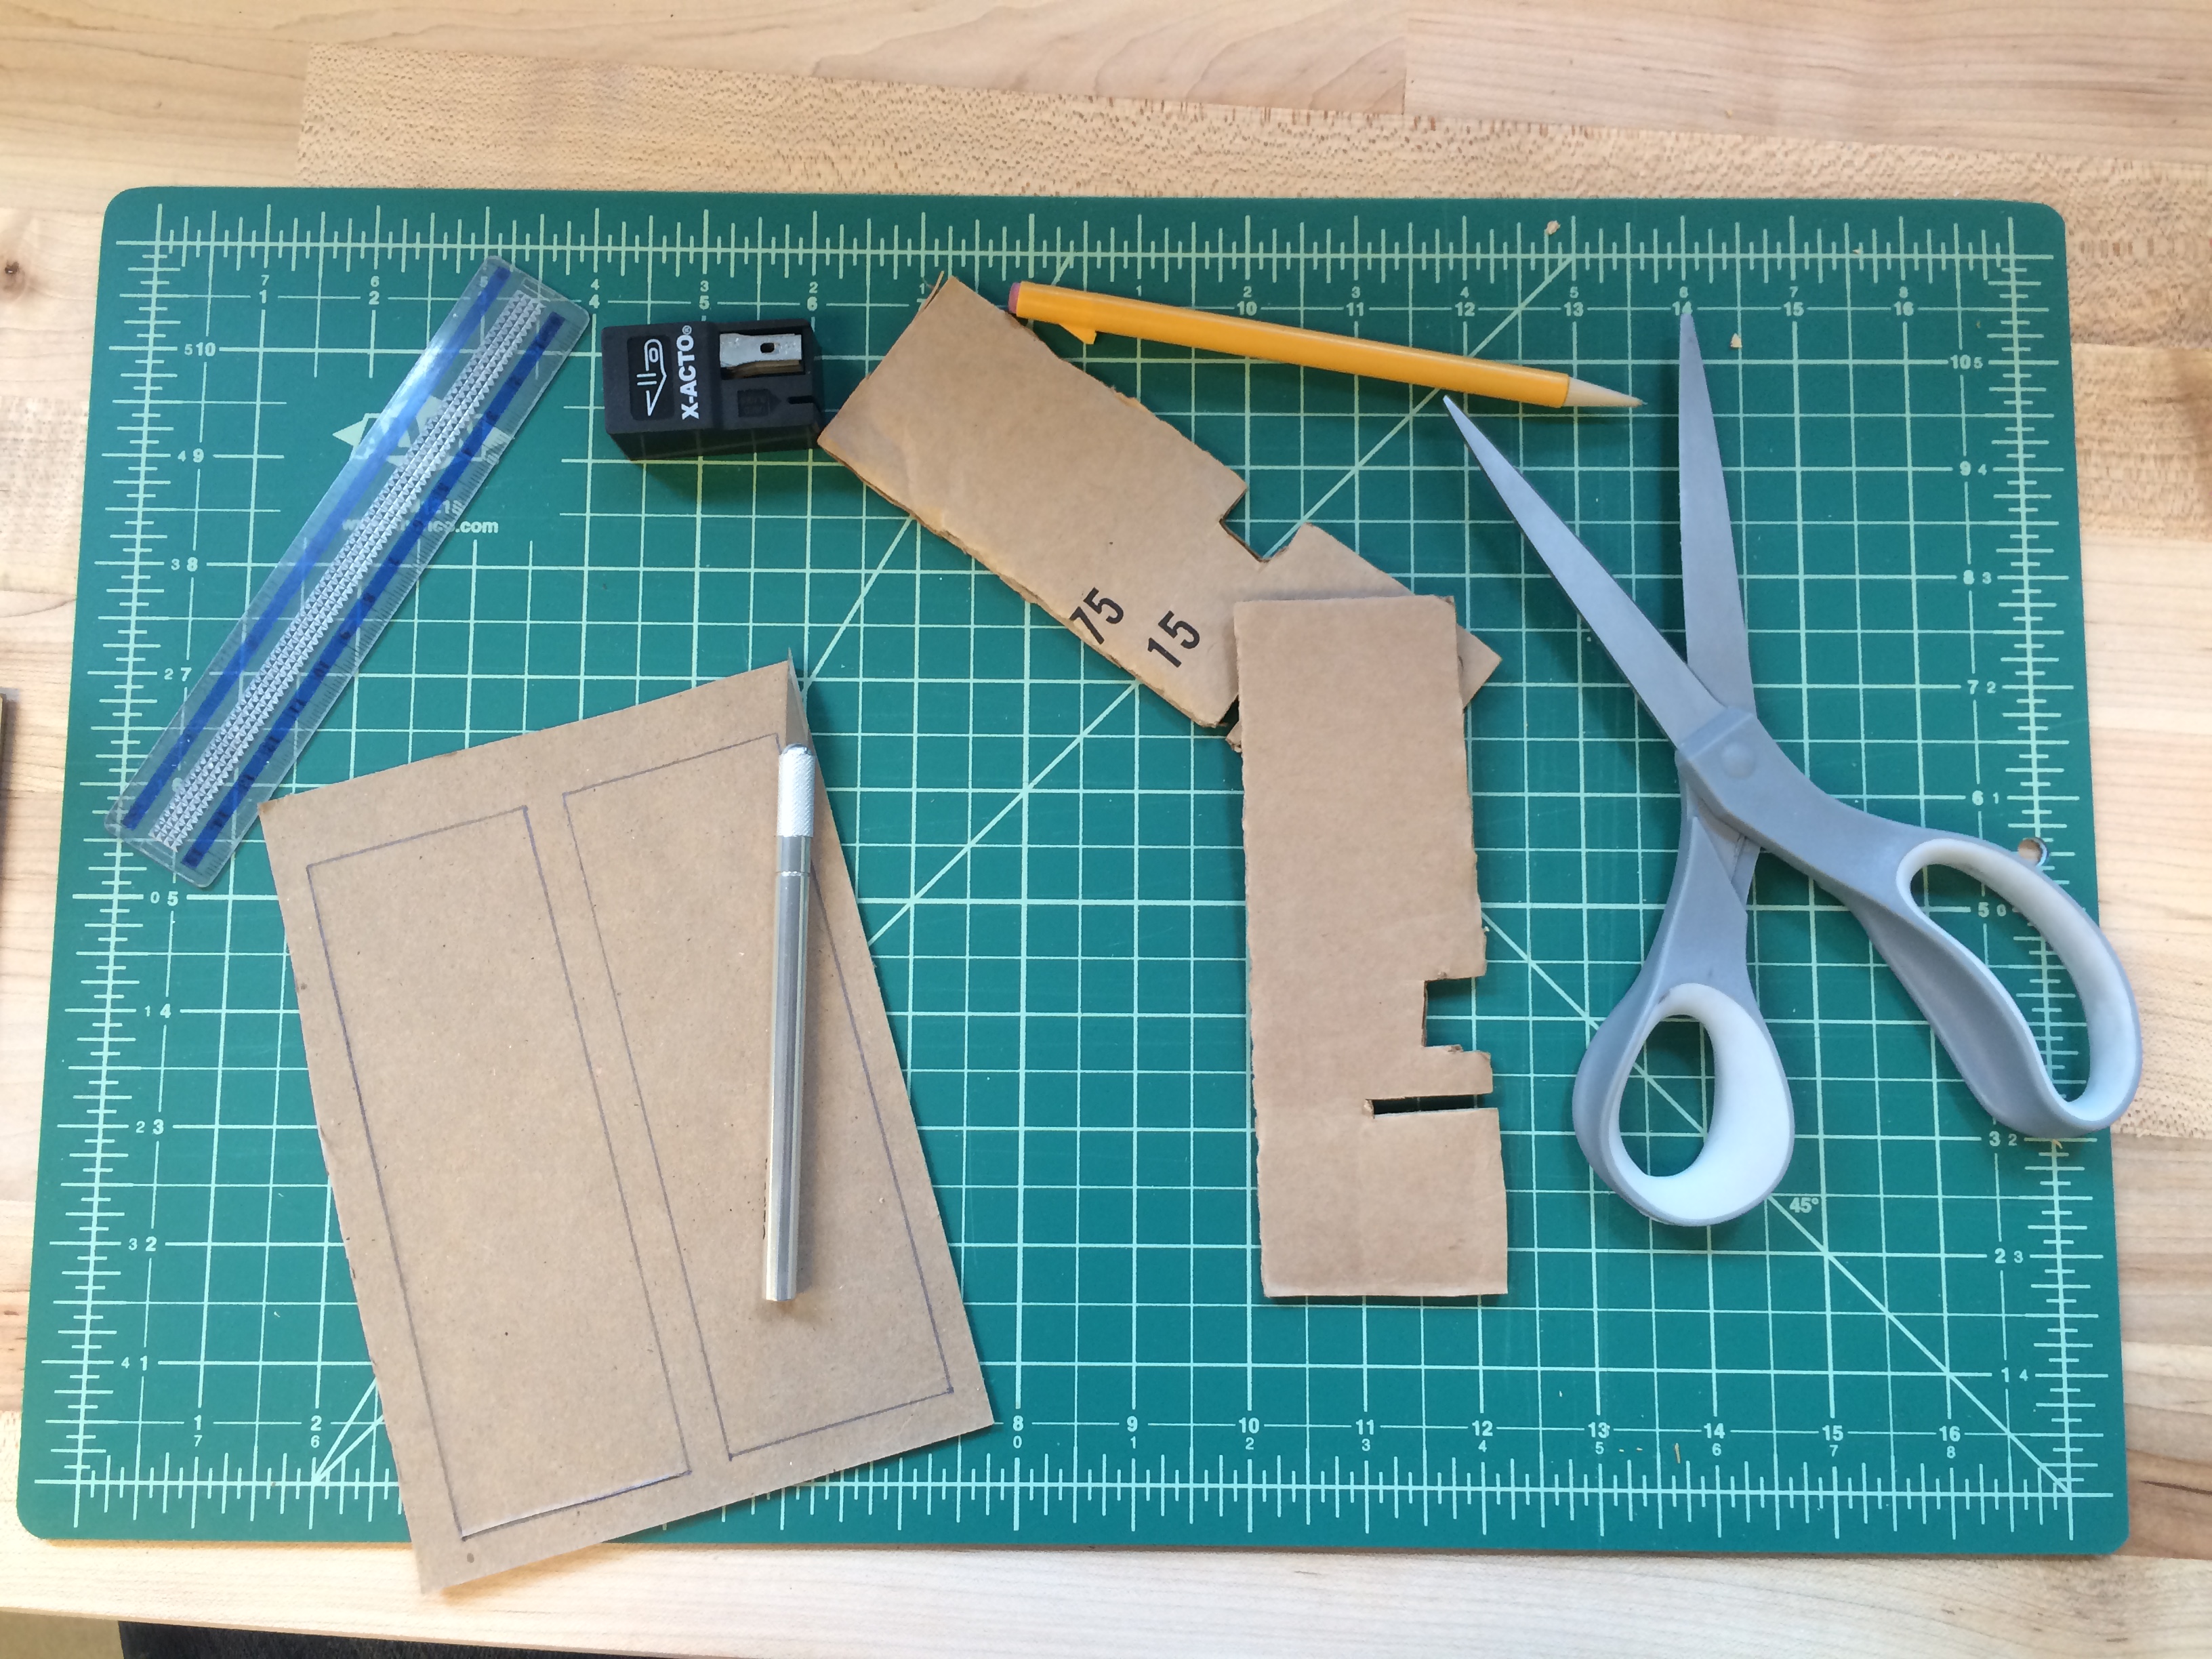
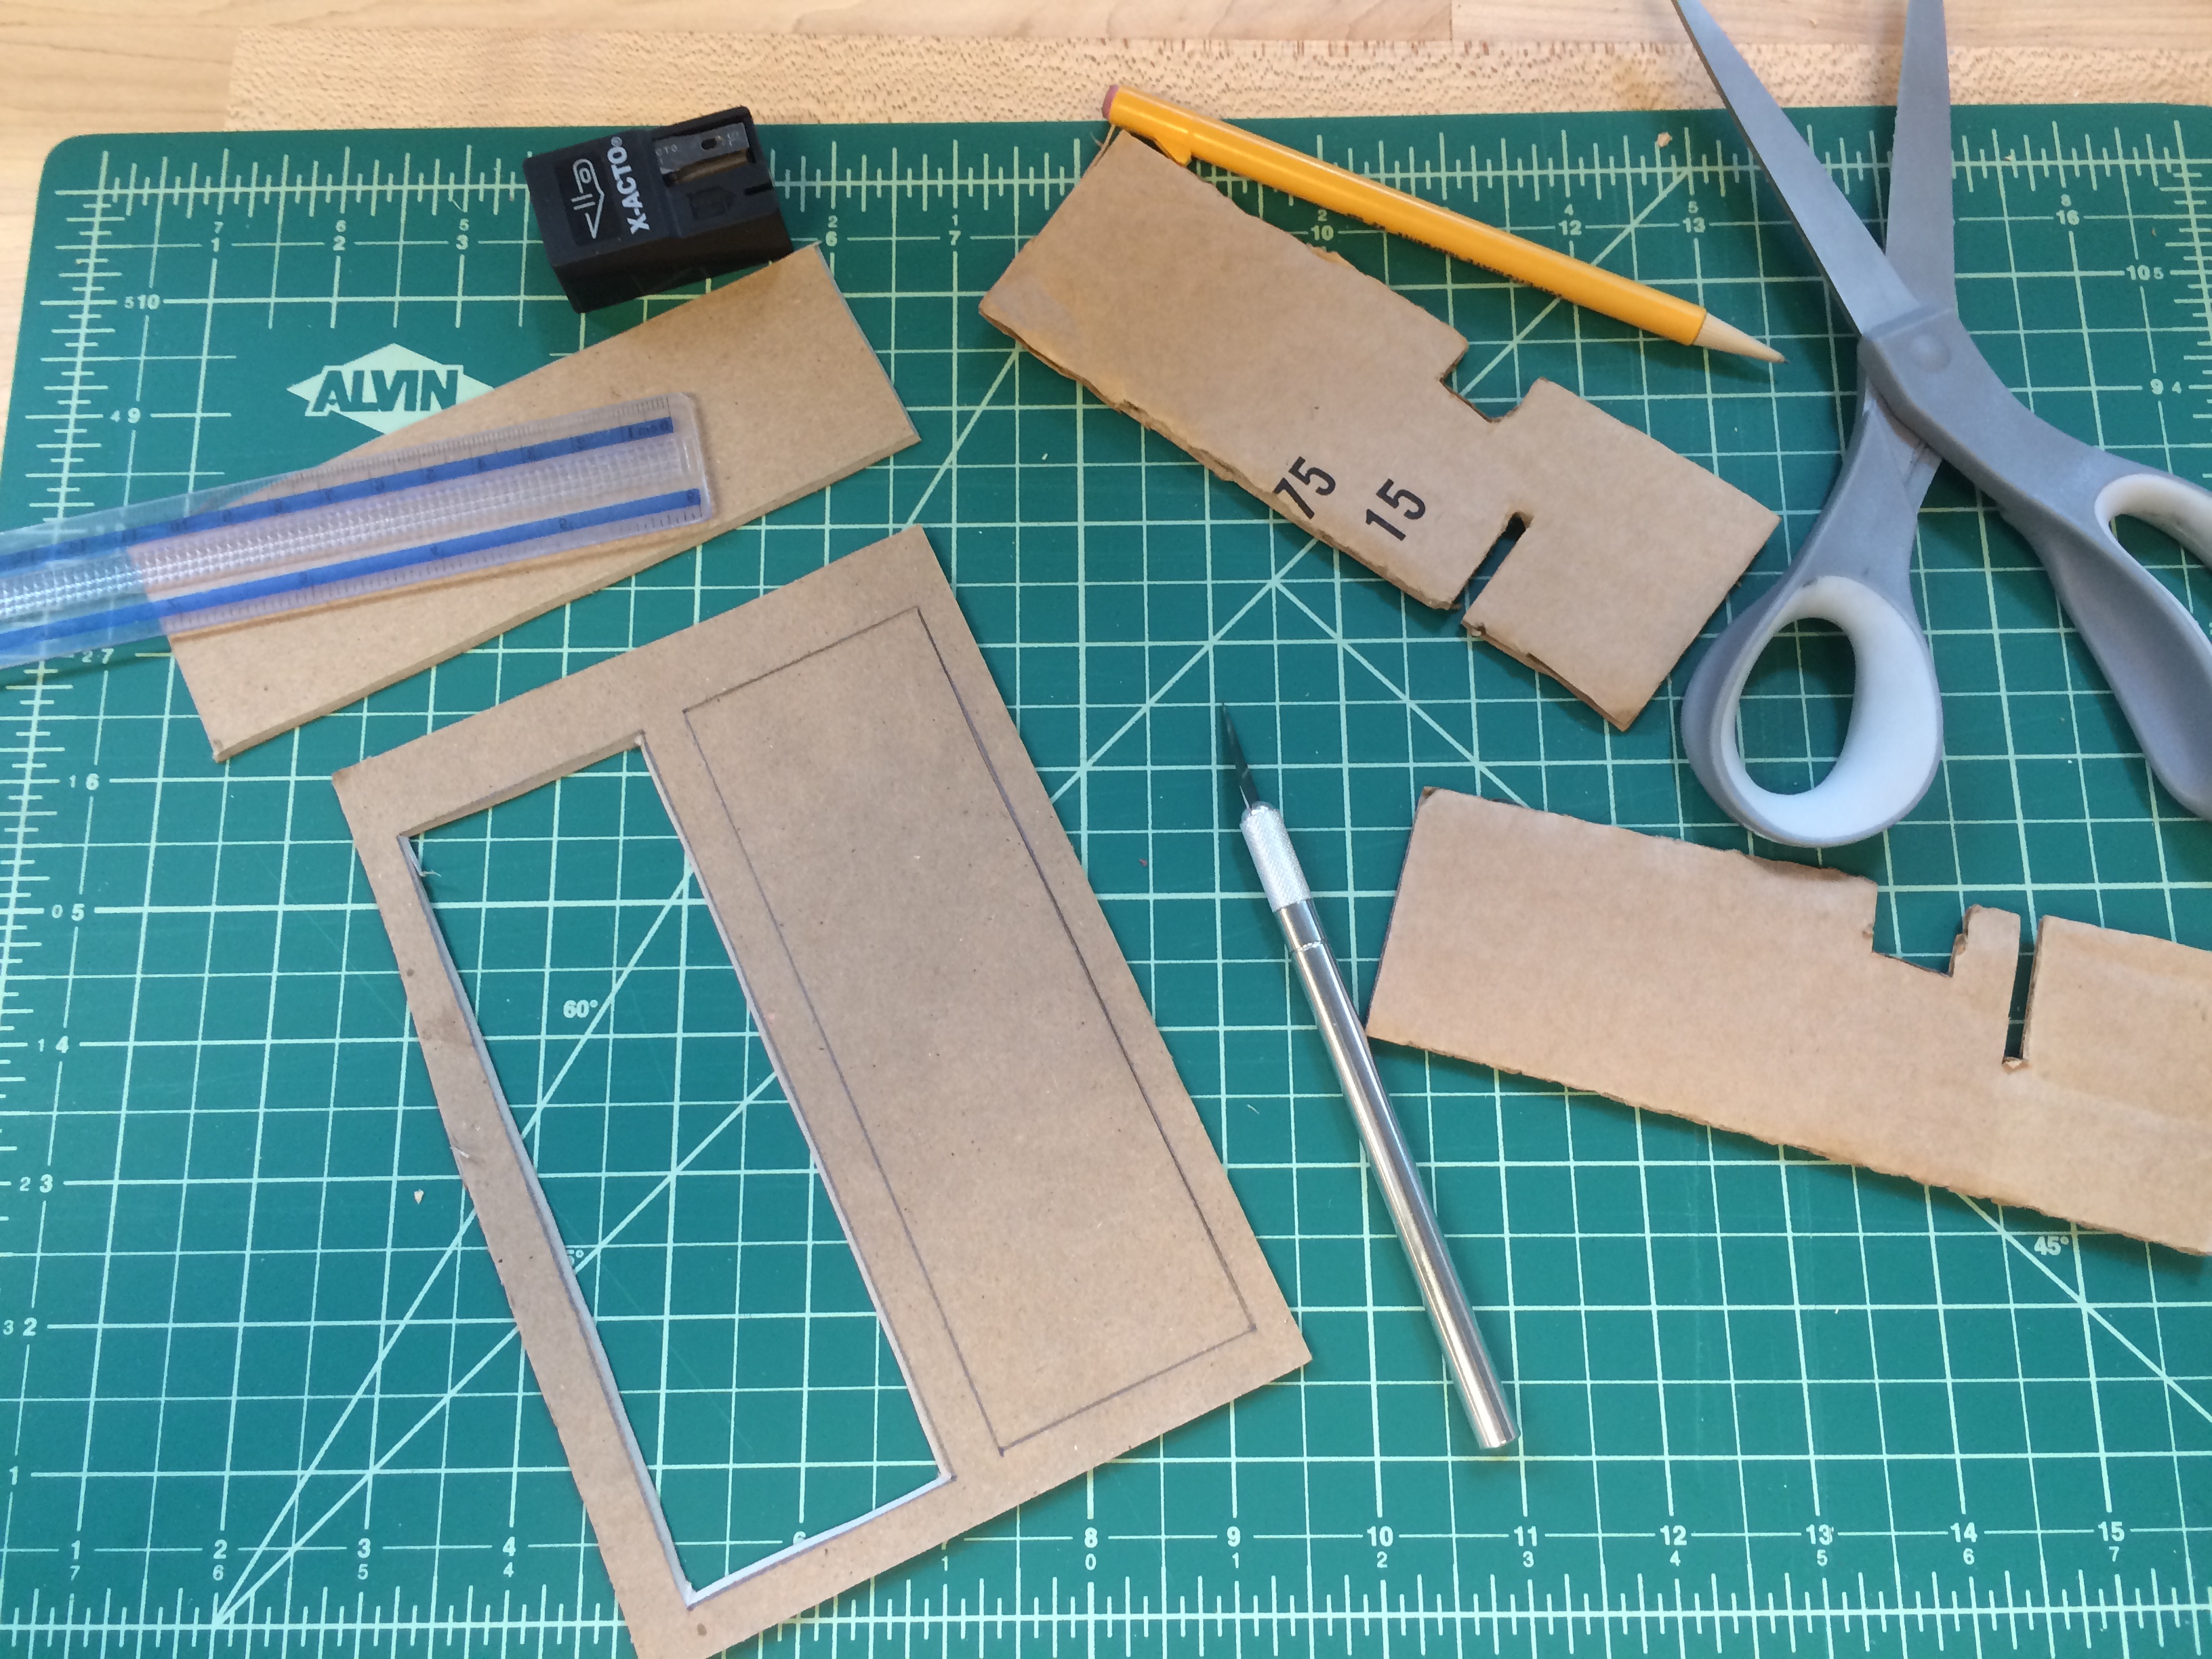
Based on the user feedback, I decided to develop the second design for the 2D prototype. We created the models using Rhino5 software. As I started creating the design I had additional questions about fixing the small section close to the X base and wondered if I could move that further away and retain the multiple views. I was also changing materials to a thinner cardboard and was concerned that it would lose some stability with a thinner material. I decided to test another iteration of the design on the pressed cardboard material, but hand cut it instead of laser print it. Below are some photos of that process.
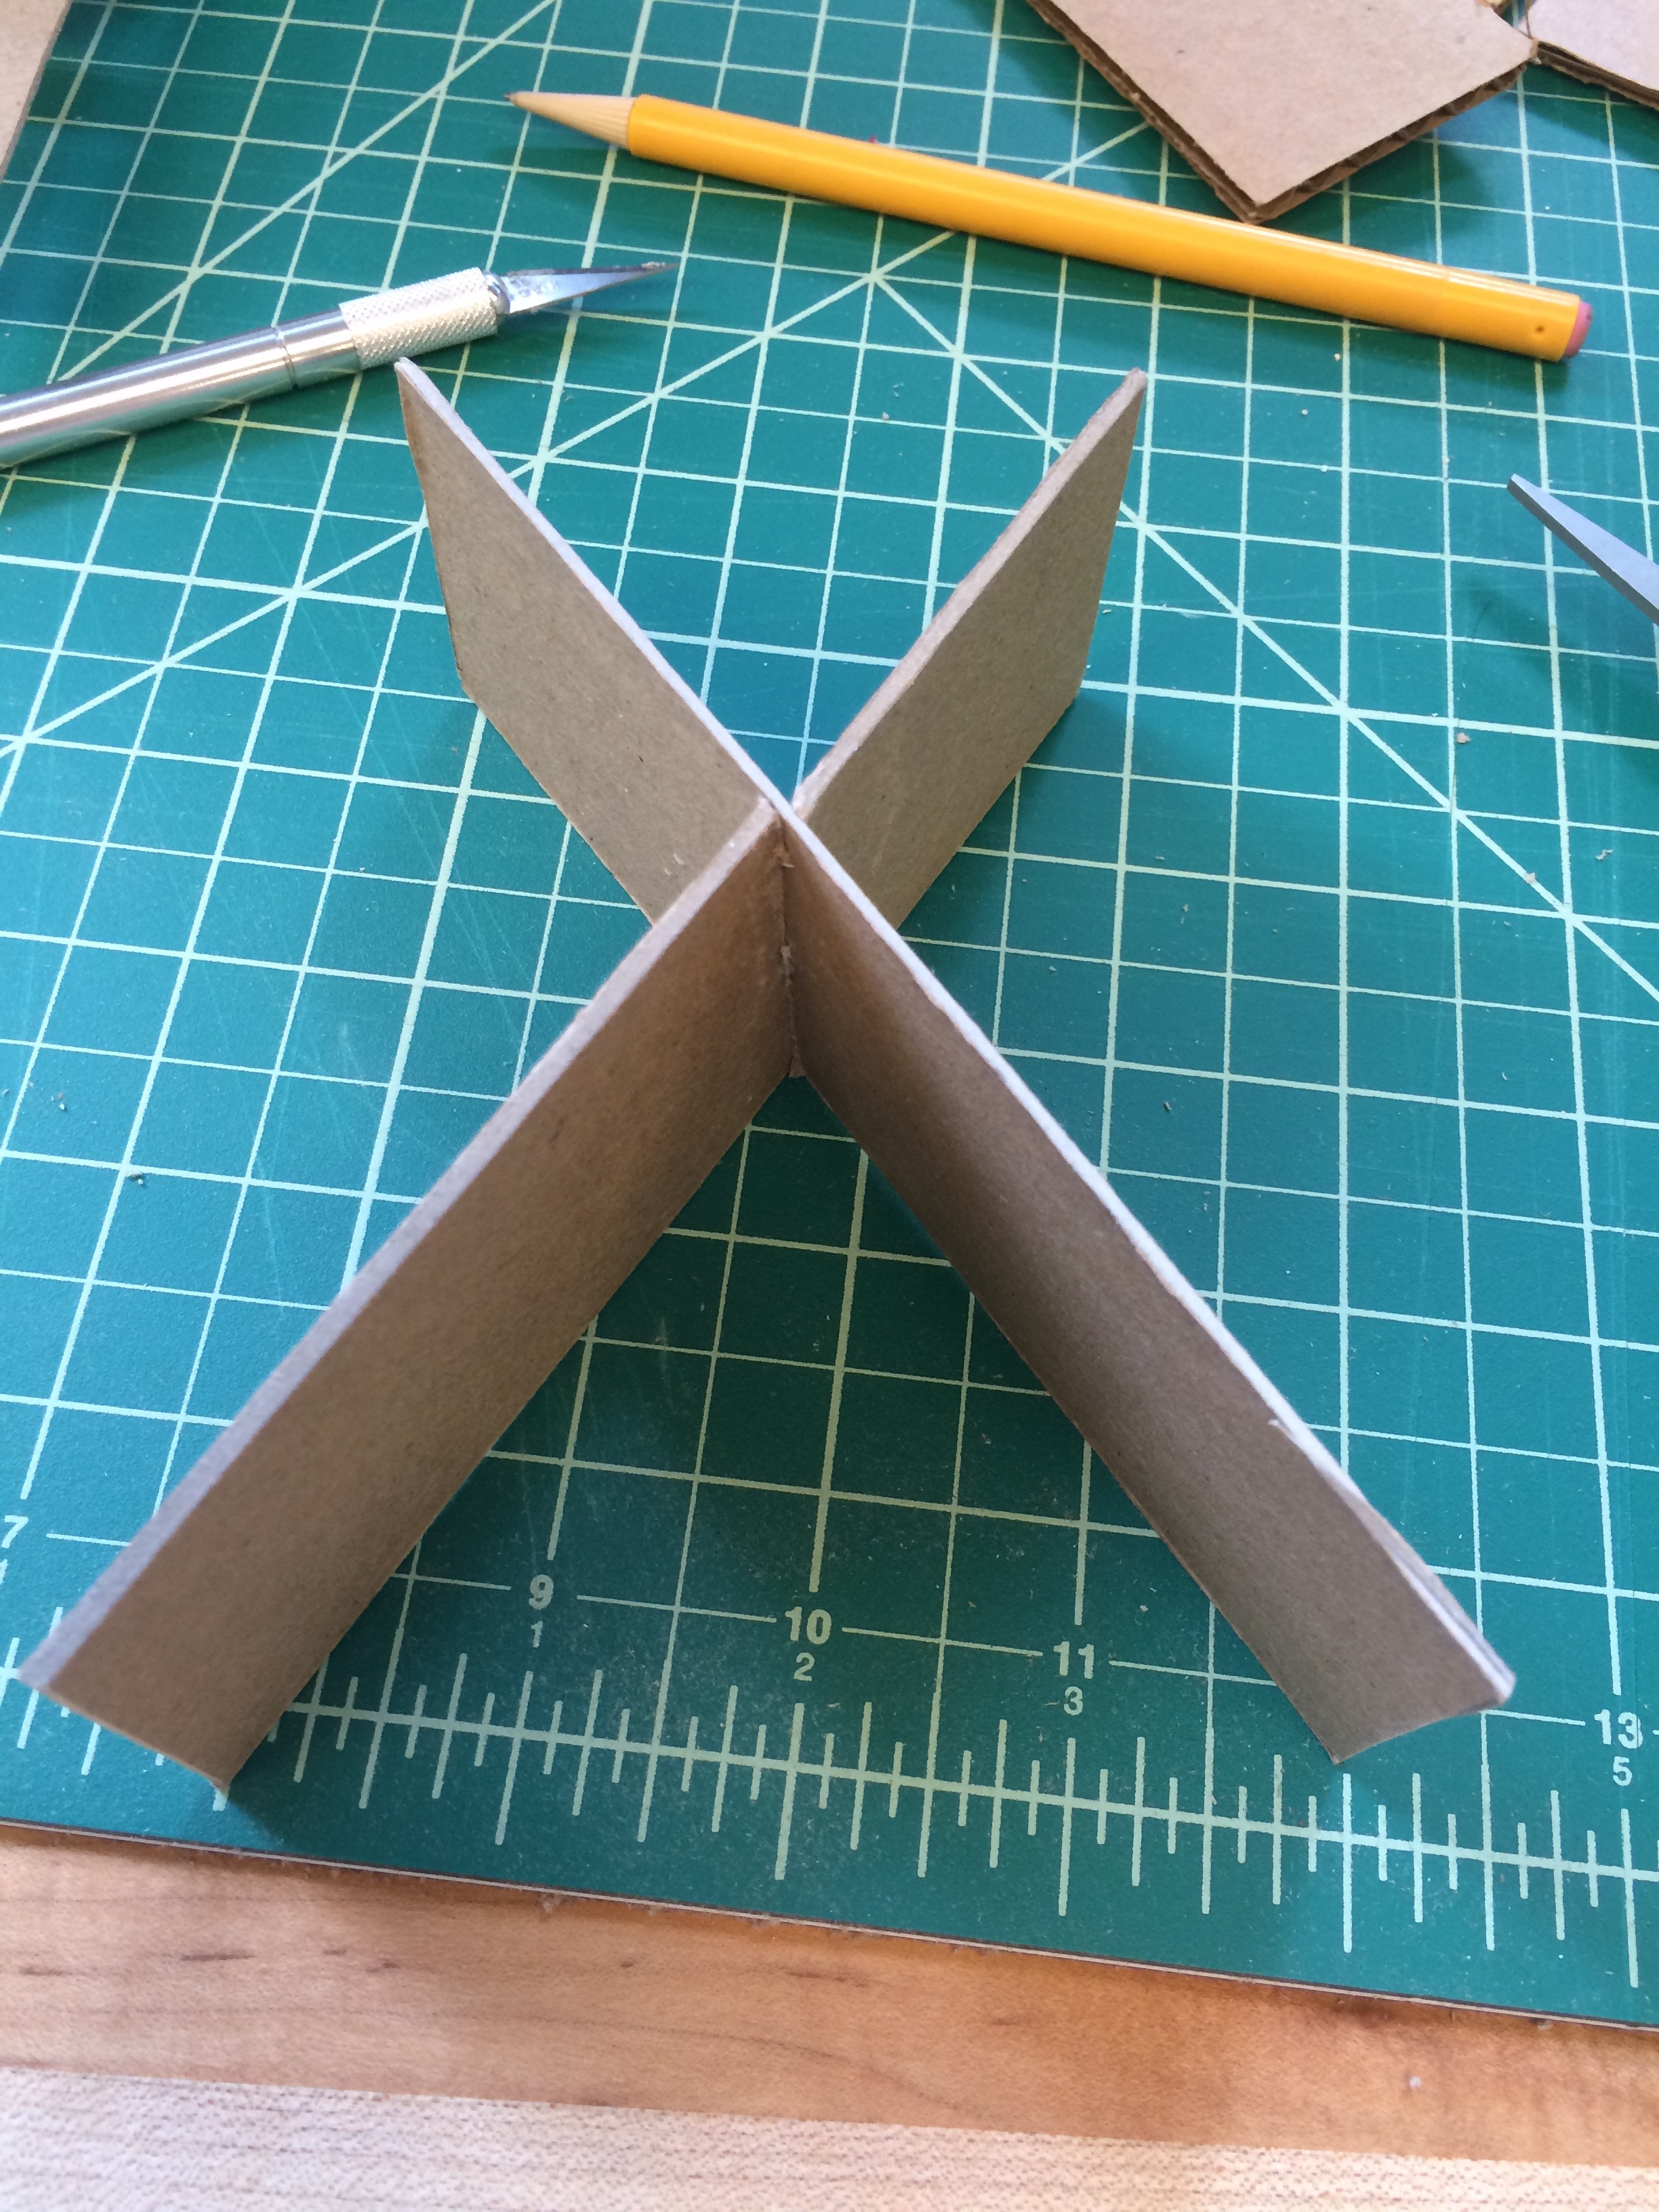
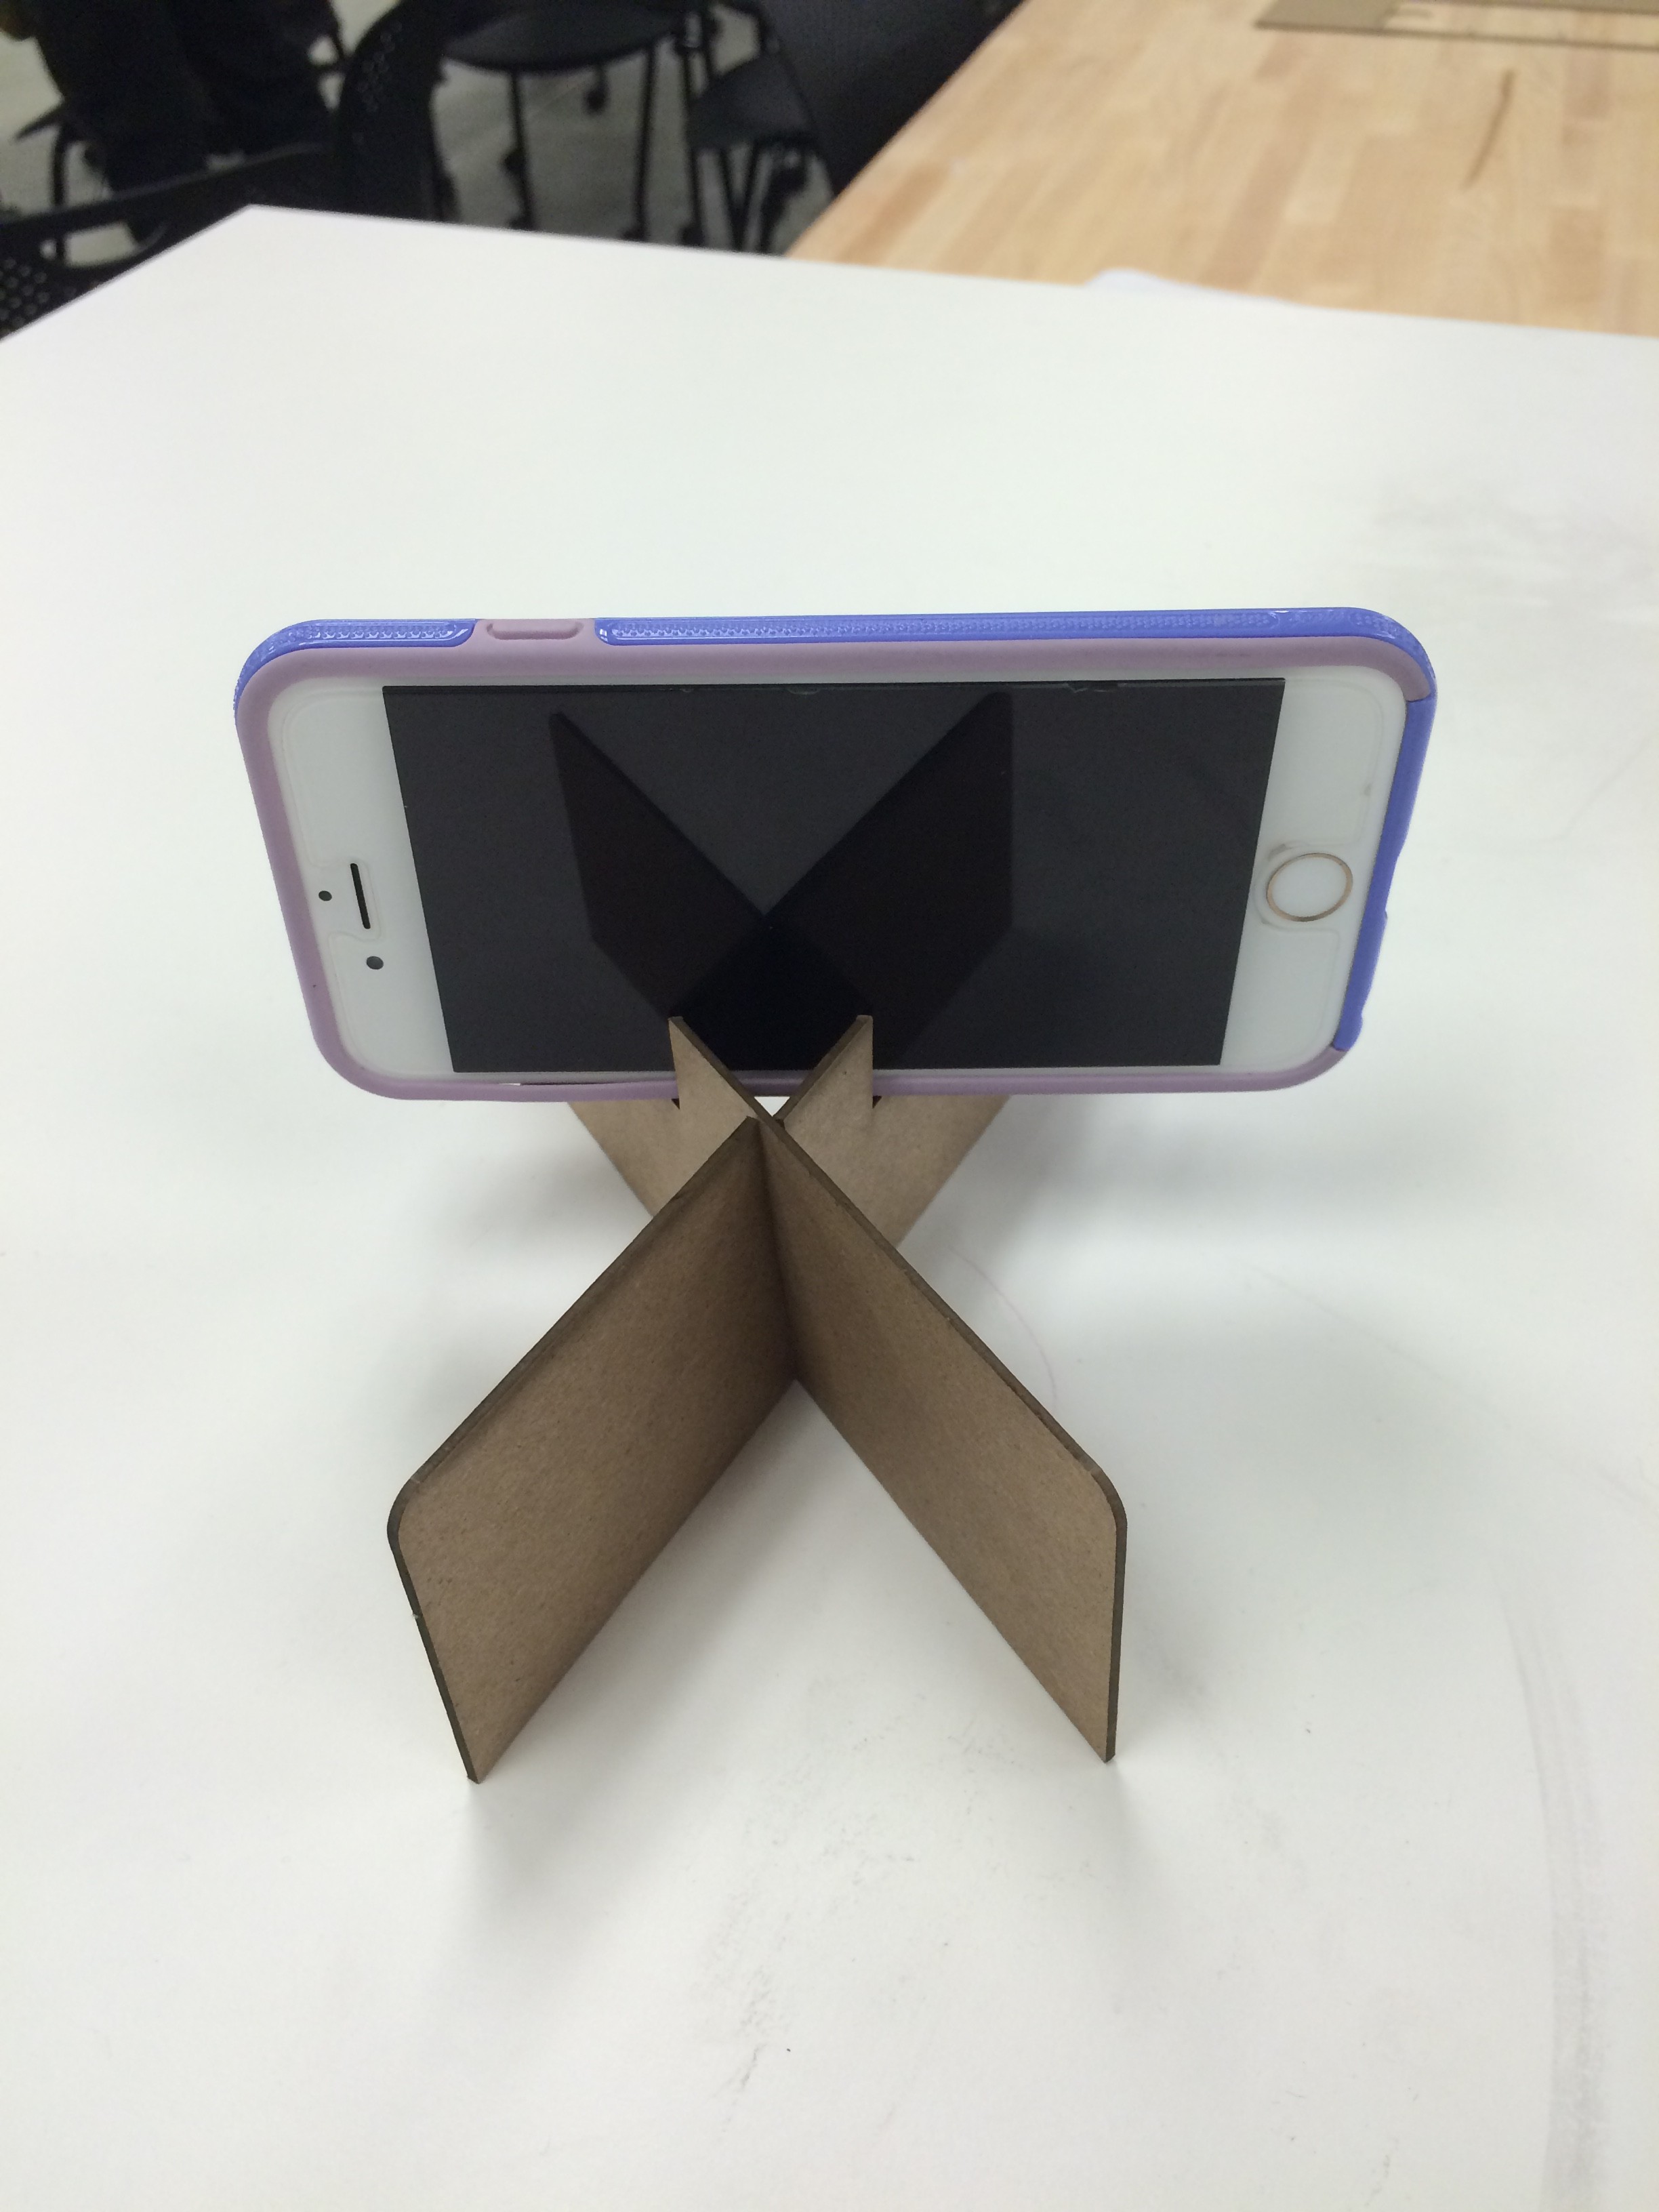
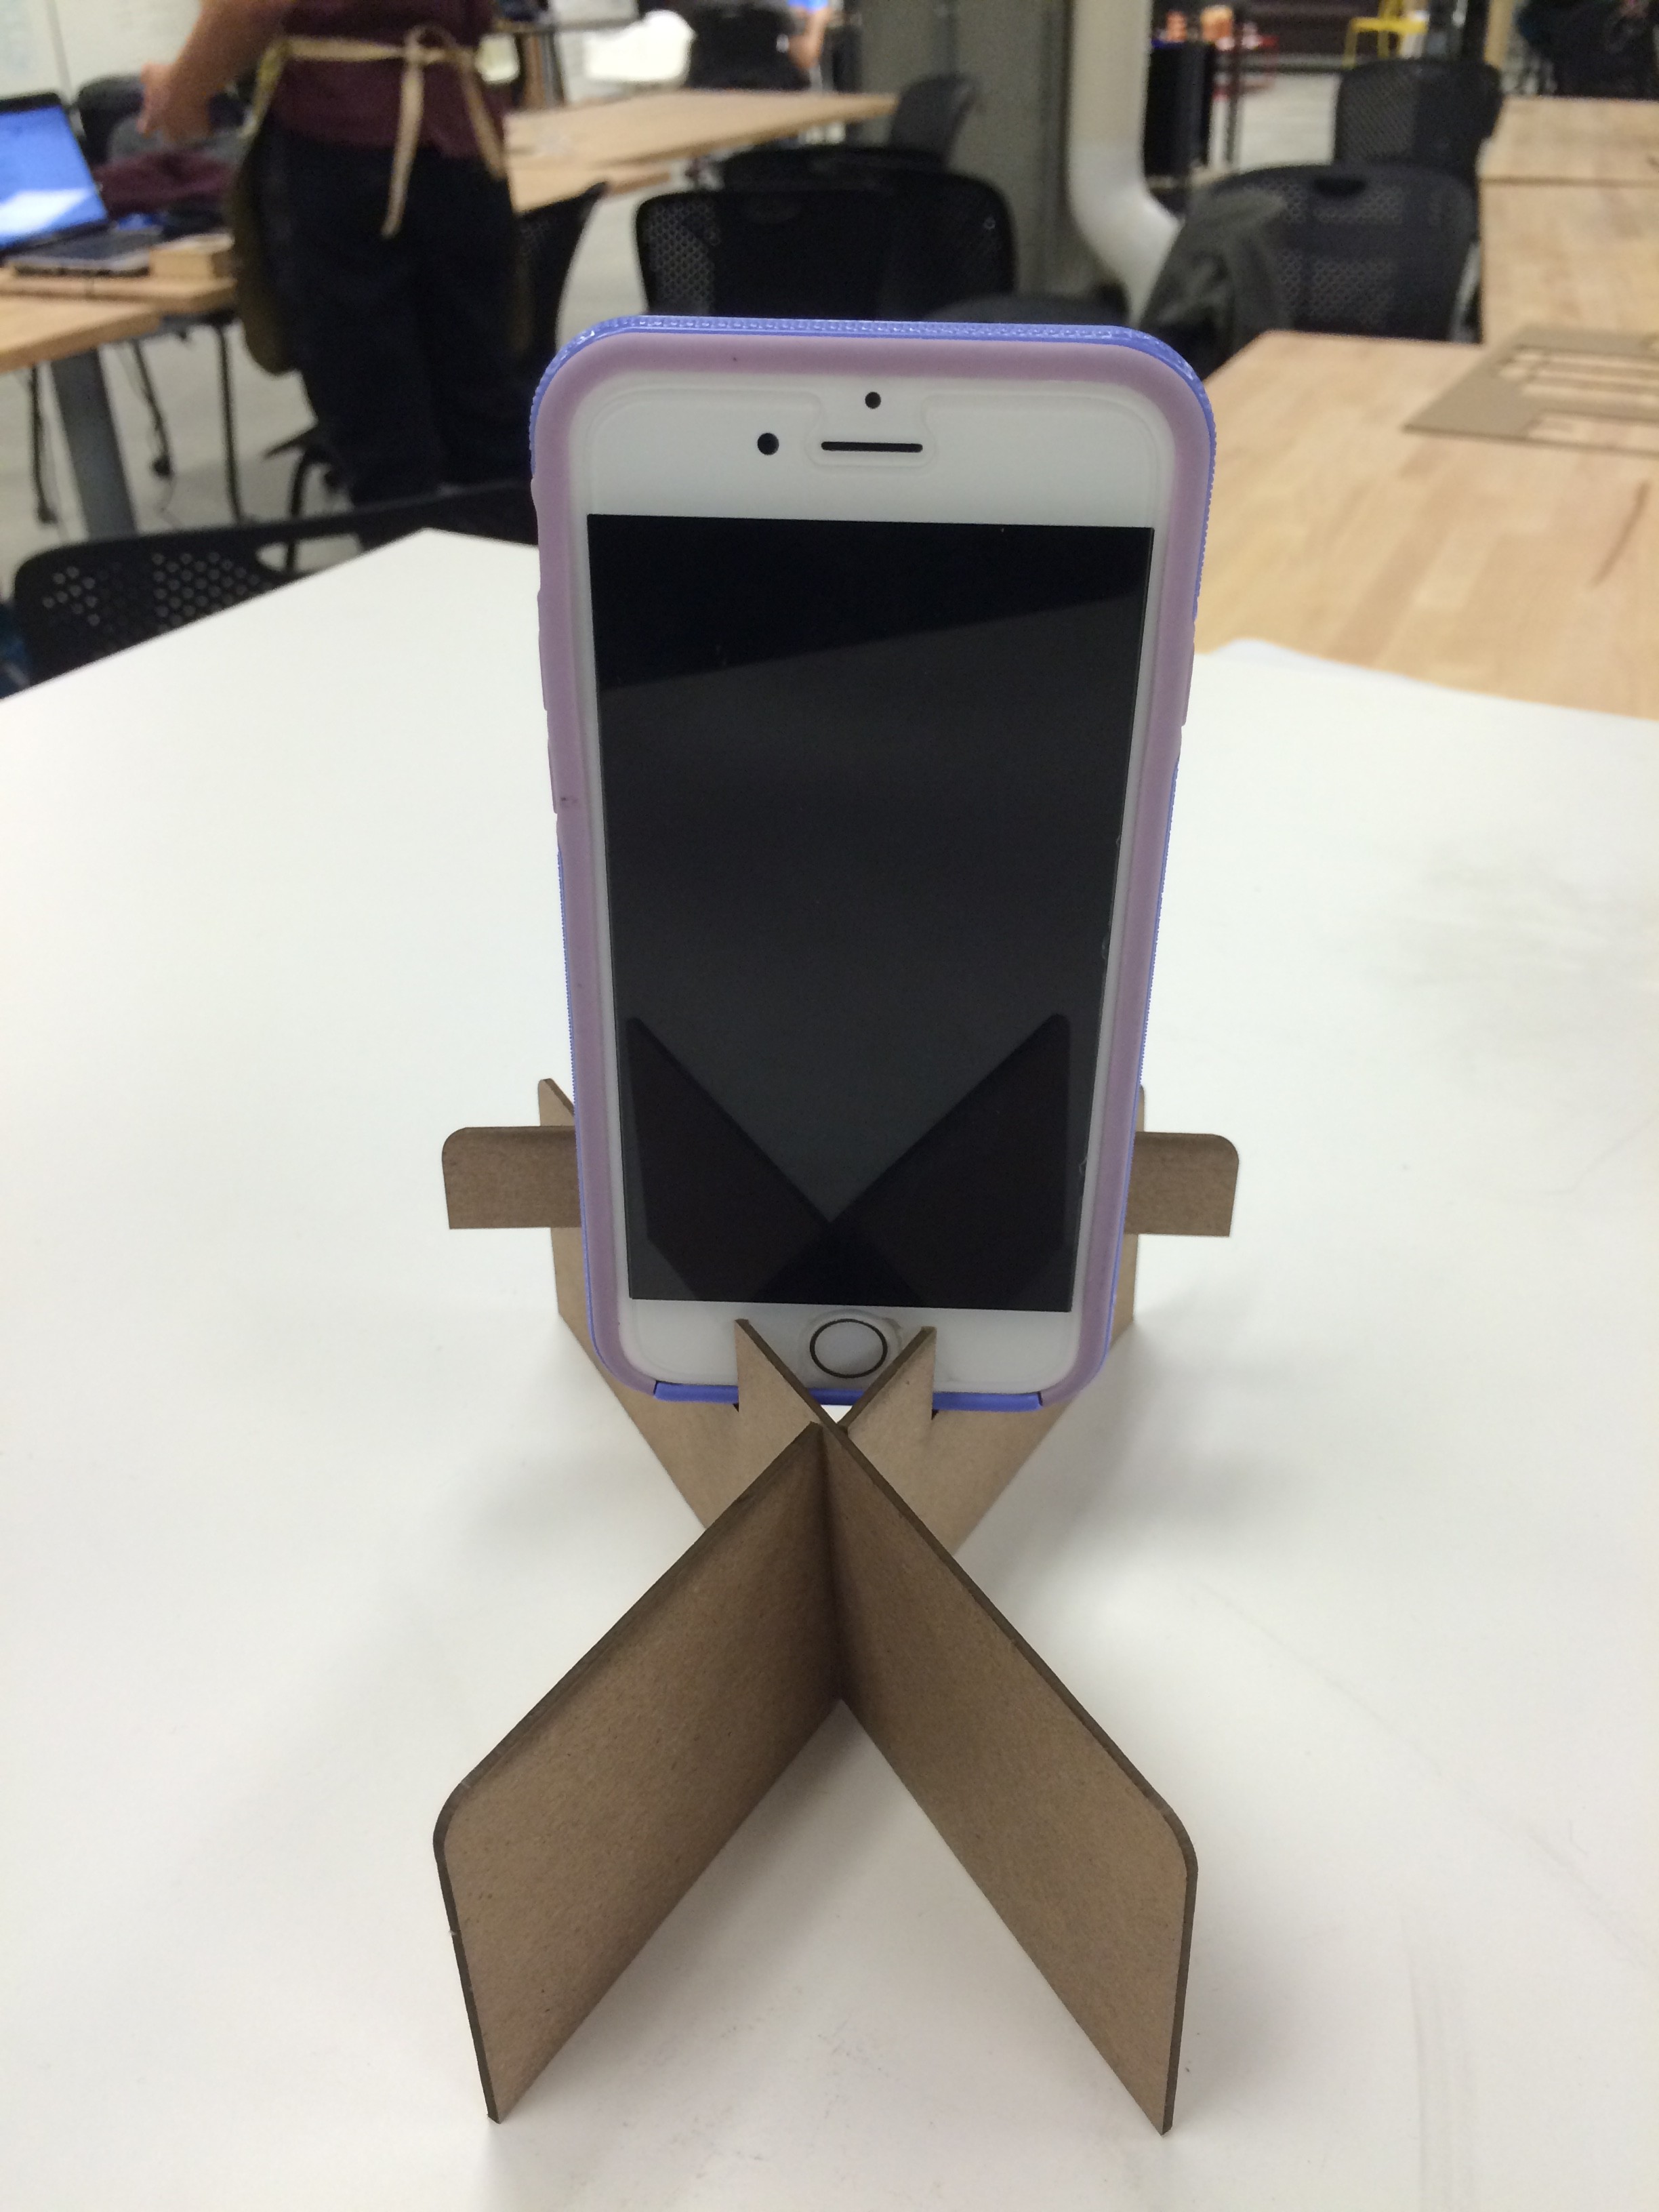
While cutting this design in class, one of my classmates suggested an additional view that could be helpful. By adding an additional cross section to provide more stability, the phone could be placed inside the X. Crazy, I know…a third position for the phone!
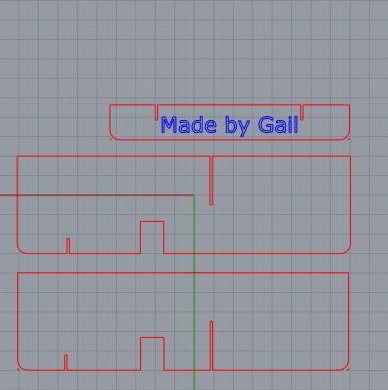
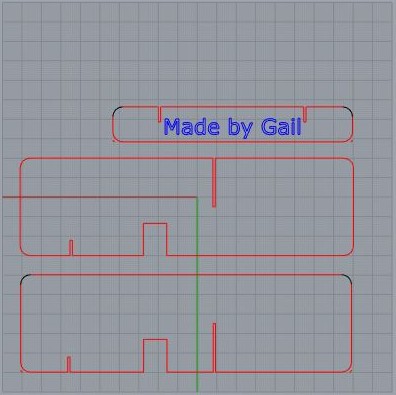
First Rhino iteration
Here are the photos of the final design from our group critique showing the various uses for the phone dock.
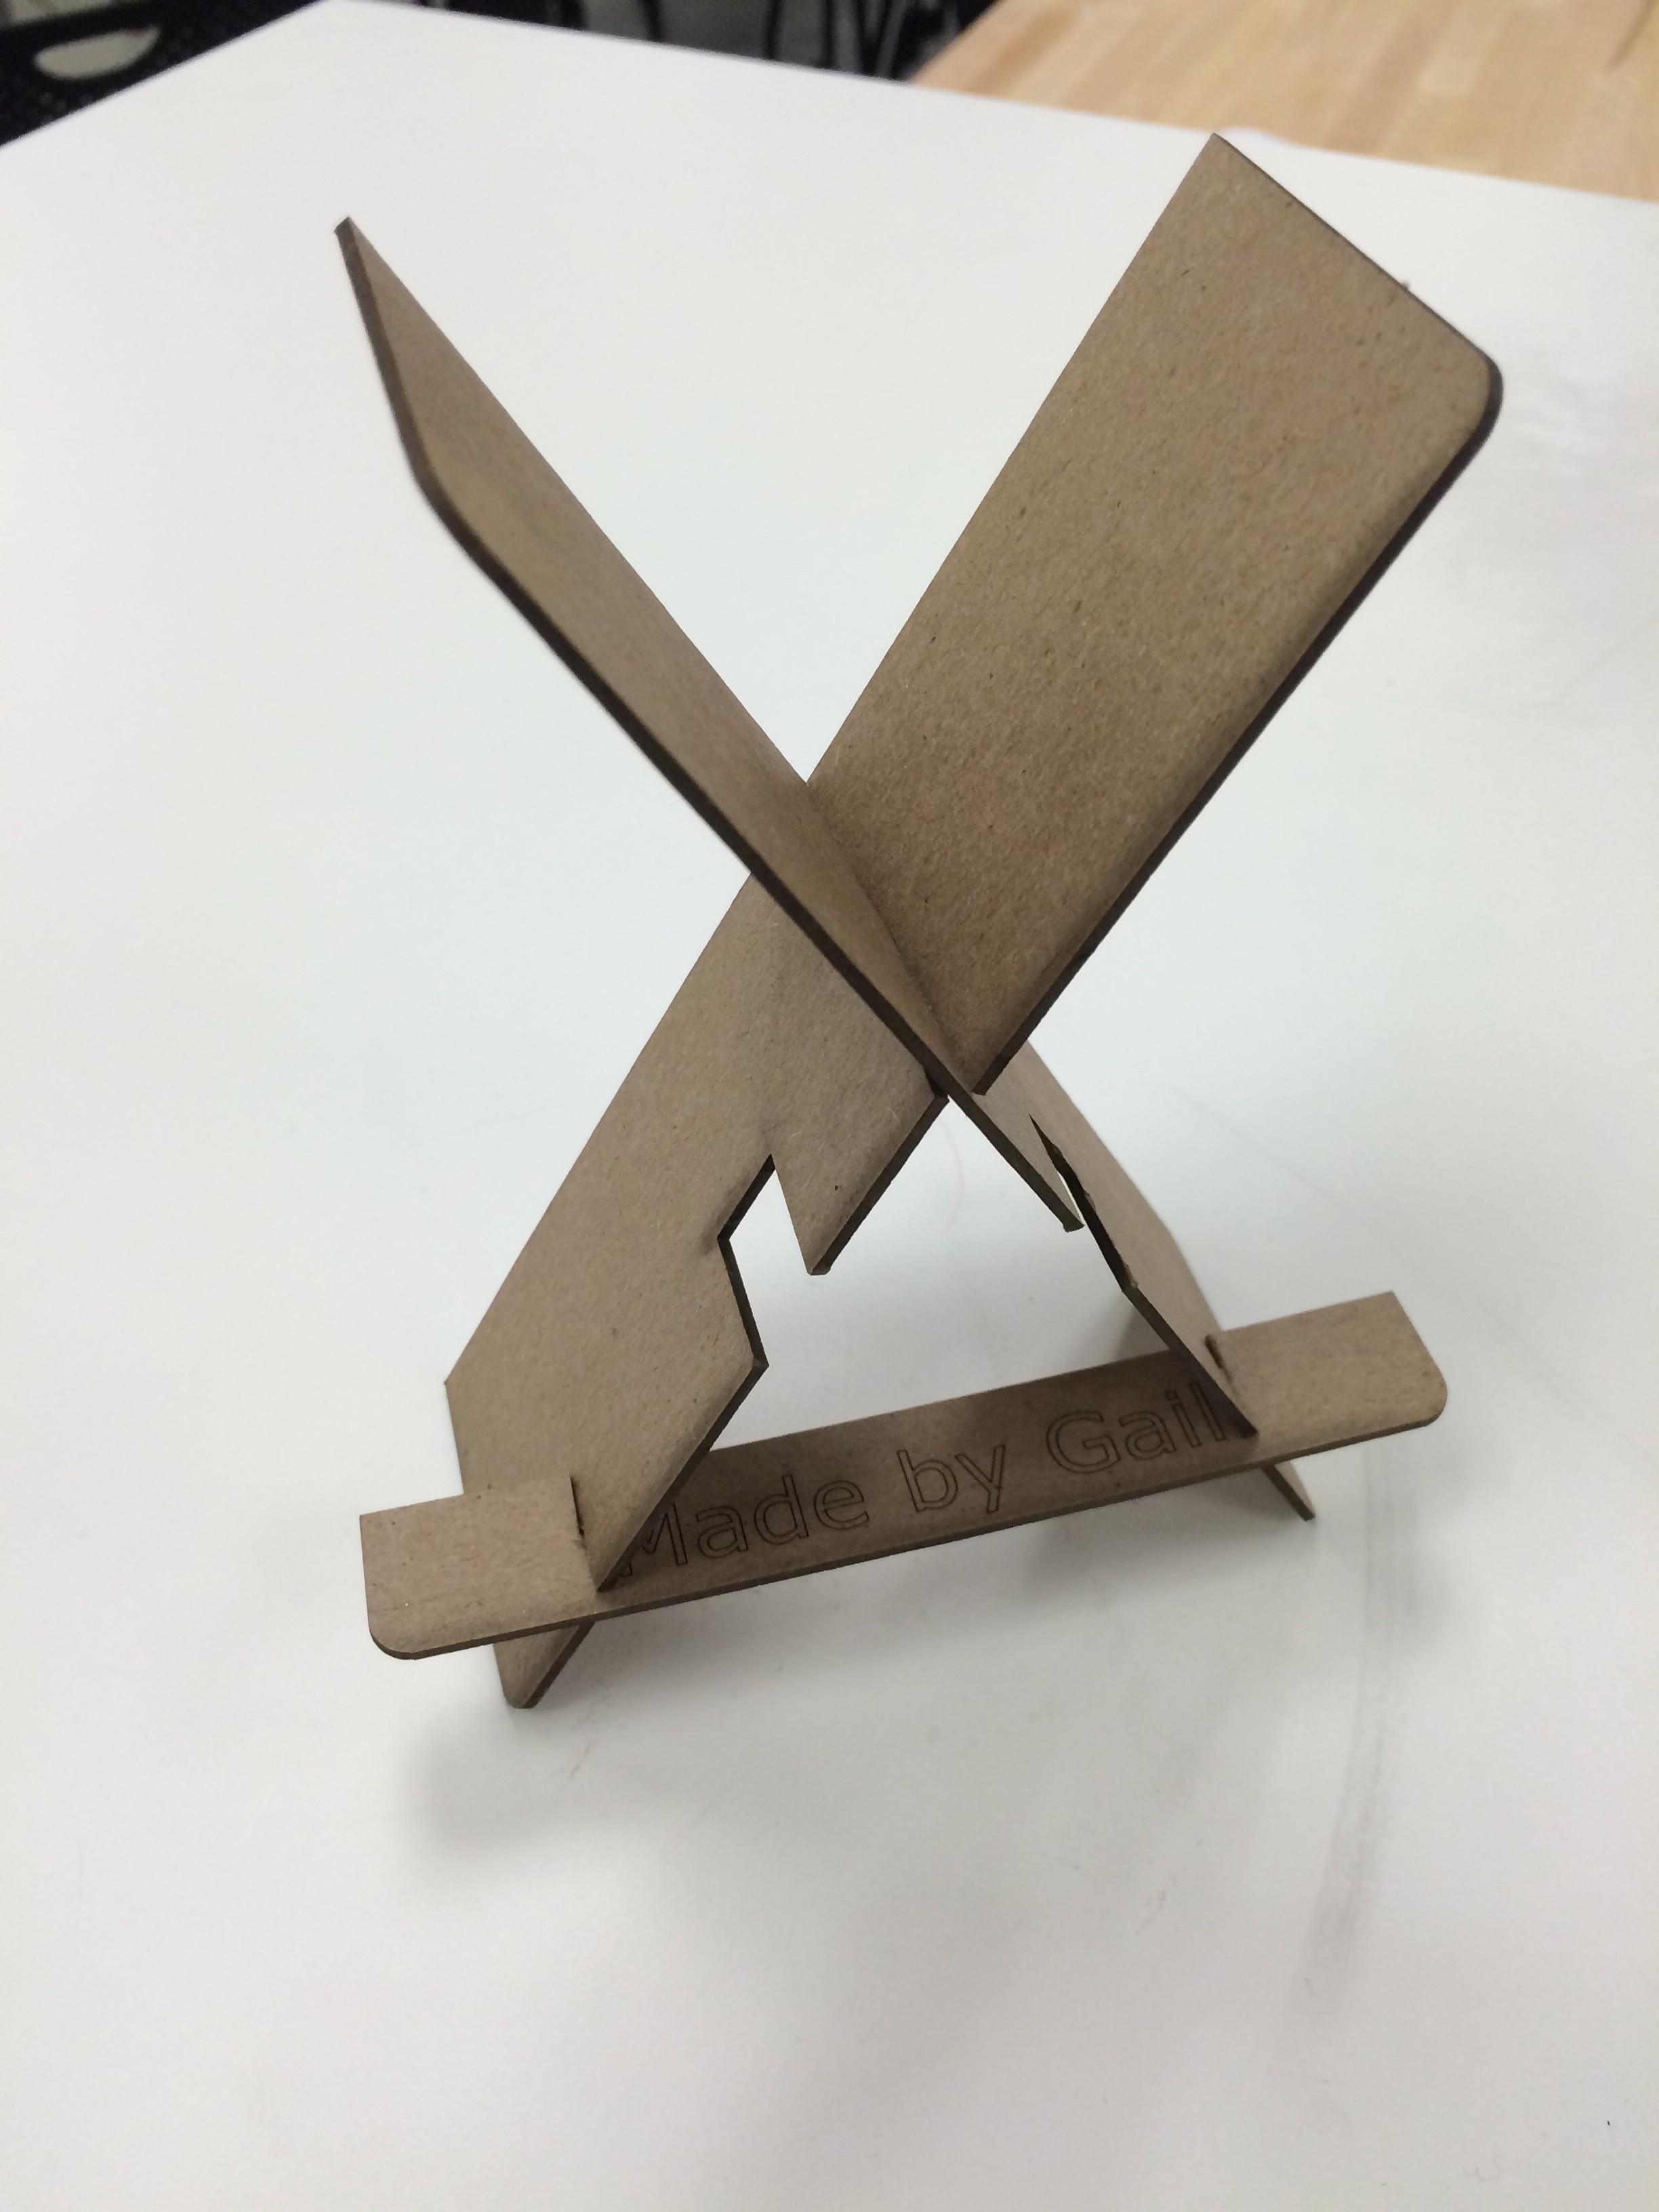
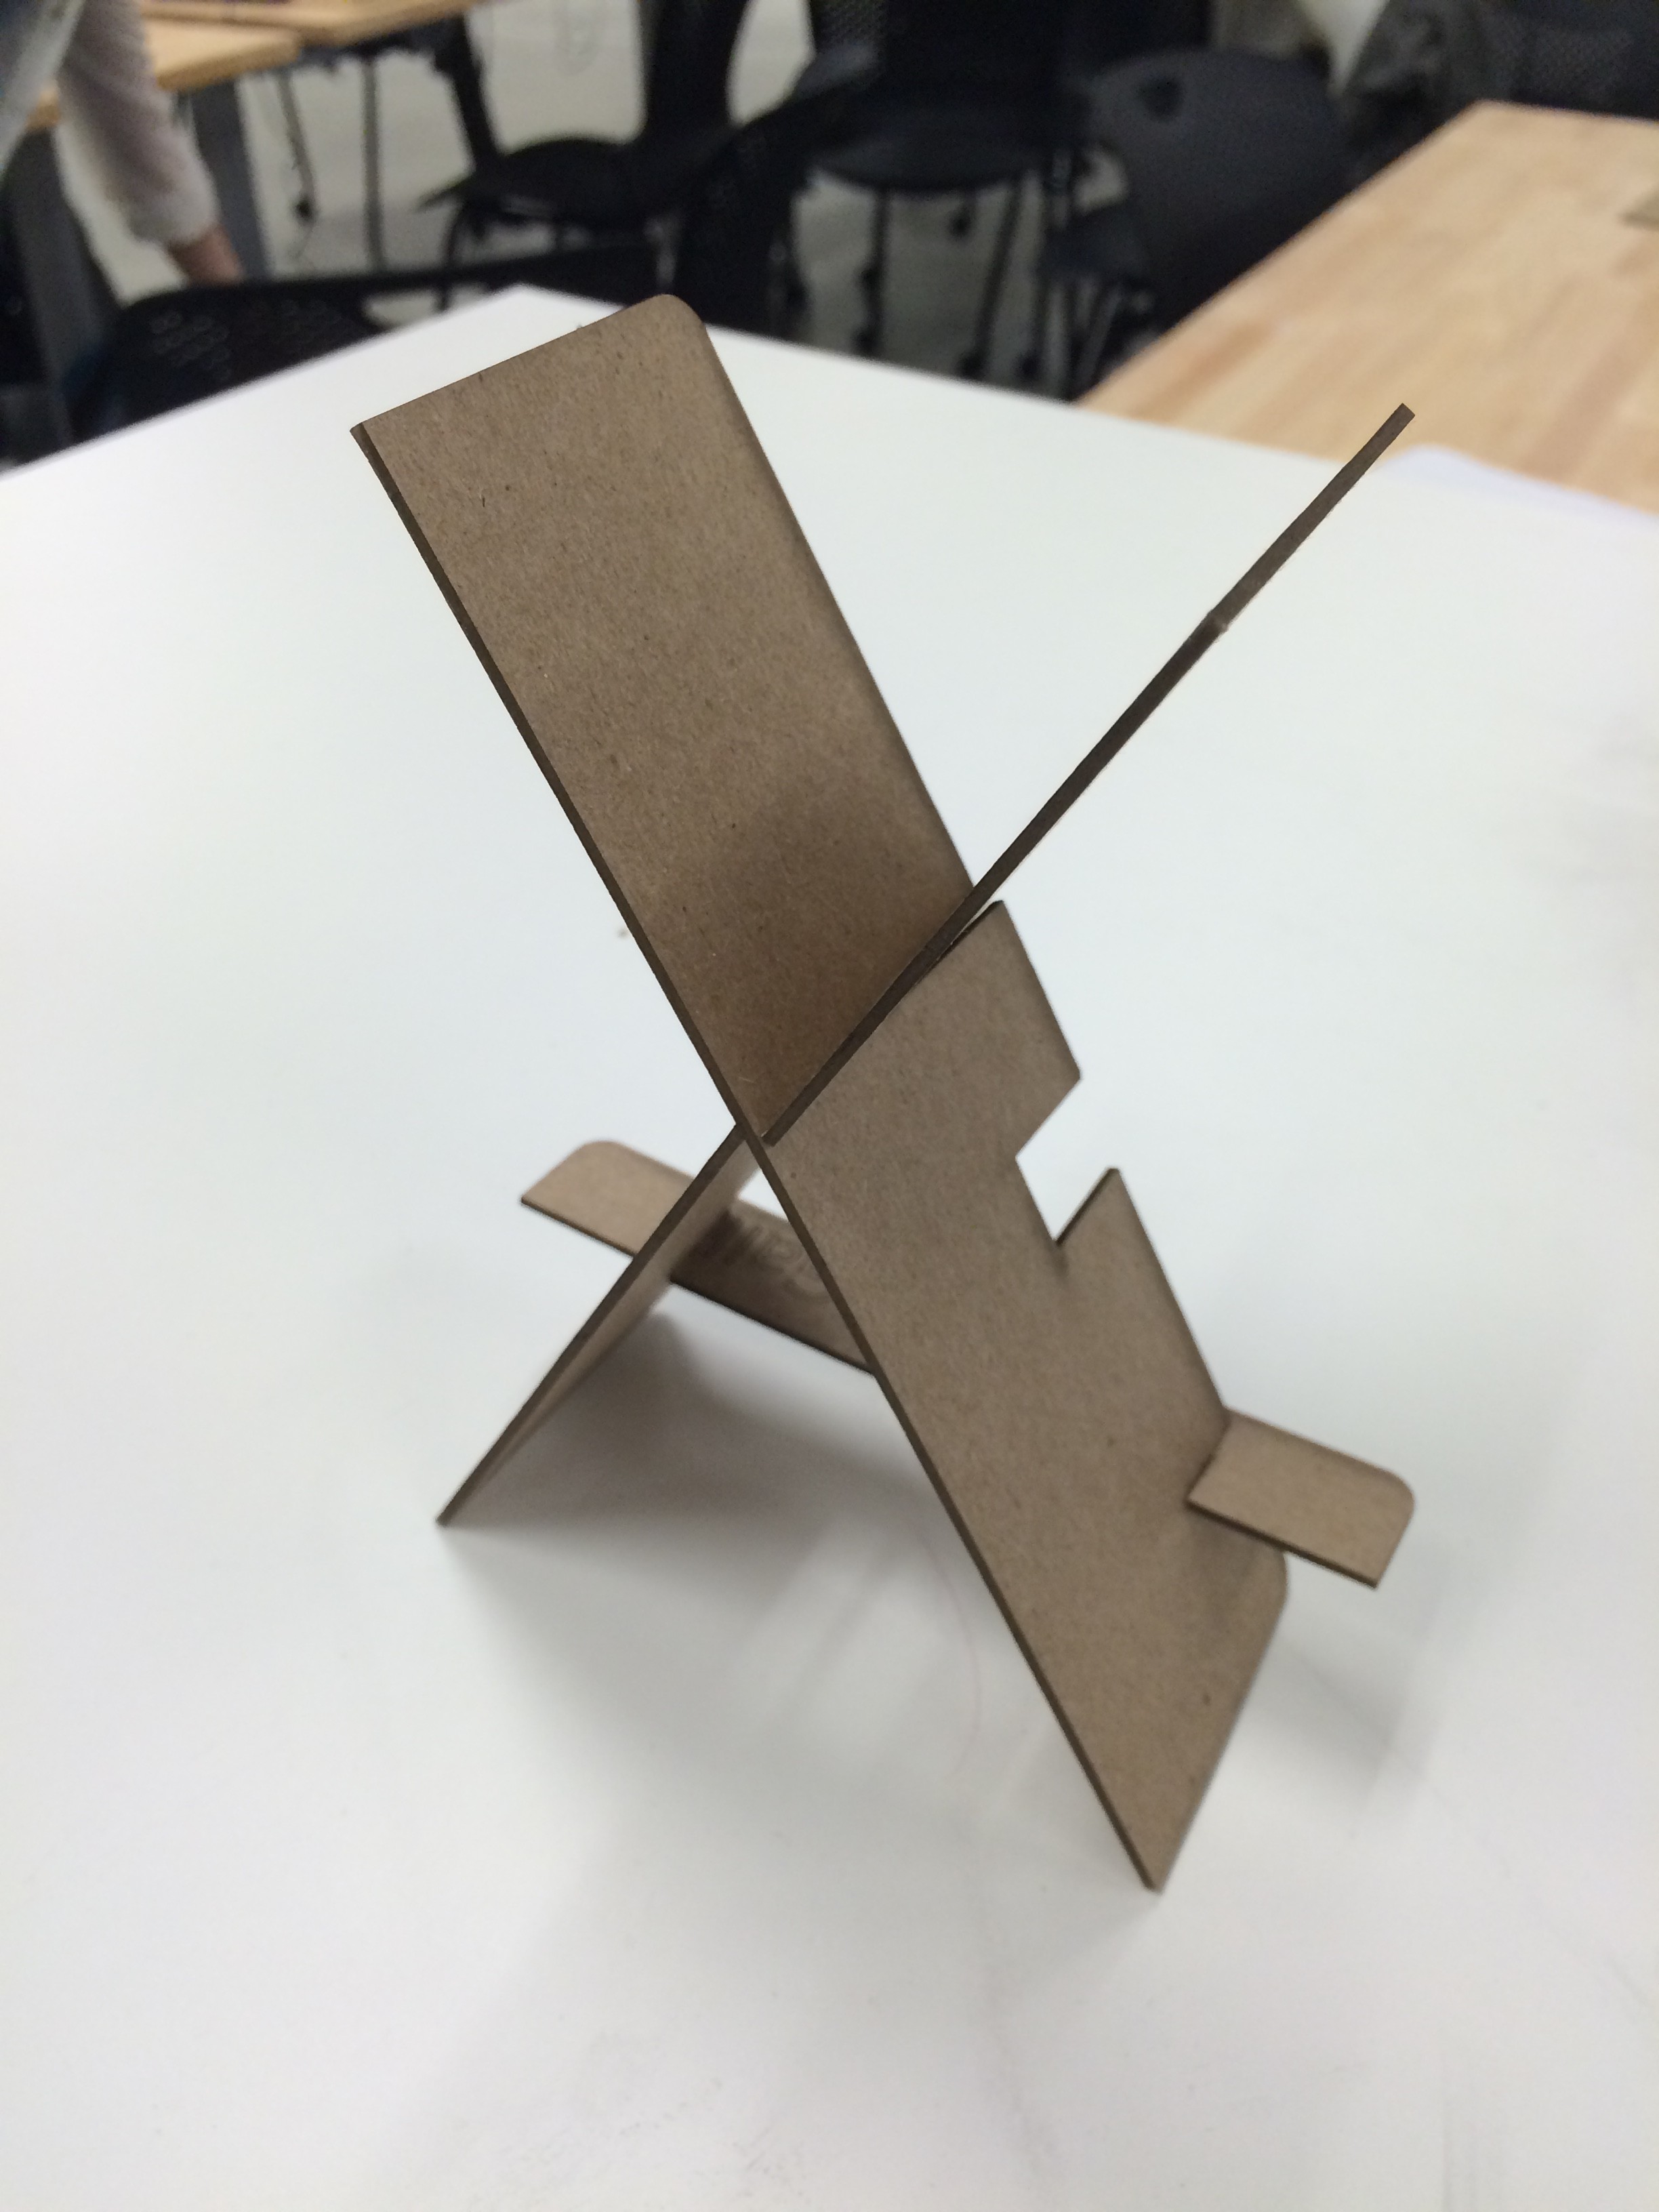
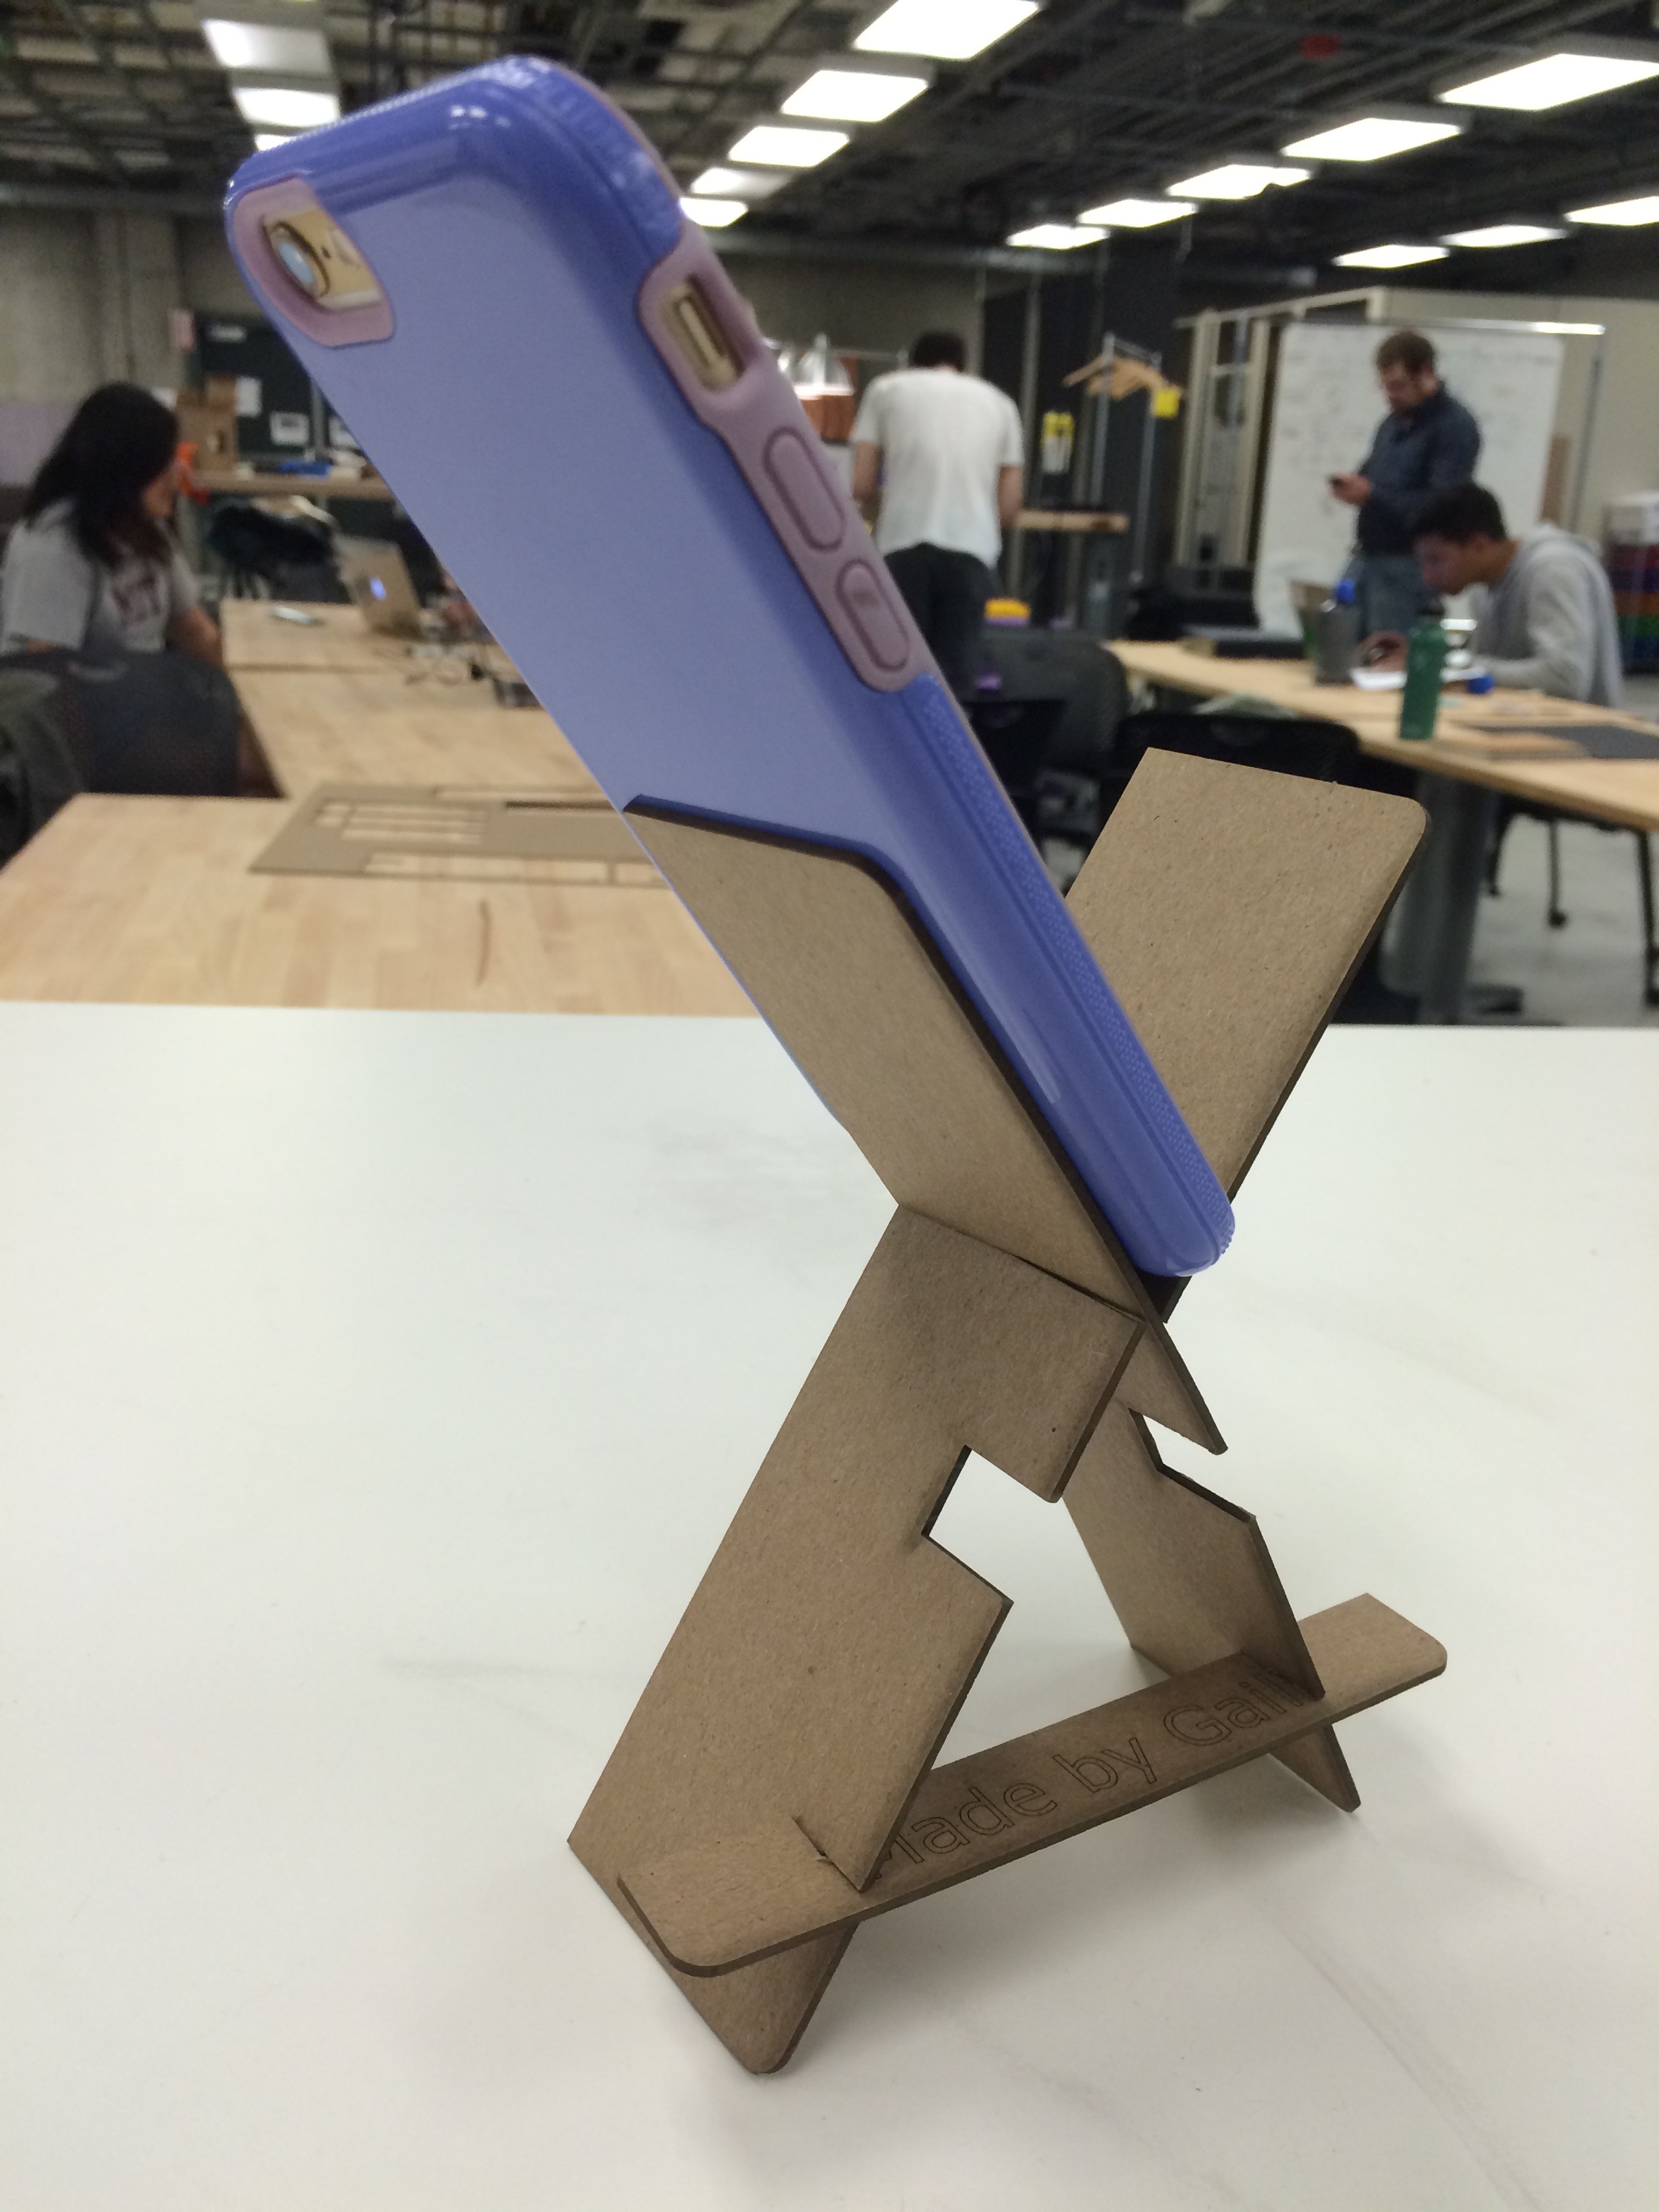
To accommodate the diagonal use of the phone, I increased the length of the X that faces up to improve the stability. Overall I’m pleased with how the design turned out. I have one final change to make, and that is to round all the corners. I was concerned the rounded corners on the side that rests on the ground could make it less stable. I tested this version upside down and discovered the stability stands up right, the next iteration of the design would include rounded corners for aesthetic improvements. Below is an image of the final Rhino image.