
DESCRIPTION
The fit shirt is a functional prototype that communicates to users which cardio zone they are currently in. The shirt monitors the heart rate and the lights change colors based on aerobic or anaerobic activity levels.
MY ROLE + DELIVERABLES
Designer and developer. Delivered Fully interactive and functional prototype.
METHODS
Sketching, Programming, Sewing, Prototyping.
TOOLS
Arduino, various other tech gadgets and sewing supplies.
This post was adapted from a blog used to document the process of building the shirt.
For our Physical Computing class, we were tasked to come up with an idea for a project to be completed as our final for the quarter. My idea is the Fit Shirt. Who needs to wear a clunky device on their wrist? With the Internet of Things, everything will be interconnected, even our clothing.
I built a prototype for a shirt with embedded sensors for a wire free fitness experience. I have a “vision” for where this shirt could go, but I only had 4 weeks to complete the prototype. Some of my loftier ideas can be included in later versions of the shirt but for now I’ll show you my initial design.
Planning
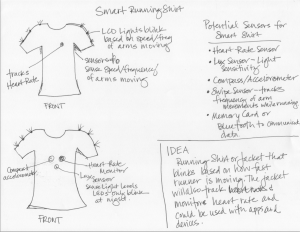
The initial plan was to design a shirt with a heart rate sensor, lux (light level) sensor, and accelerometer. The shirt tracks users’ heart rate and eventually will save and transmit (or just transmit this data) to wherever they track their data. Using the lux sensor and the accelerometer the shirt tracks users’ speed and blinks according to how fast they are running. This feature works only at night when the light is needed for additional security. My initial thoughts were the rate of blinking could alert cars on the road the rate speed you are approaching. If users are walking cars don’t need to be alerted as quickly.
If I have trouble getting the components to work together in the next four weeks, my back up plan is the have the lights blink according to how hard you’re working (based on heart beats).
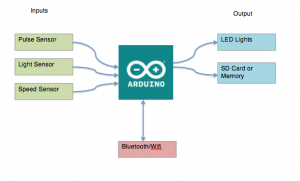 This is my diagram for the project. I took a trip out to Vetco in Bellevue to pick up some of the components, and was disappointed to learn they don’t carry any wearable components. I came home and purchased a bunch of stuff from Adafruit.
Here are a list of components I am planning to use for this project:
- 1 Arduino Flora ( you could use an Arduino Uno to save $)
- 1 Pulse Sensor (http://www.adafruit.com/products/1093)
- 1 Luminosity Sensor (http://www.adafruit.com/products/439)
- 1 Accelerometer (http://www.adafruit.com/products/1247)
- 1 Bluetooth connector (http://www.adafruit.com/products/1697)
- 1 micro SD card (http://www.adafruit.com/products/254)
- 10 LED sequins (http://www.adafruit.com/products/1758)
- Power Supply such as battery
- 1 shirt or jacket to add components to
- 1 band to attach pulse sensor to the body
- Various wires, adaptors, buttons, resistors, etc.
For my power supply I purchased a CR2032 Lithium Coin Cell Battery. I have two different ways to connect them, one of which is sewable and work best. I also purchased a small solar panel, which is the size of two inch button. It likely won’t supply enough power, but it may be fun to include in the design and eventually see if the Fit Shirt could be an energy independent product.
The last thing I want to mention is the future iterations of my idea. My big vision is to have a context aware shirt that integrates with your devices and predicts your preferences while also challenging your performance. I would like to add a GPS sensor that could track users’ routes and integrate that data to their fitness tracking applications. The shirt could also have a play button and synchronize to the users “playlist” on their device. It could also provide users with their performance information while running…”Your pace is 28 seconds slower than your last run, would you like me to play faster music?” or …”You’re planning to run an additional three miles today, you may want to slow down this next mile and save some energy for later.”
To view the full proposal in .pdf form click Physical Computing Project Proposal.
Coding the Shirt
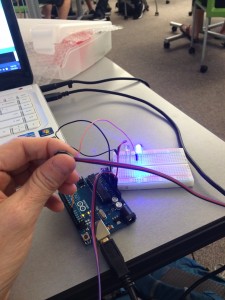
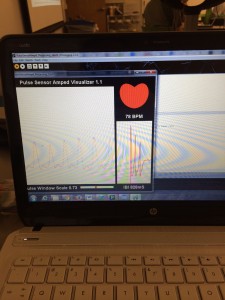
I have a few real victories to share. The first victory was getting my Adafruit Pulse Sensor Amped up and running. Below are the images of the board layout, along with an LED that displayed the pulse. Adafruit supplies you with some great code,one of which was a processing interface to visualize the pulse data. I have shown this in the second photo below. I had never used their processing code, so I was unfamiliar with it and needed help to get that set-up. Adafruit did not provide any tutorials that accompanied the code for this feature. It appeared that they assumed you already had knowledge of how the processing worked, but since I was not familiar with it, I didn’t even know what to look for it or where to find how to’s.
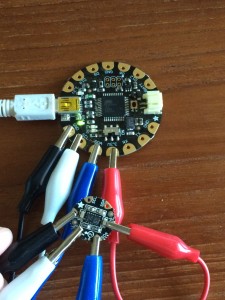
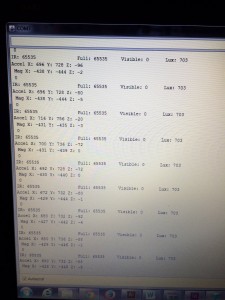
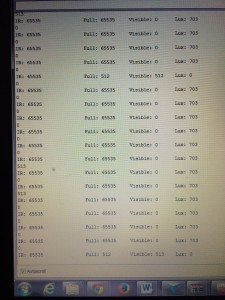
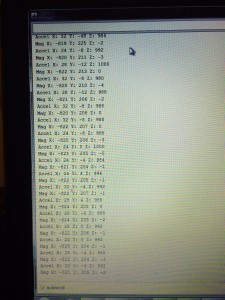
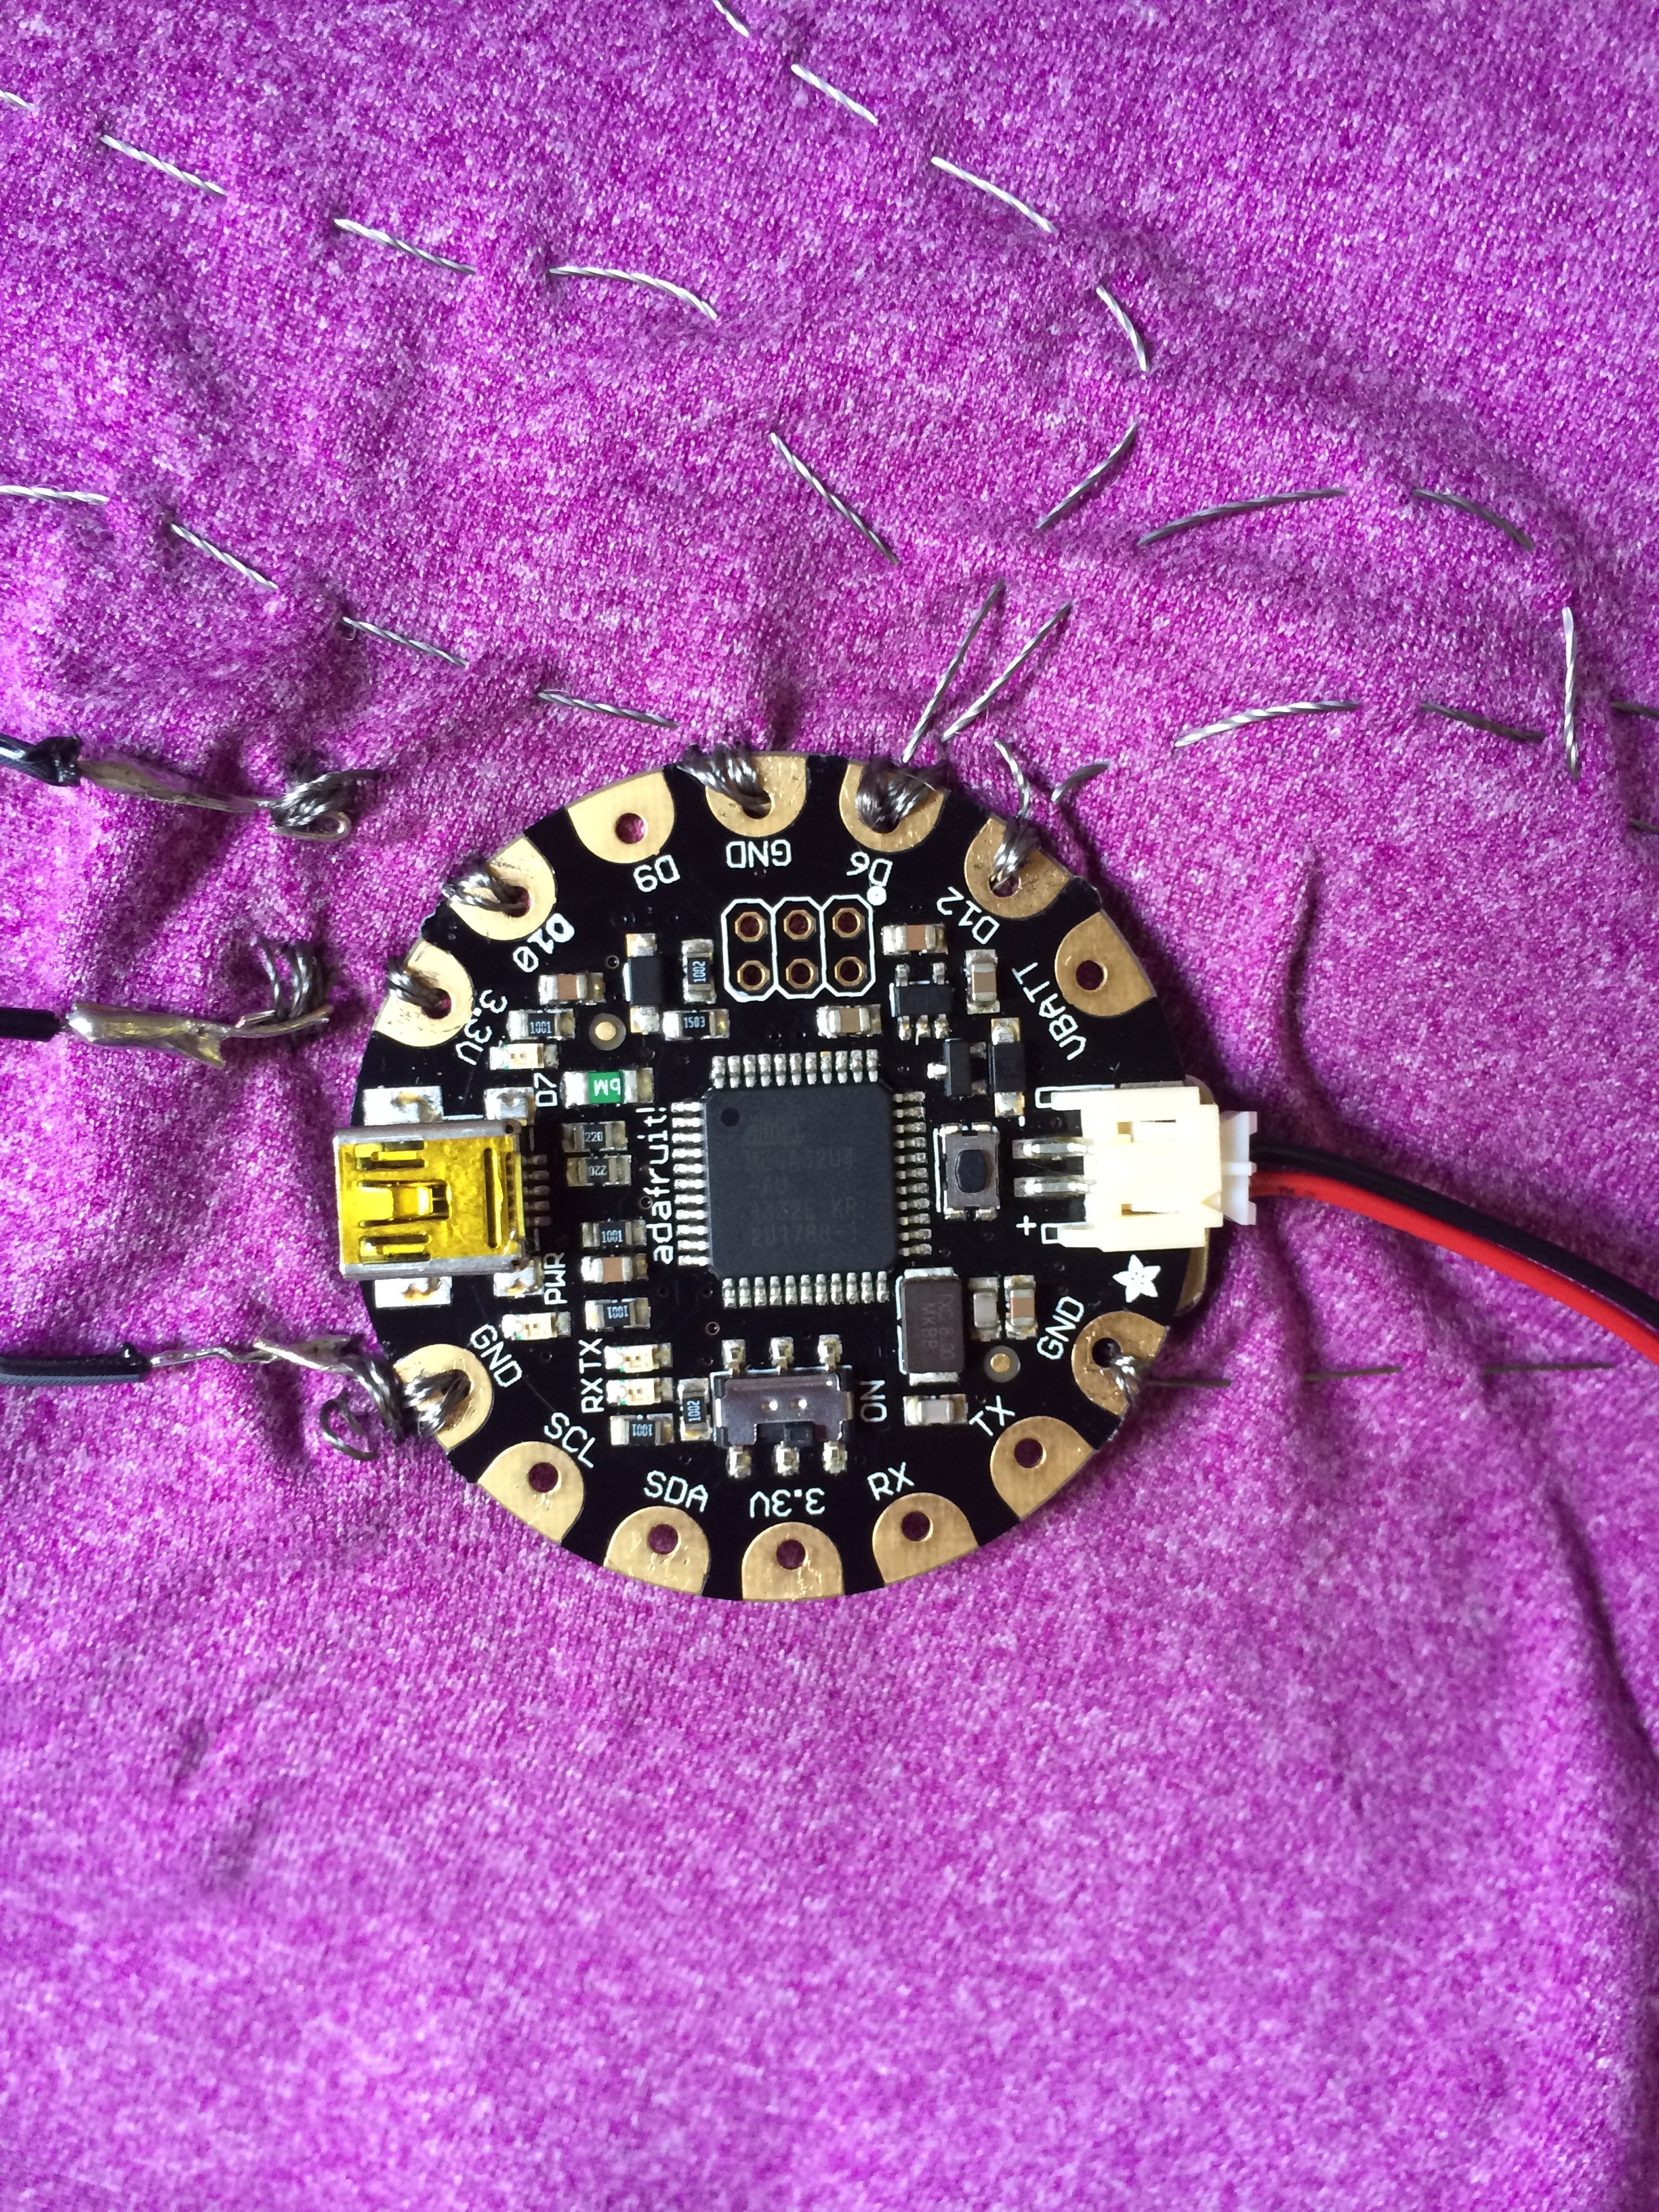
I moved on to getting my accelerometer integrated and ran into my first obstacle. The accelerometer I ordered is not compatible with an Arduino Uno board. It is only compatible with the Flora board, lucky for me I had already purchased one. Getting the Flora board up and working was not the easiest thing though. This world of Arduino was very new to me. I had to initialize the board and install a new Arduino IDE for the Flora and a library for the accelerometer. Once the kinks were ironed out, I was able to get the accelerometer working, or at least kind of. I was not able to get any data reading because I couldn’t go anywhere since it was hooked up to wires. In the photos above you can see the data didn’t change.
What’s cool about this process is that I wasn’t sure I would have time to install the components onto the Flora board for the Final Project due date and now that’s a necessity. I took apart the Arduino Uno board and have begun connecting the pulse sensor to the Flora board, but I am having a problem figuring out which pin to connect it to. There is a great walk through of the code, which I looked through but was unable to find what I needed. I need to read through the documentation and code one more time before resorting to other measures.
I’ll be honest, I don’t have any of the lights hooked up yet, and have not played around with any of the code. I leave Thursday night for St. Louis and the Electronics prototype is due on Friday. I’m scared that I have bit off more than I can chew and at the same time I know it always works out in the end. I’ll do my best this week to make sure I have something build on over the next week. As for now, I’ll celebrate my victories of installing the first two components and the Flora Board!
Fit Shirt
I have had some successes and some significant set-backs, like frying my board in class on Wednesday. I was able to get my Lux Sensor and Accelerometer working with the LED sequins with the generic code that was supplied. I have not been able to customize the code or figure out how to adjust the lights blinking based on speed or to only blink when it’s dark out. I did find two examples online of a shirt that blink with accelerometer and another wrist band that blinks in the dark that I can use to help me figure out how to program my shirt. To check out the projects click on either of these links foraccelerometer shirt or 3D Printed Wrist Band.
I have also not been able to figure out how to connect the Pulse sensor to the Arduino Flora board. The Pulse sensor is analog and the Flora board is digital, but there are a few pins that can be used either way when specified. I have not been able to resolve this issue, and this may be the cause of frying the board.
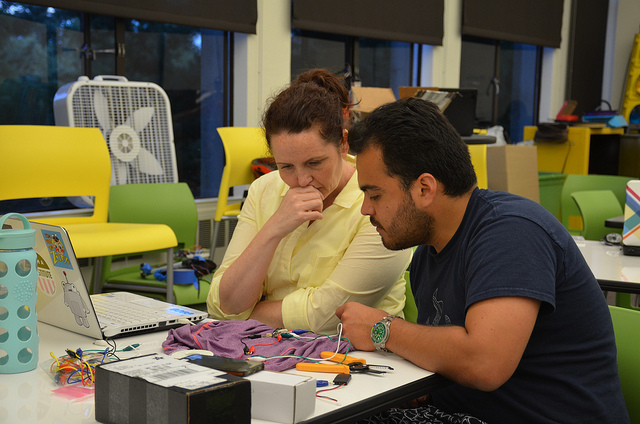
I was also having some technical difficulties this week where the data would quit reporting after only a few loops through the code. I was using jumper wires to connect all the components, and Andy suggesting I use alligator clips, which quickly resolved the issue. I was able to purchase another batch of clips so I could continue to build the prototype. Andy also loaned me another Flora board until I could order another, which has afforded me the ability to keep testing the code and working on my project through the weekend. I have updated the diagram for my project to reflect the actual components Revised Fit Shirt Diagram.
Rethinking the Fit Shirt
Well this has been an interesting week. This has been the second time I’m drafting this post, it didn’t upload last night as I thought it did. I seem to be caught in the Bermuda Triangle for technology this week. Everything is breaking, or having technical issues.
Speaking of which let’s talk about Fit Shirt 2.0…
The first version of the shirt, was not exactly feasible with my current skill level and the allotted time to complete a finished product. I had some issues figuring out how to determine the “speed” for the lights to blink. the accelerometer has three axis and I was not sure if I should use 1, 2 or all three of them to compute the speed. I got a little stalled out on this and became a little paralyzed in the “how-to” that I stopped tinkering. I decided I needed to rethink this idea and come at if from a different direction.
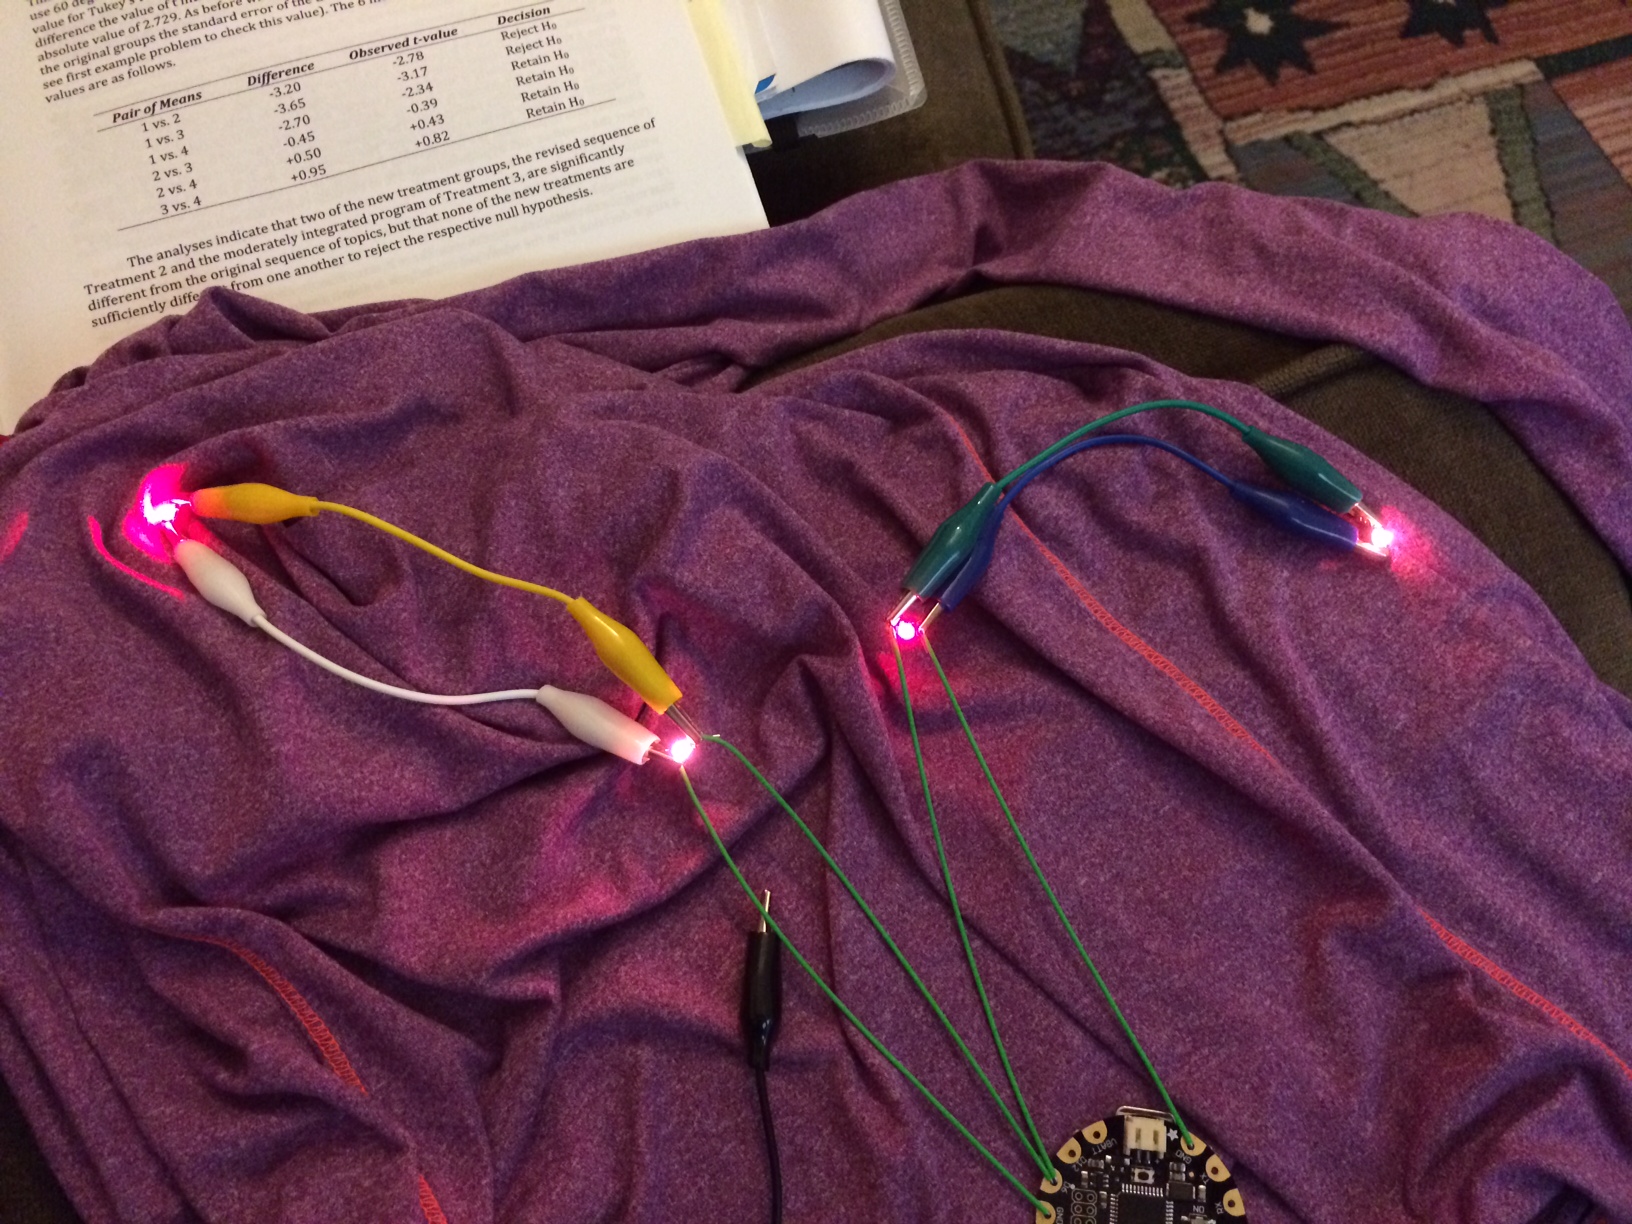
I decided to consult a SME (Subject Matter Expert), so I chatted with my personal trainer about my shirt idea and what could be useful for his clients. We talked extensively about the Pulse Sensor and the useful information that it tracks. Fit Shirt 2.0 now tracks the users heart rate and blinks based on their cardio zone. When people are trying to get in shape or lose weight, staying in the most efficient cardio zone (aerobic) is incredibly important. Fit Shirt 2.0 blinks pink when the users pulse is in the aerobic and blinks red when the user transitions into the anaerobic zone and there alerting them to slow down.
Having changed the direction of my design, I have been able to step back and use less code. Connecting the components to the Flora board was easy, but I ran into complications with blinking the LEDs. I was testing the condition of the BPM (beats per minute) before sending the blink command the the pin. By connecting the Pink and Red LEDs to separate pins, I could control the color that blinks. The LEDs were barely blinking, and I couldn’t figure out why. Late Wednesday night I realized I was testing the condition in the wrong place. When I tested the BPM in the set_up instead of the loop the shirt started working correctly. Here is the working code for this section:
void setup(){
if (BPM > 185){
blinkPin = 12;
} else {
blinkPin = 6;
}
pinMode(blinkPin,OUTPUT);
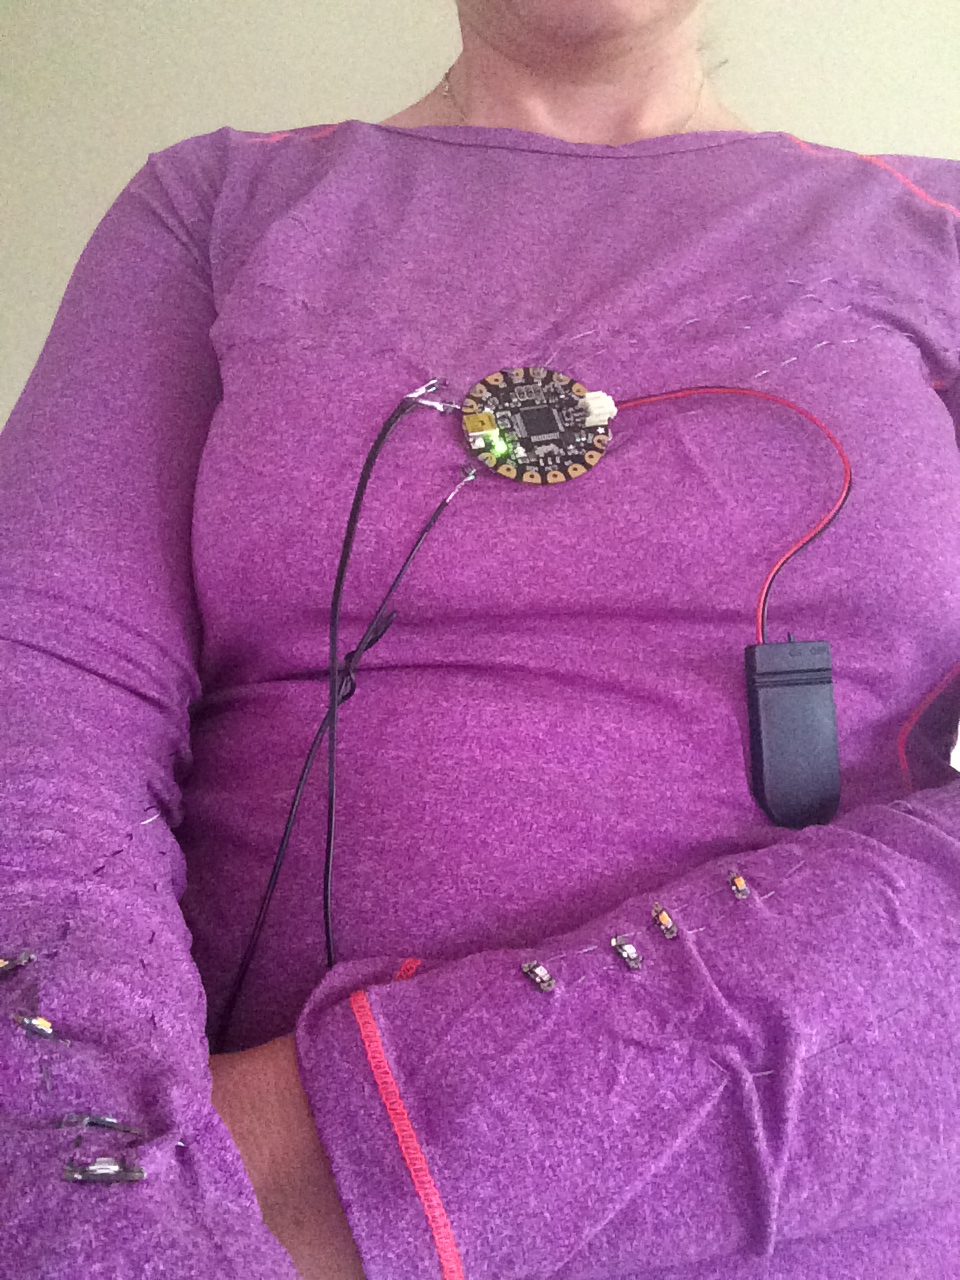
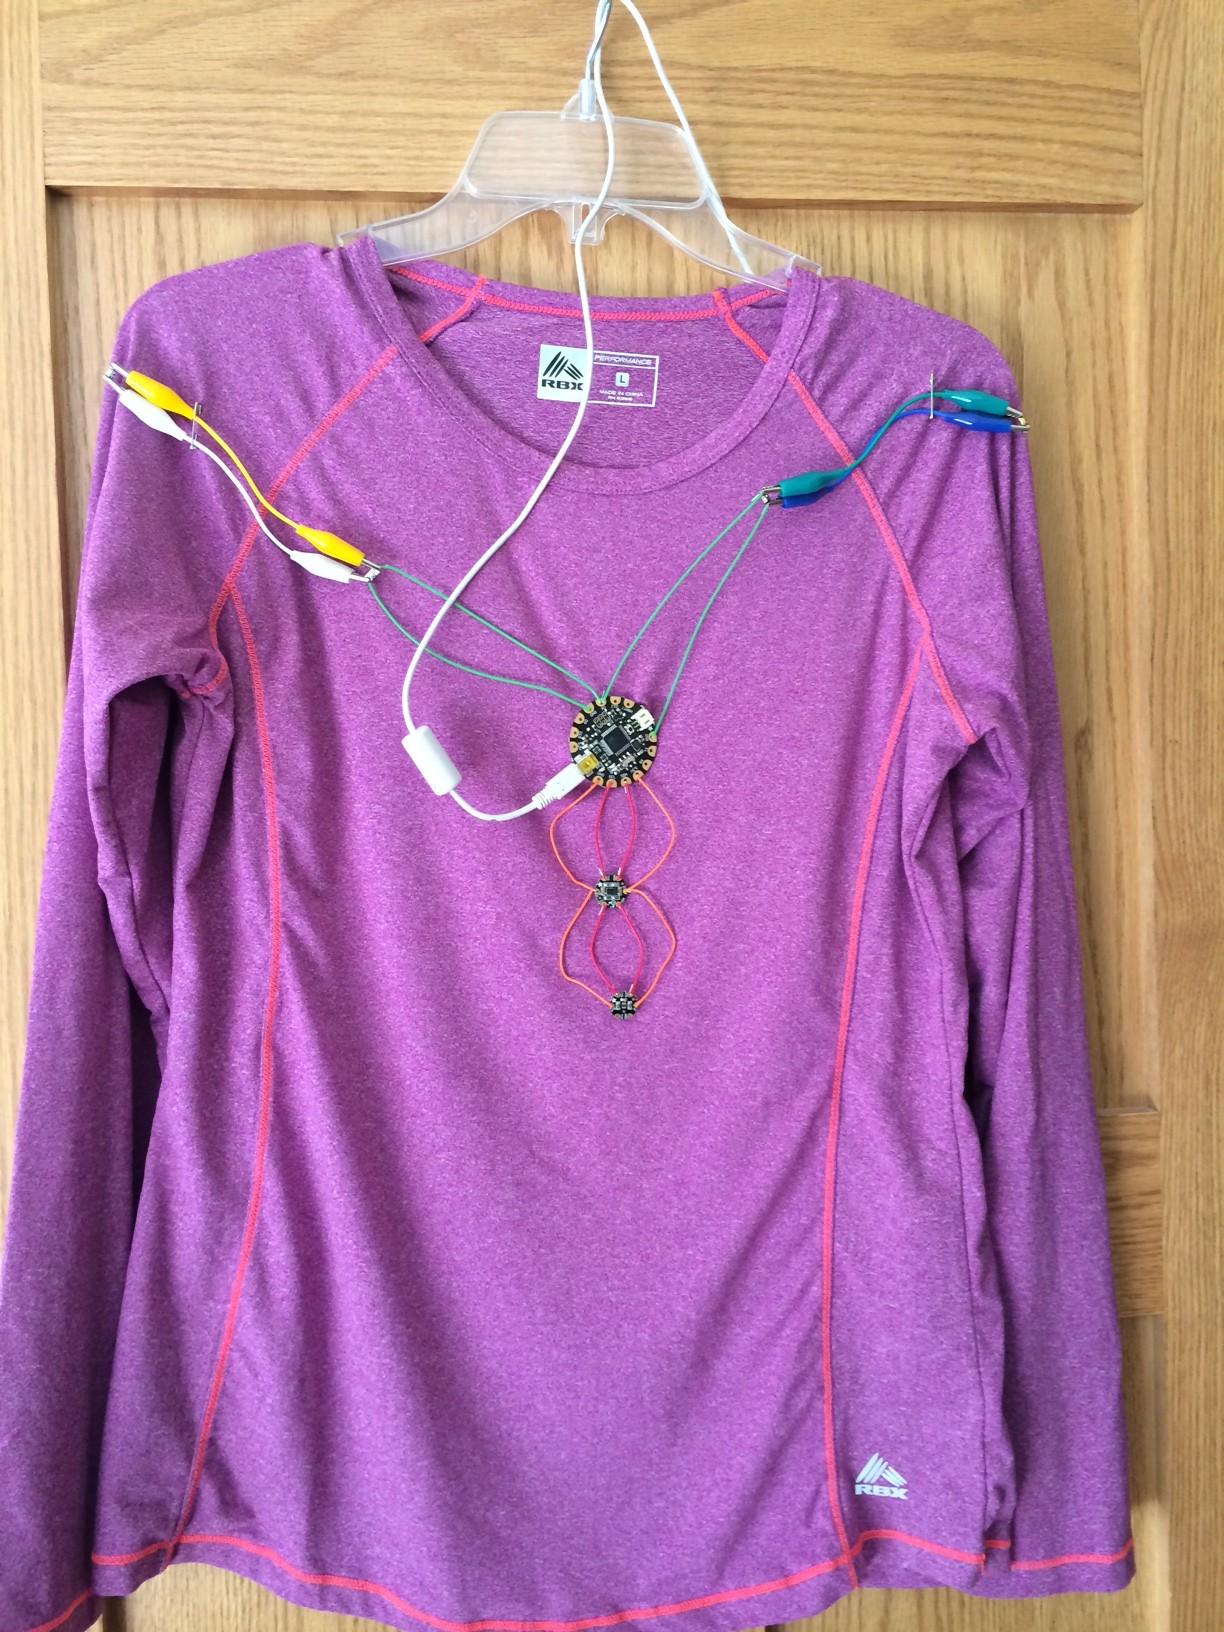
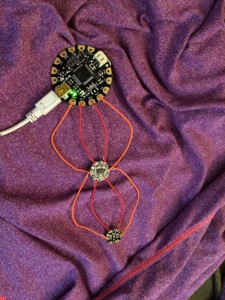
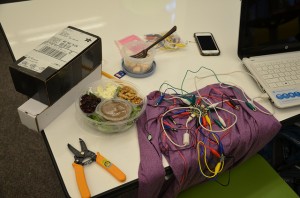
Si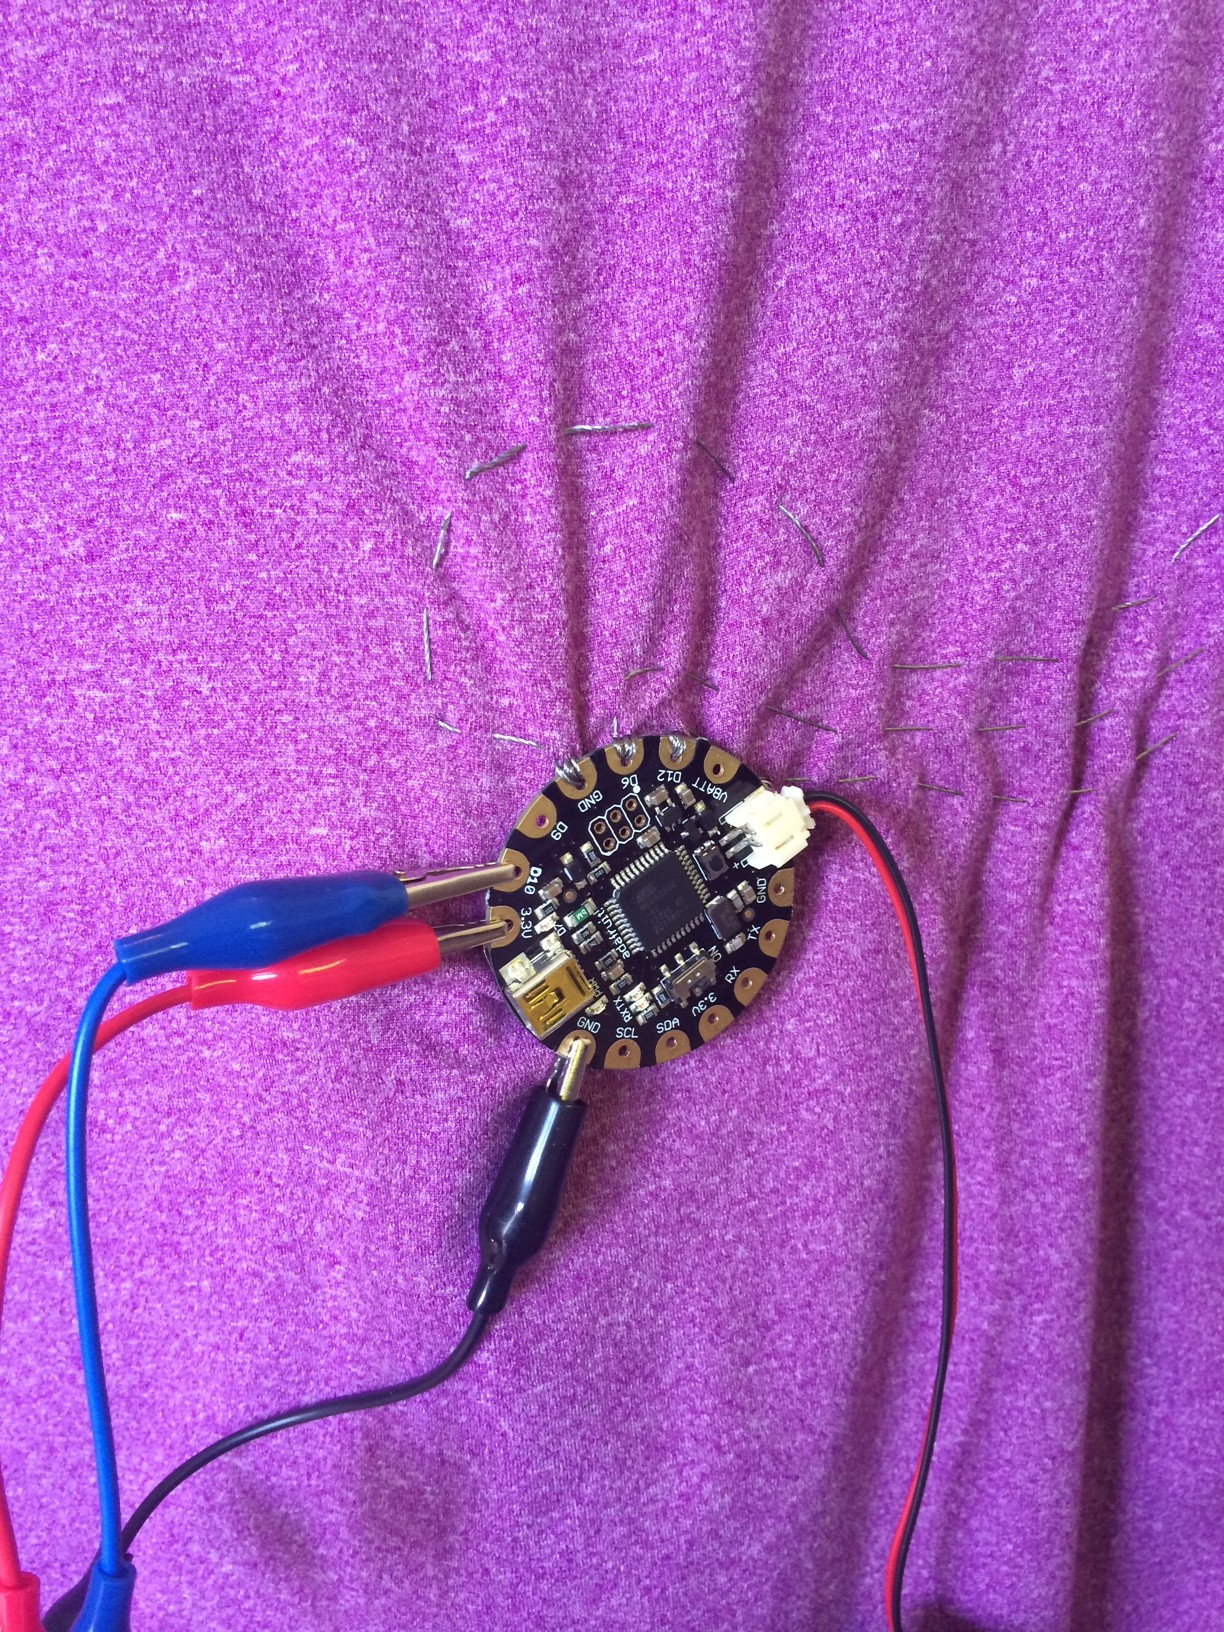 nce the components are all working, I decided I still have time to stitch the components on the shirt before the Demo night Wednesday. I am not a great seamstress, but I have really enjoyed playing with conductive thread. I have a few photos of my progress even though I’m not finished.
Another valuable lesson I learned this week is to test all the components before you sew them to your garment. I realize this seems obvious, but since they were all new components it didn’t occur to me that any of them might not be working…that is until I sewed on an LED sequin that wouldn’t blink. I’ve had to get creative to resolve the issue and stay tuned for photos of the final project and the Demo night Wednesday.
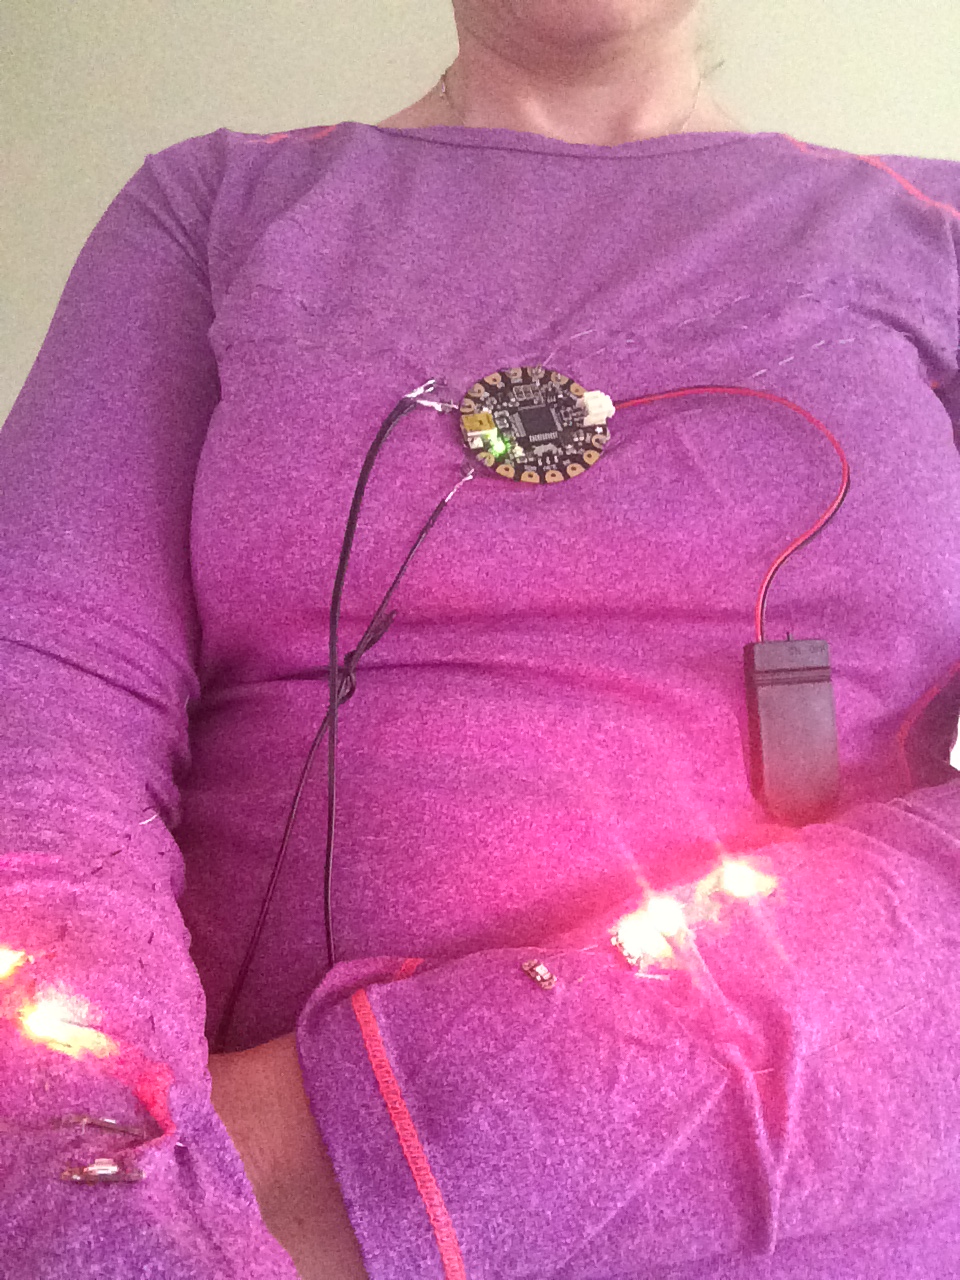
Fit Shirt 1.0 Final Design
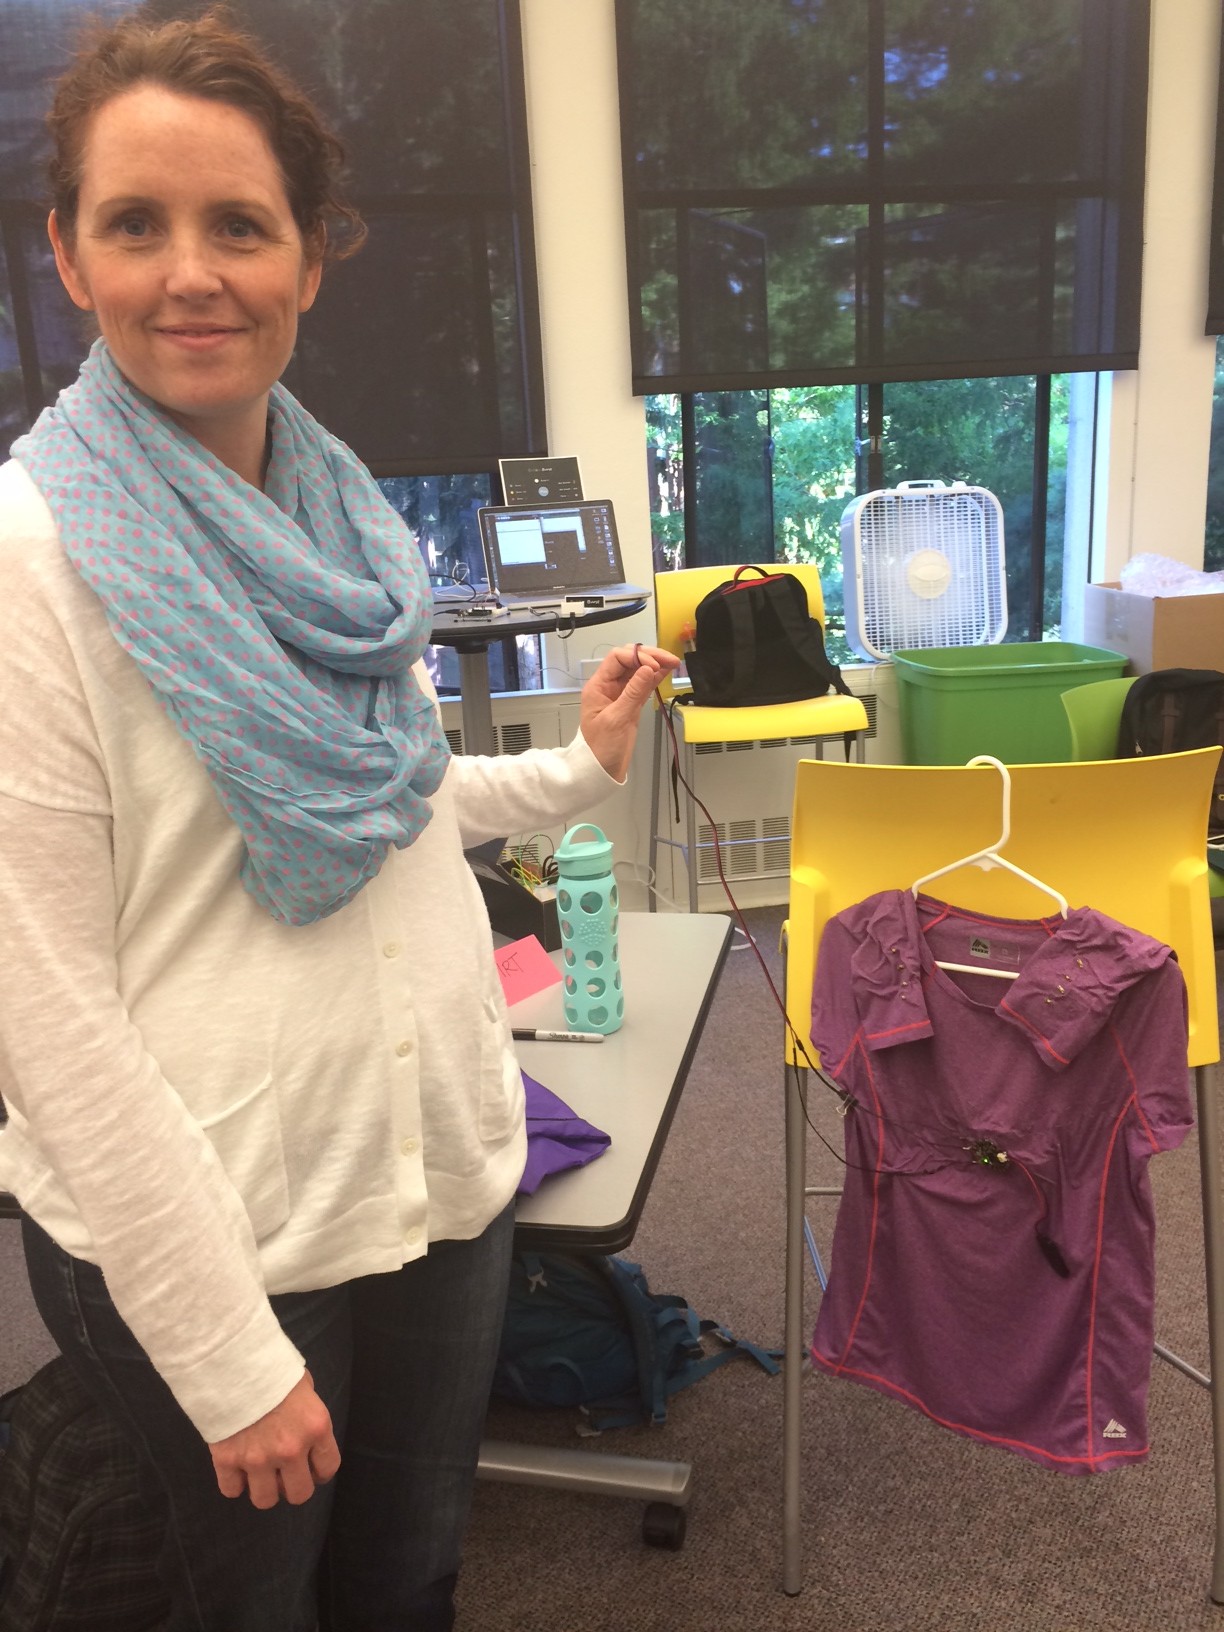
So the class is over and the I demonstrated the prototype of the final design Wednesday. I wasn’t sure I could pull it off, but low and behold it all came together perfectly, including the last minute shuddering due to damage that occurred en route. Overall I’m pleased with the final design. The conductive thread turned out to be trickier than I anticipated, despite al the blog warnings about how finicky it could be. I often times think I am the exception to this rule and am unpleasantly surprised to discover that I’m not. The image to the left is me on Demo night with the final version of the shirt, which I’ll go into more detail later.
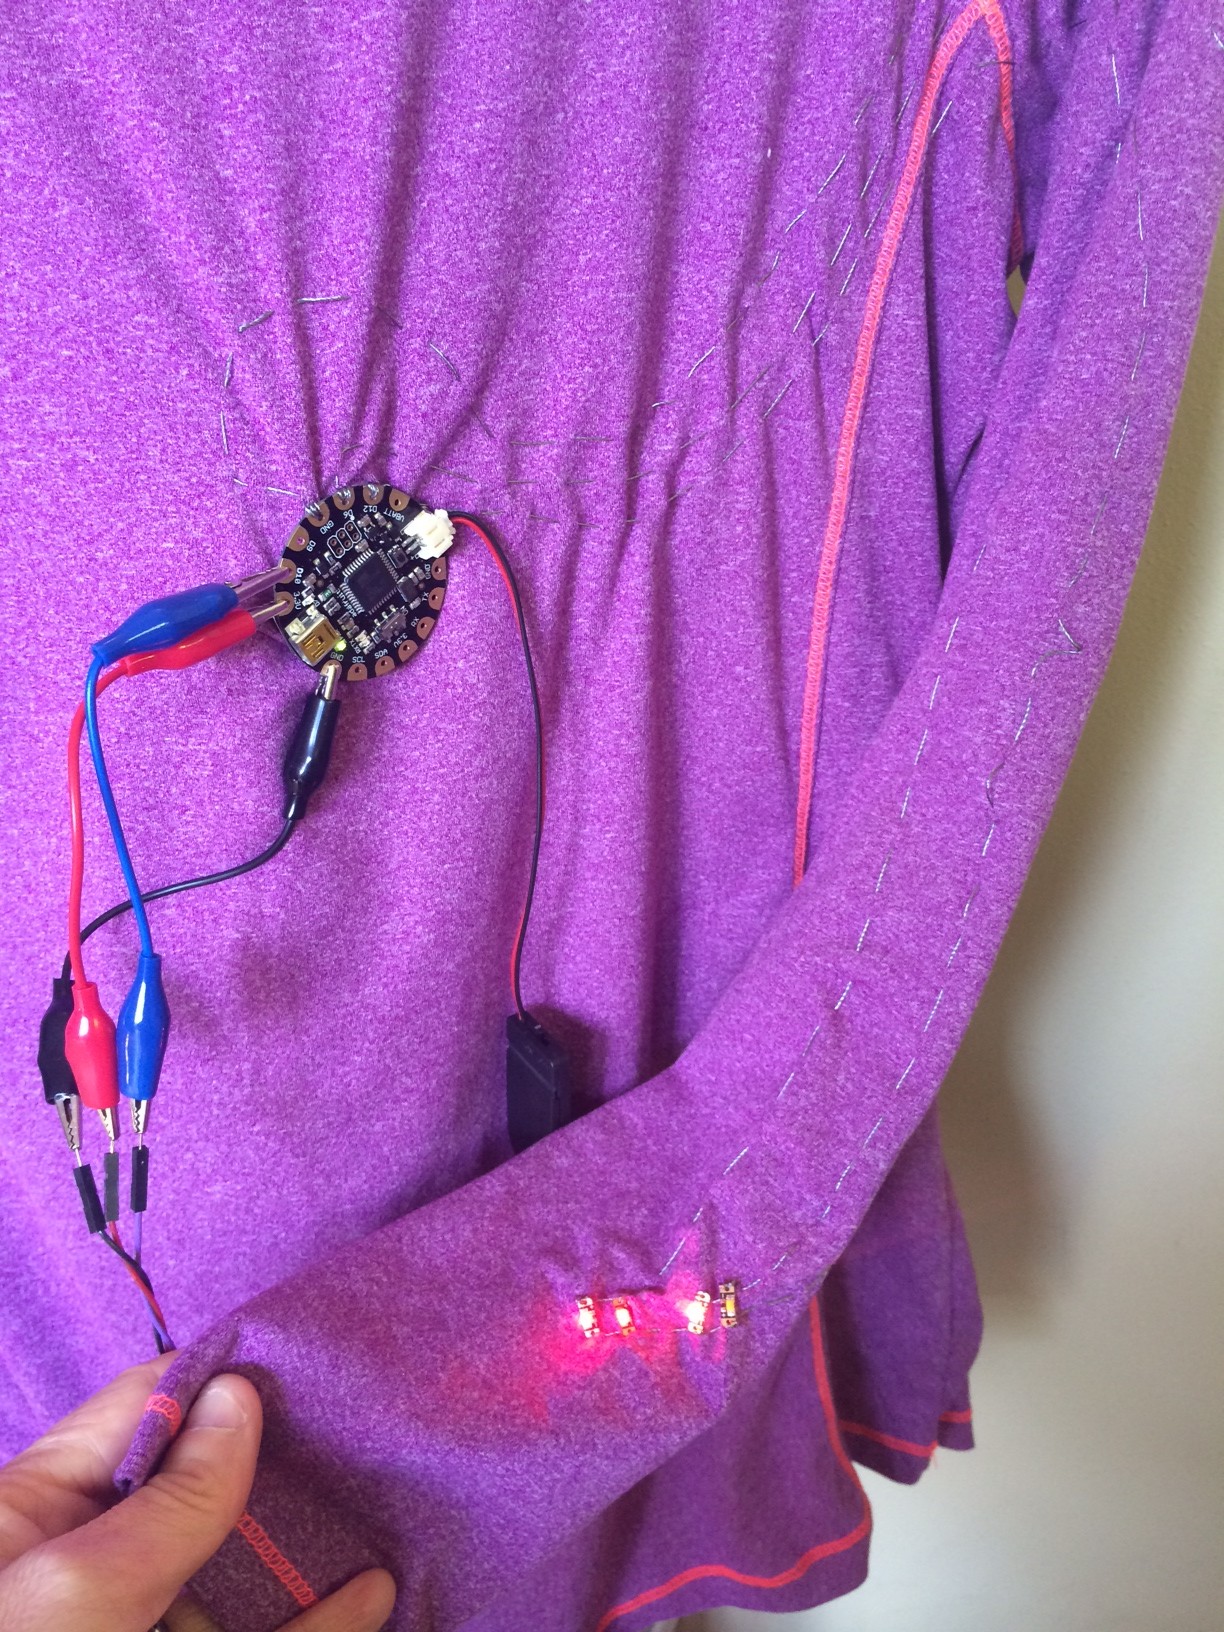
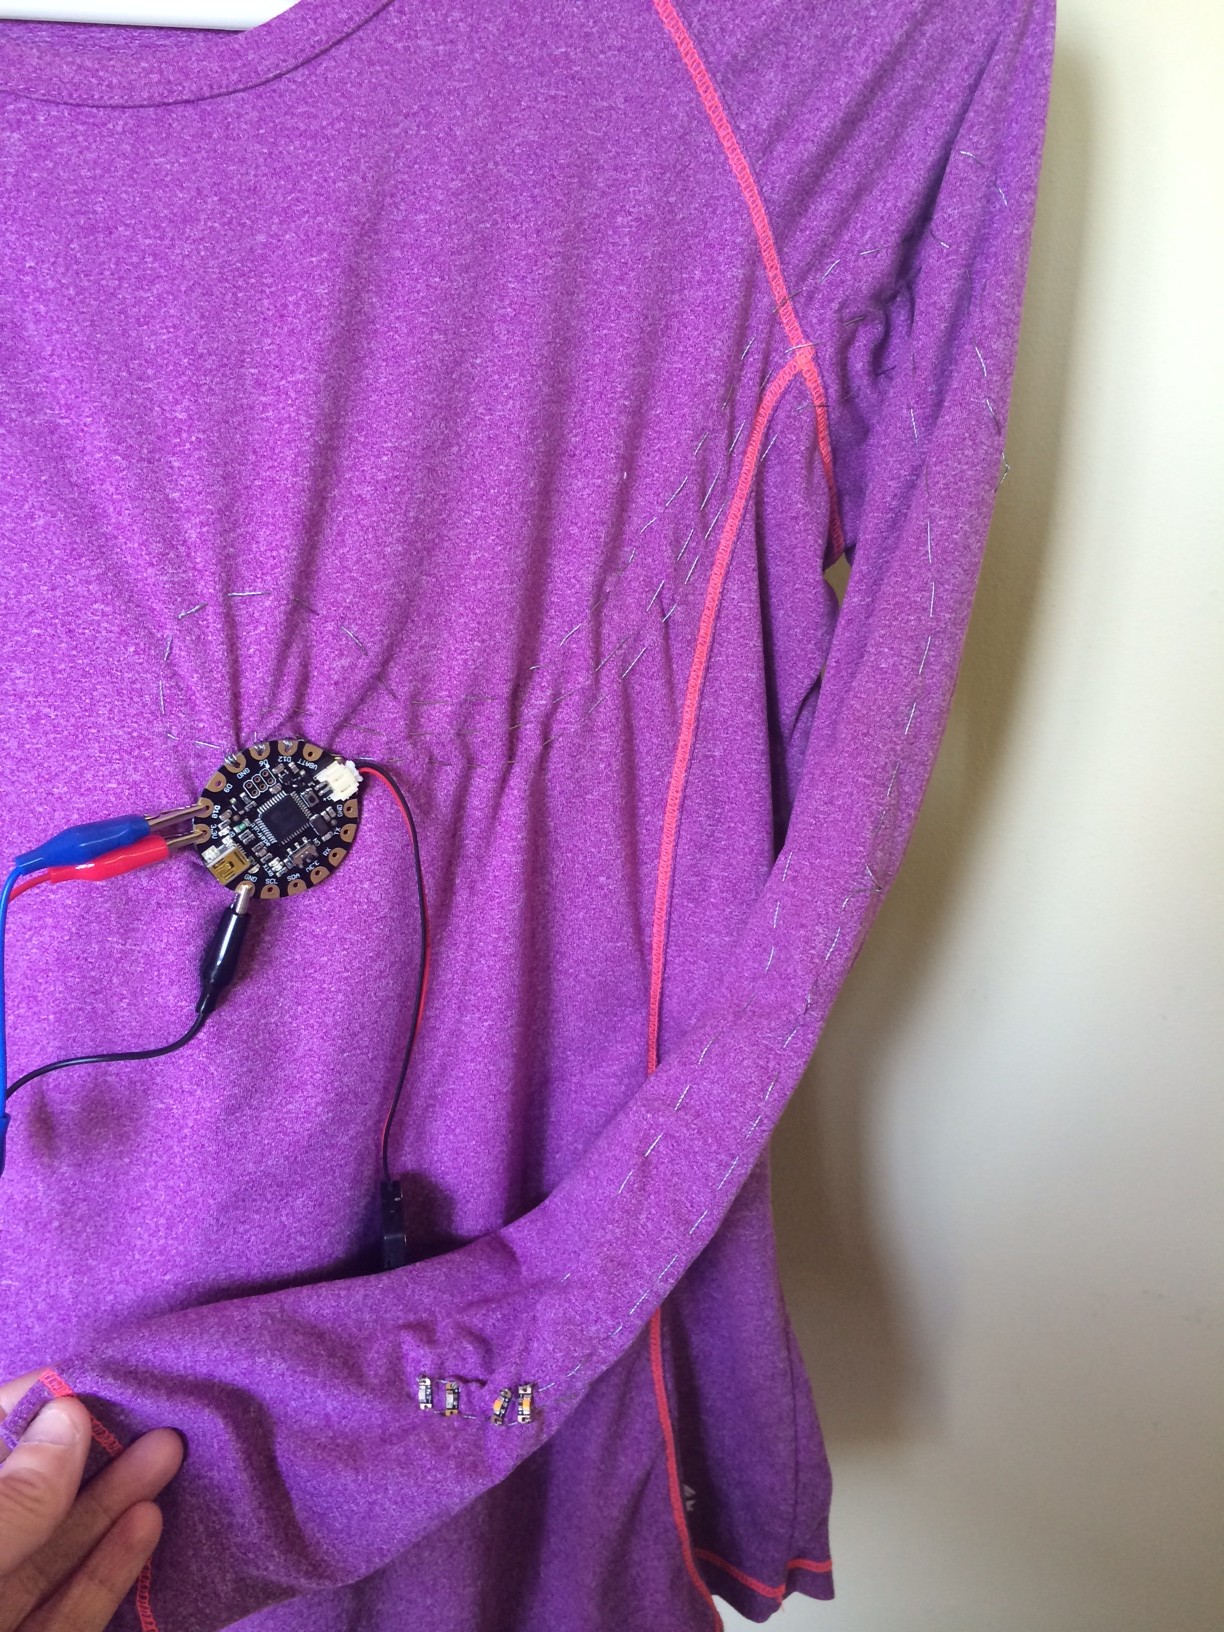
I have some detailed photos of my Fit Shirt to review some of the details with you. The like I mentioned sewing the conductive thread was the most challenging aspect of this project once I figured out the accelerometer was a little too ambitious for my original idea. Some things to consider when sewing a shirt is that the thread can’t touch at all. This can be tricky when connecting multiple LED’s to one pin hole on the Flora board, as well as when planning where to sew down sleeves as the shirt can short out if they touch each other when the user bends the shirt at any important seams like armpits and elbows.
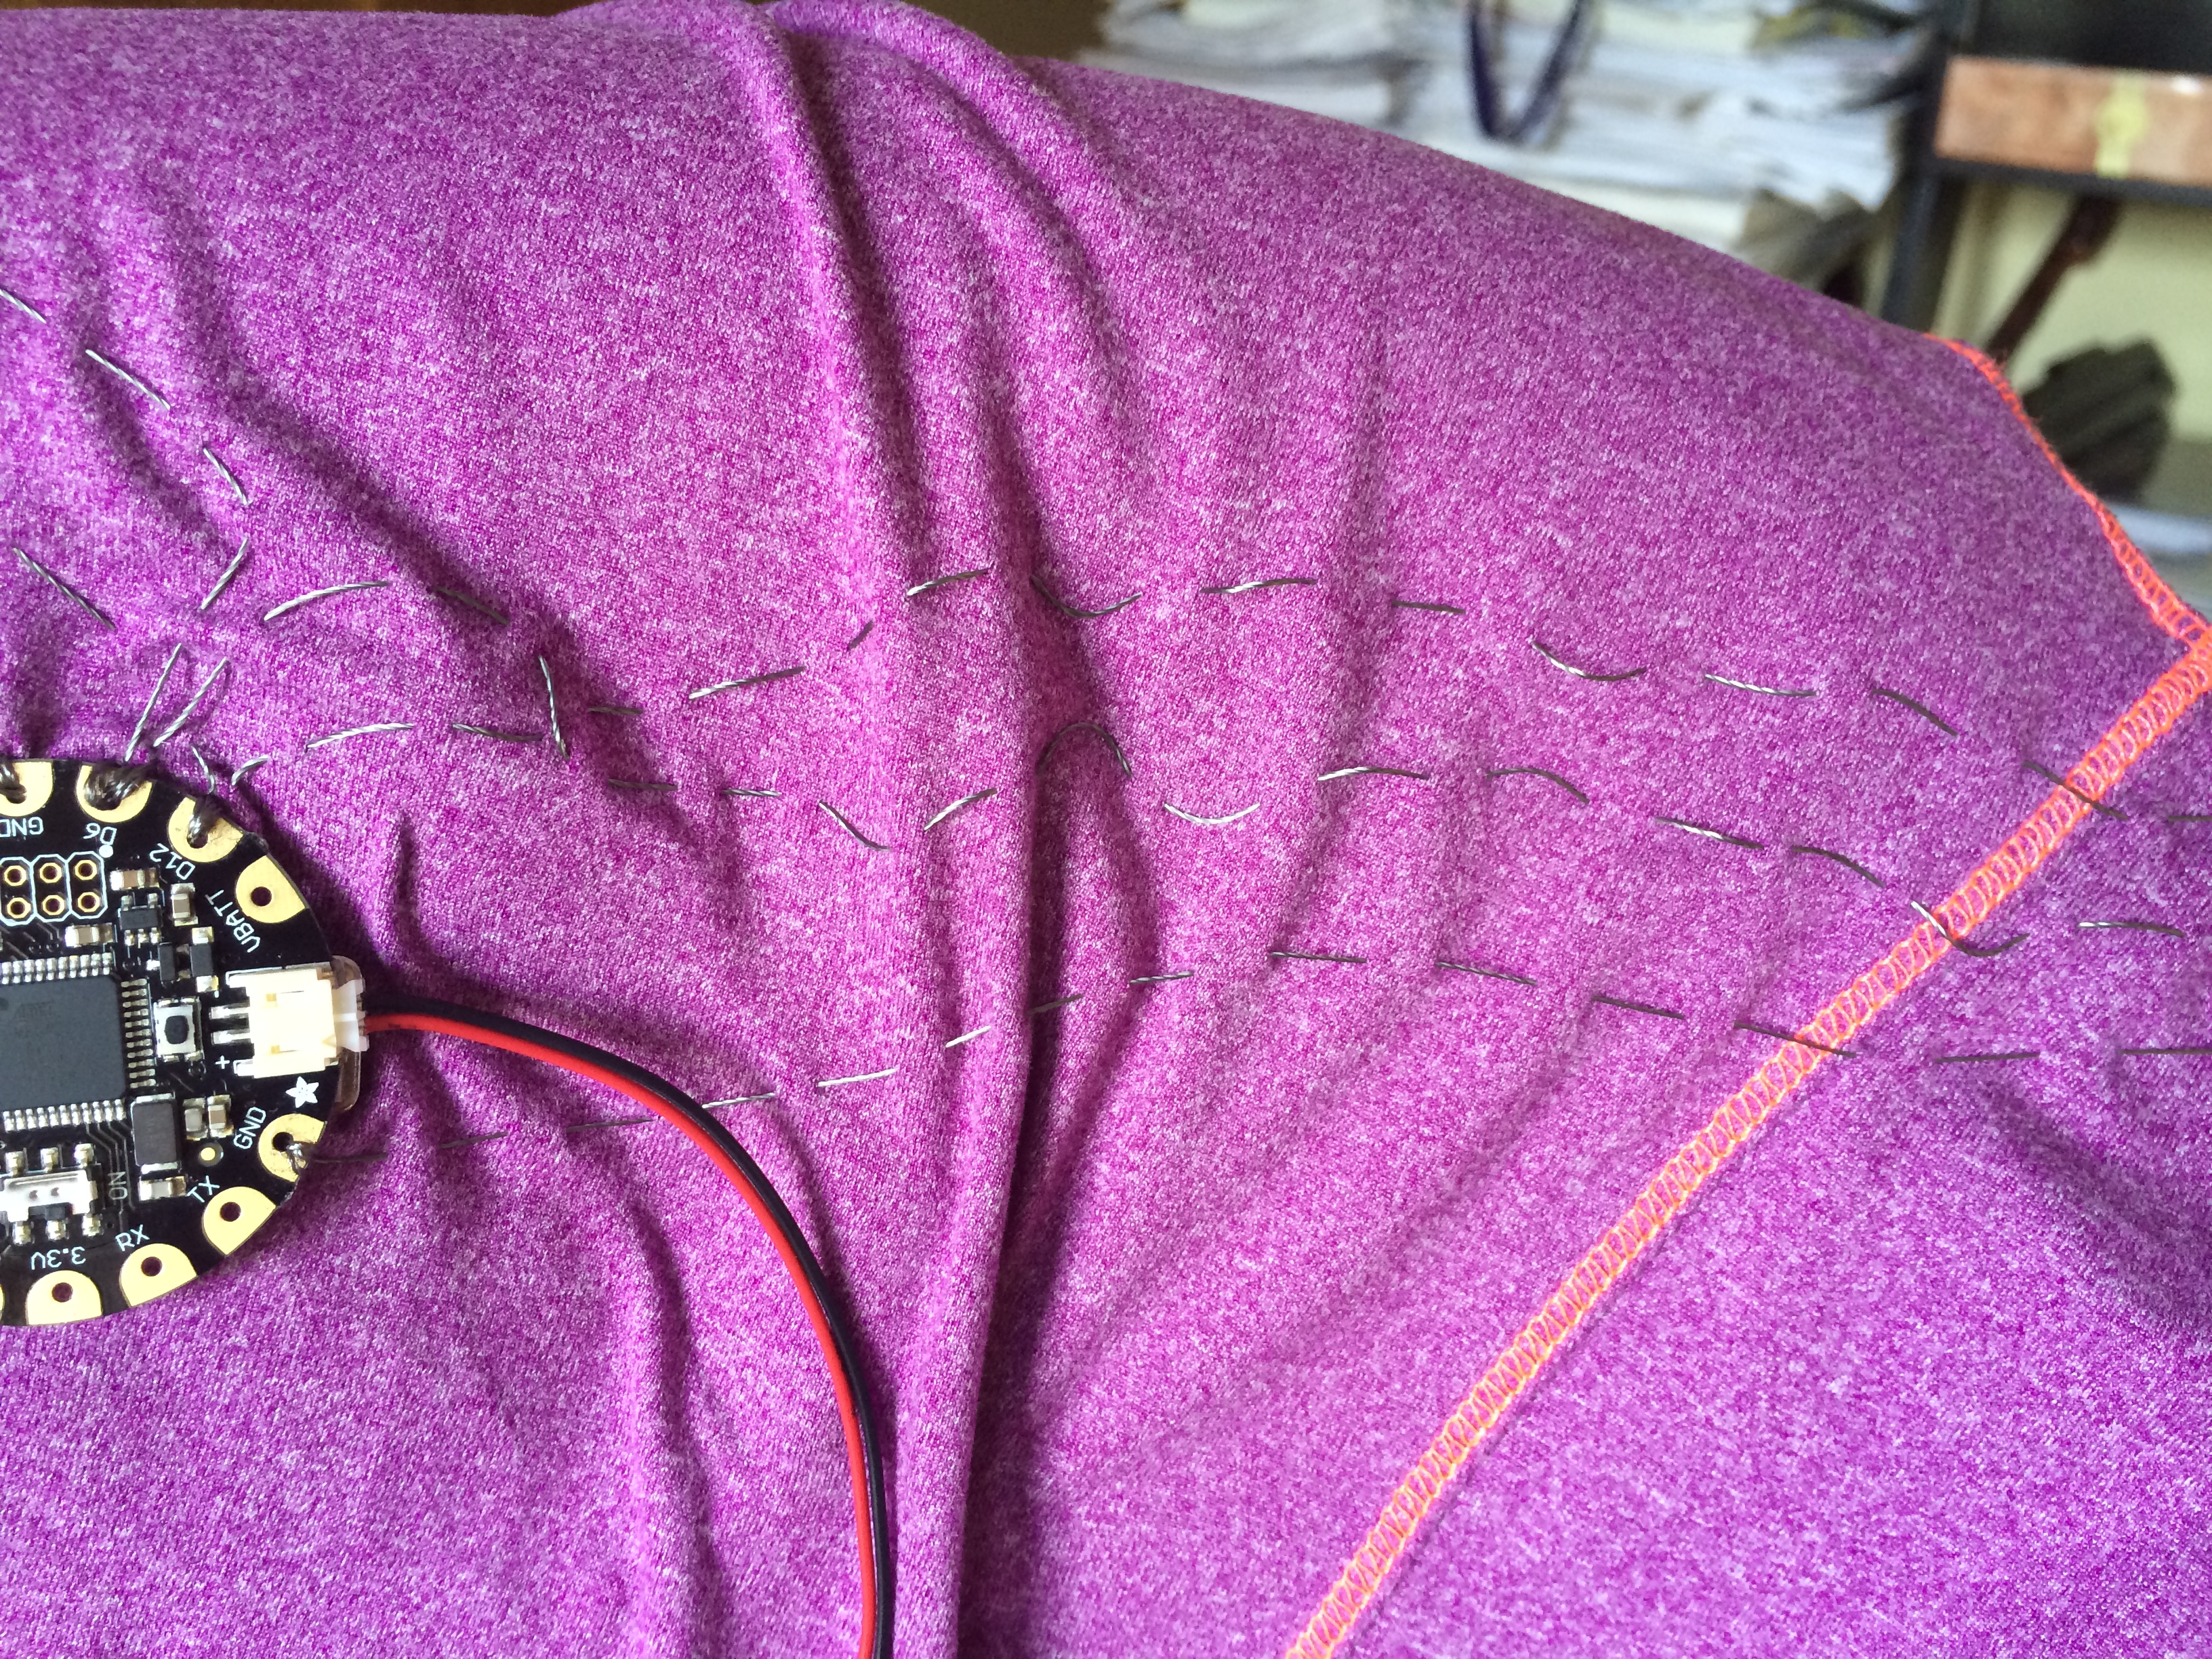
I learned some important lessons during this project and sewing that seem obvious now, but were not so intuitive at the time. I was extremely excited to start sewing and probably did not spend as much time mapping out the entire project as was needed to avoid the following issues. Sewing the LEDs was extremely problematic for me.
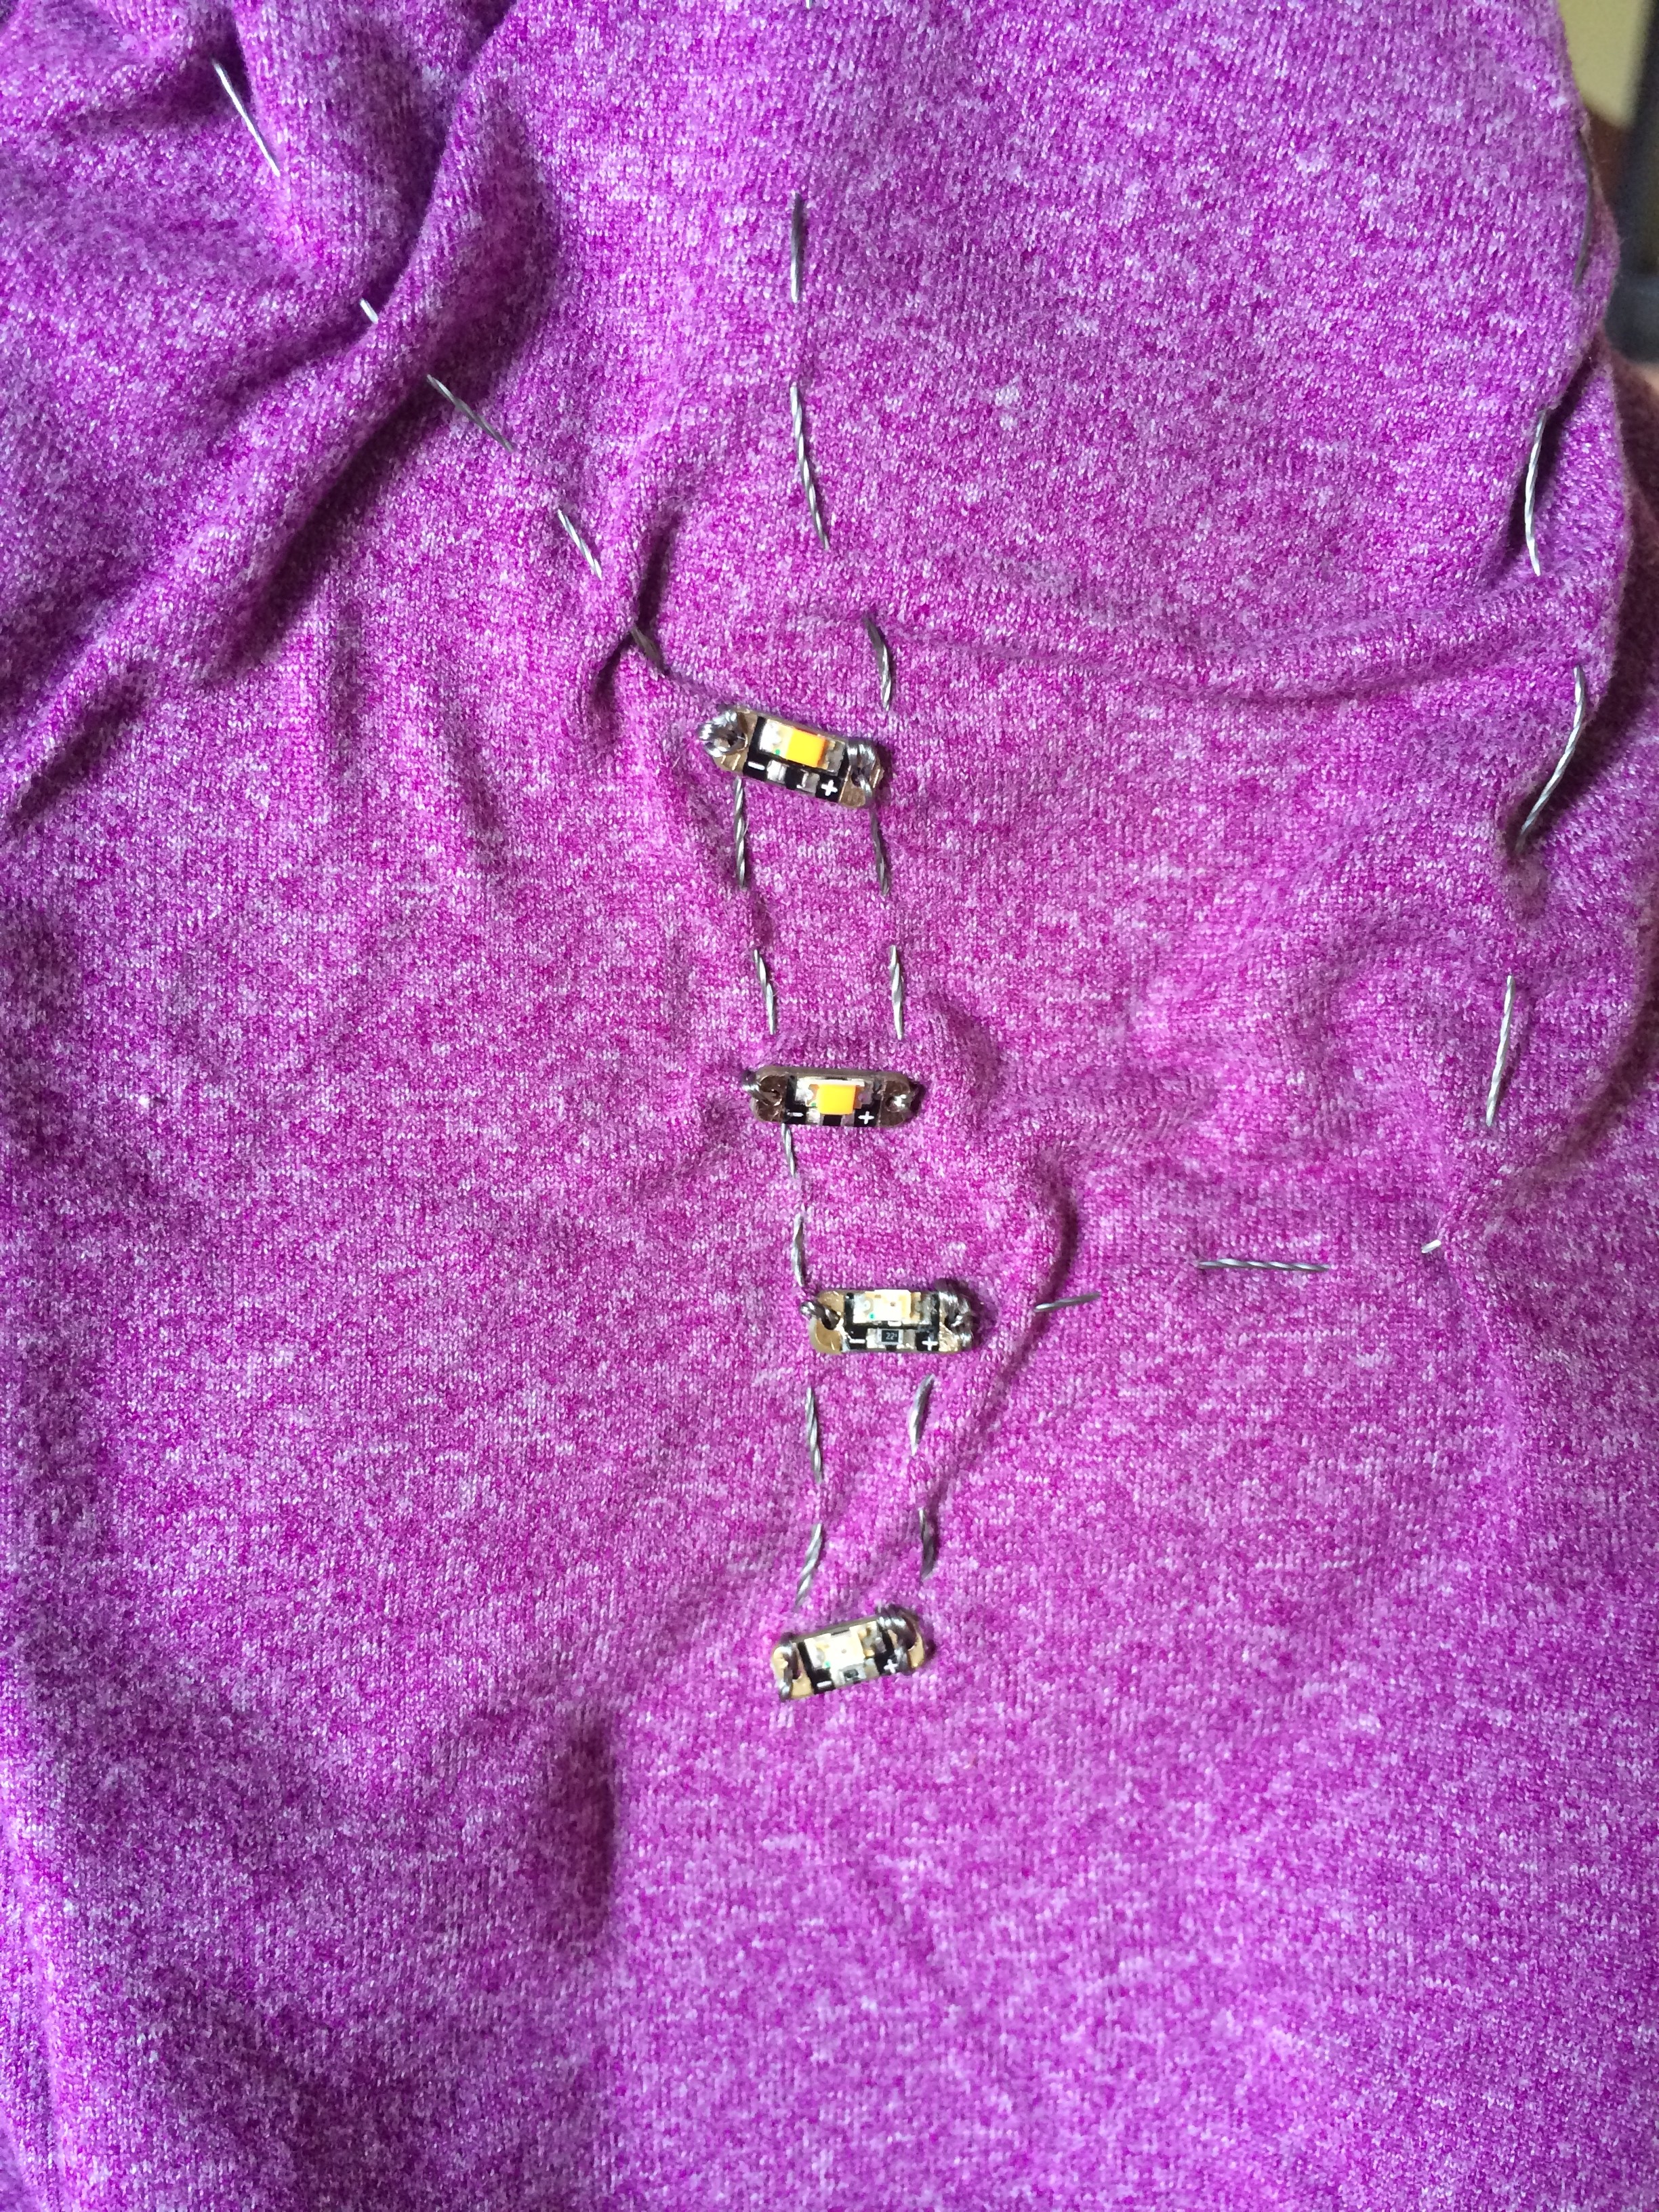
I chose to use two different colored LED Sequins in order to distinguish between the two heart rate zones instead of using one set of LEDs that could change to different colors. I did this for three reasons. The first reason was I wanted to play with the LED sequins. The second was that I thought they would be smaller, lighter, and better suited for a shirt physical activity. The third reason is I thought they would be less complicated to work with due to the lack of programming. While this was true, it added a level of complexity to the sewing that, again, I didn’t anticipate.
It took three sewing attempts to get all of the LEDs working properly. The first time I sewed all the components together in one long string, and discovered when I connected everything that one of the LED sequins was broken and had to rip the entire project apart and start over. The second time I got the LEDs facing the wrong direction so the grounding thread had to be sewn across the back of the arm over the elbow. The third time I decided to sew the LEDs in sections to compartmentalize the components in case there were issues in the future.
The LED’s are one section and the thread that connects them to the Flora are another section and either of these can be replaced without having to completely restitch the entire shirt again. The third time was the charm.
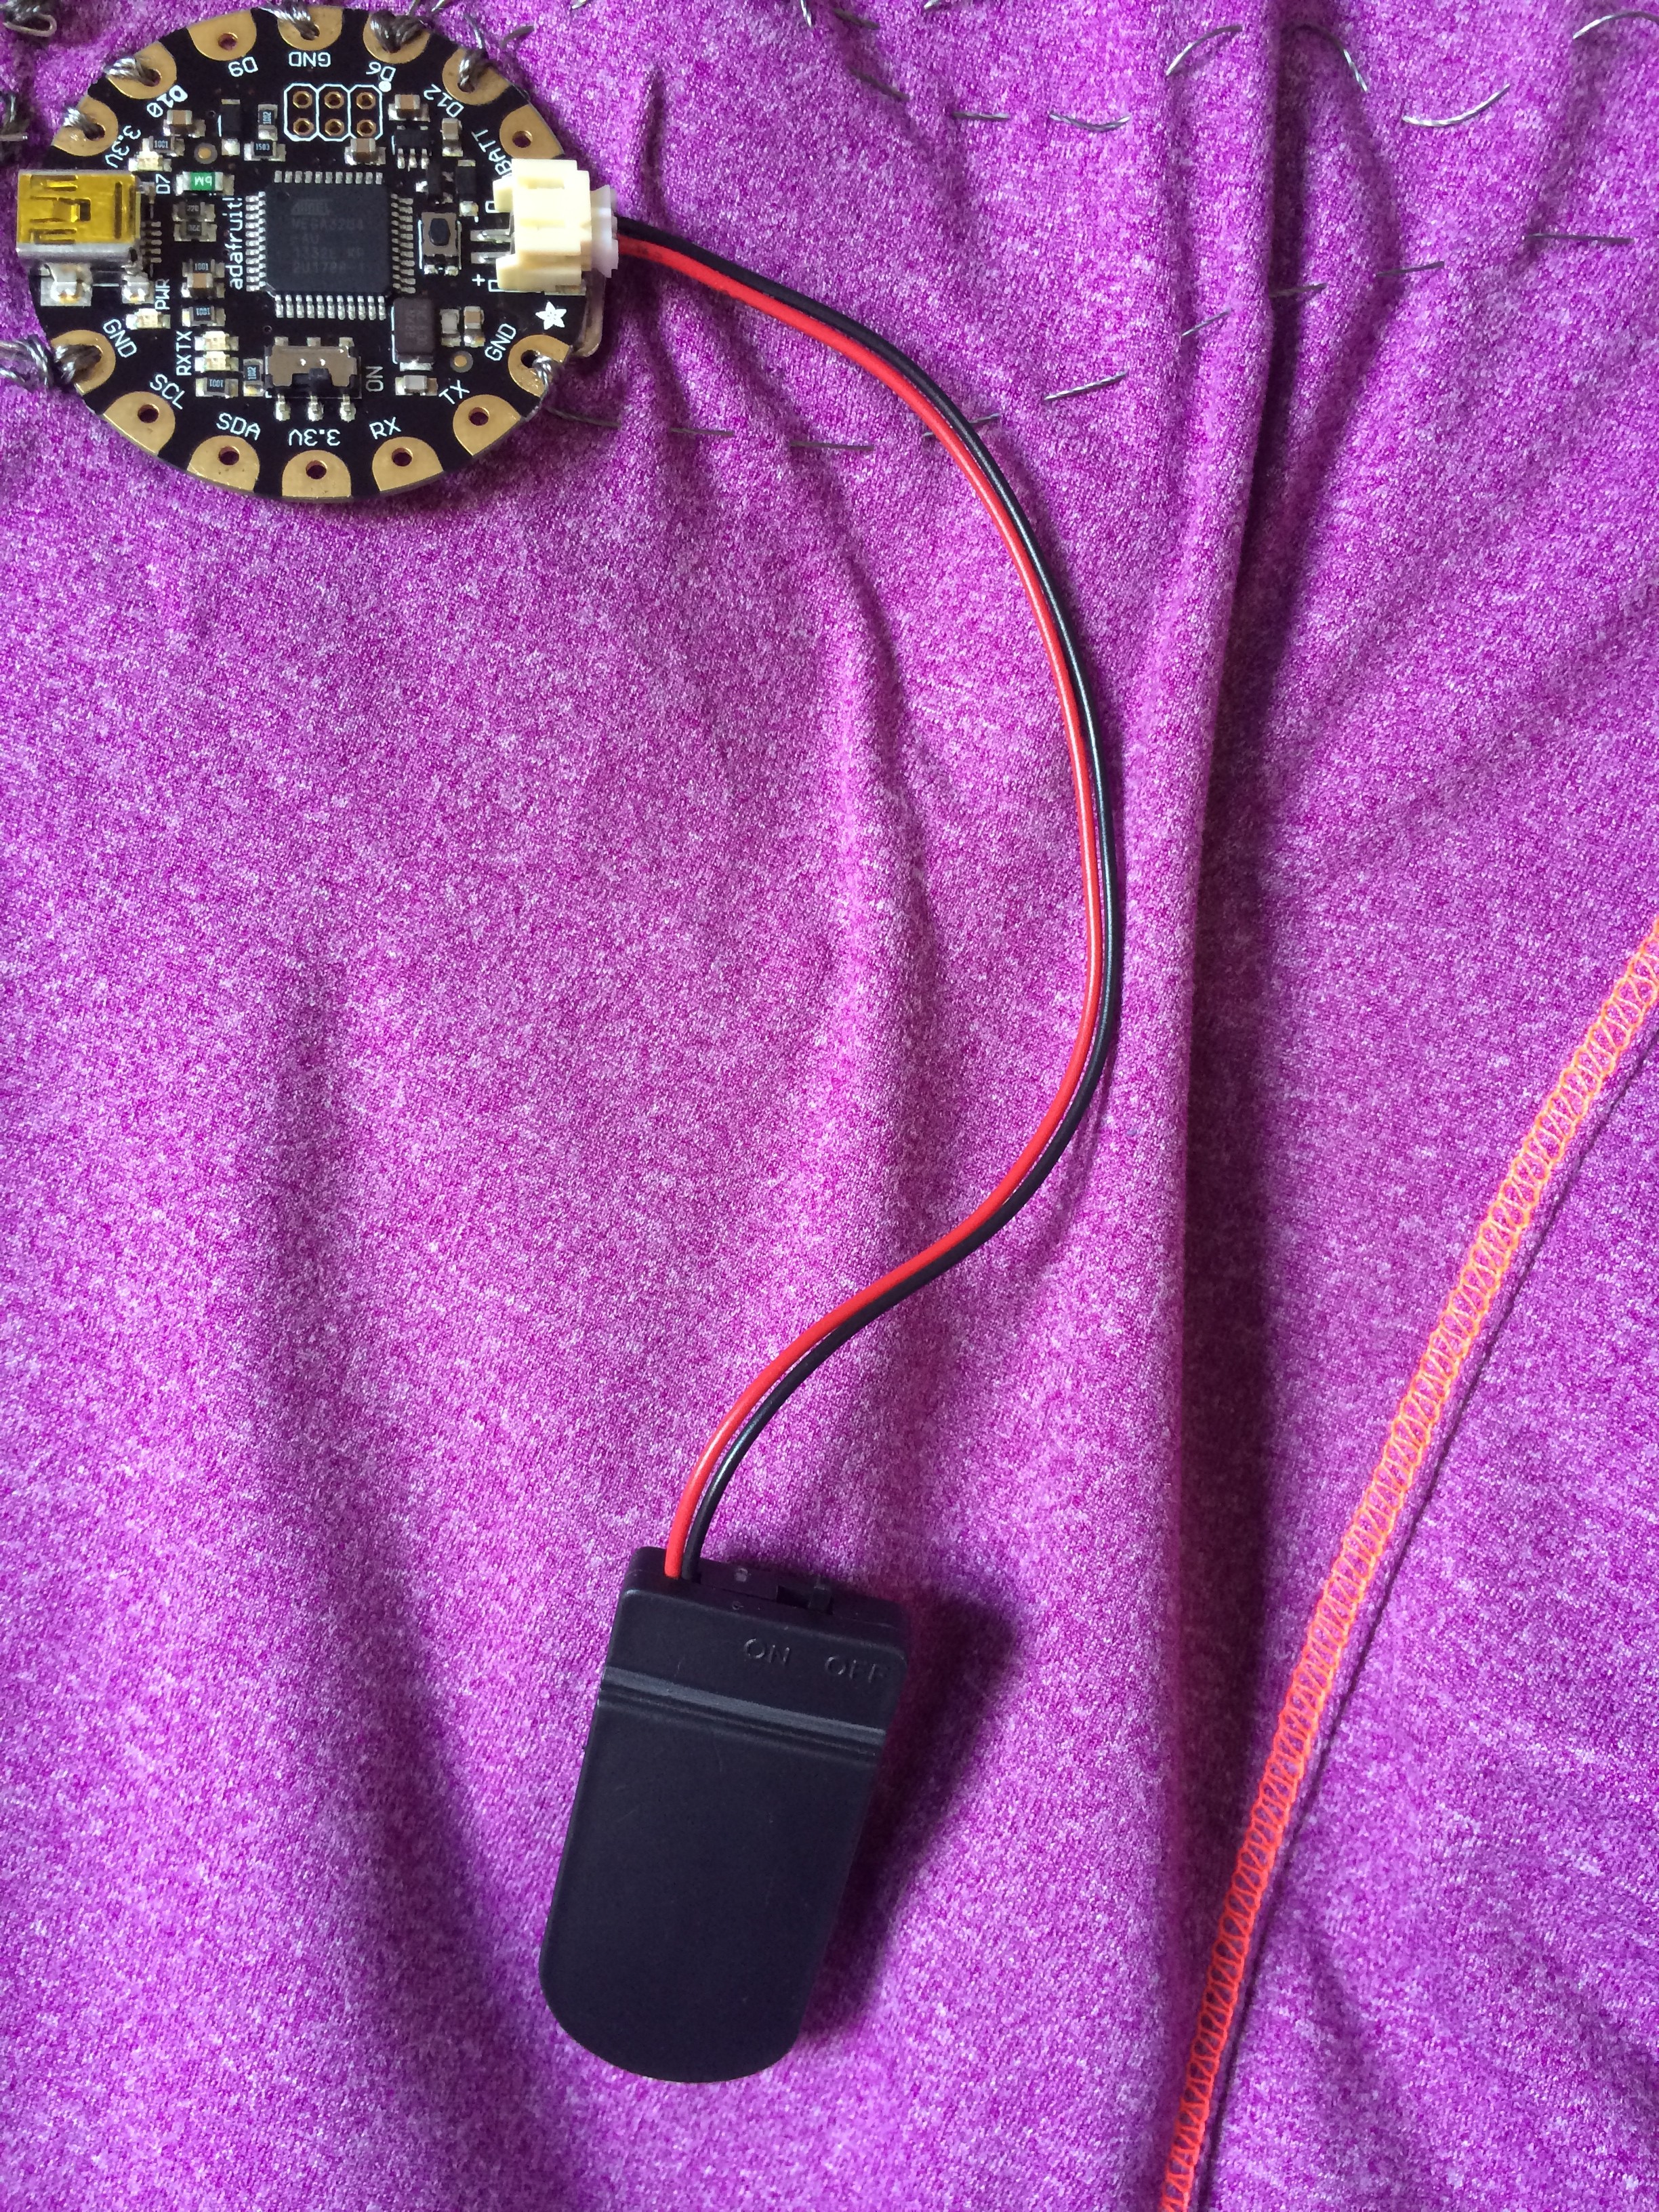
Once all the LED’s were working properly, I connected the battery so it could be autonomous. I chose to go with the coin batteries instead of the Lithium ion batteries strictly due to the weight factor. There were two small holes in the back of the battery case that I stitched the conductive thread to to hold it in place and tied a very simple knot.
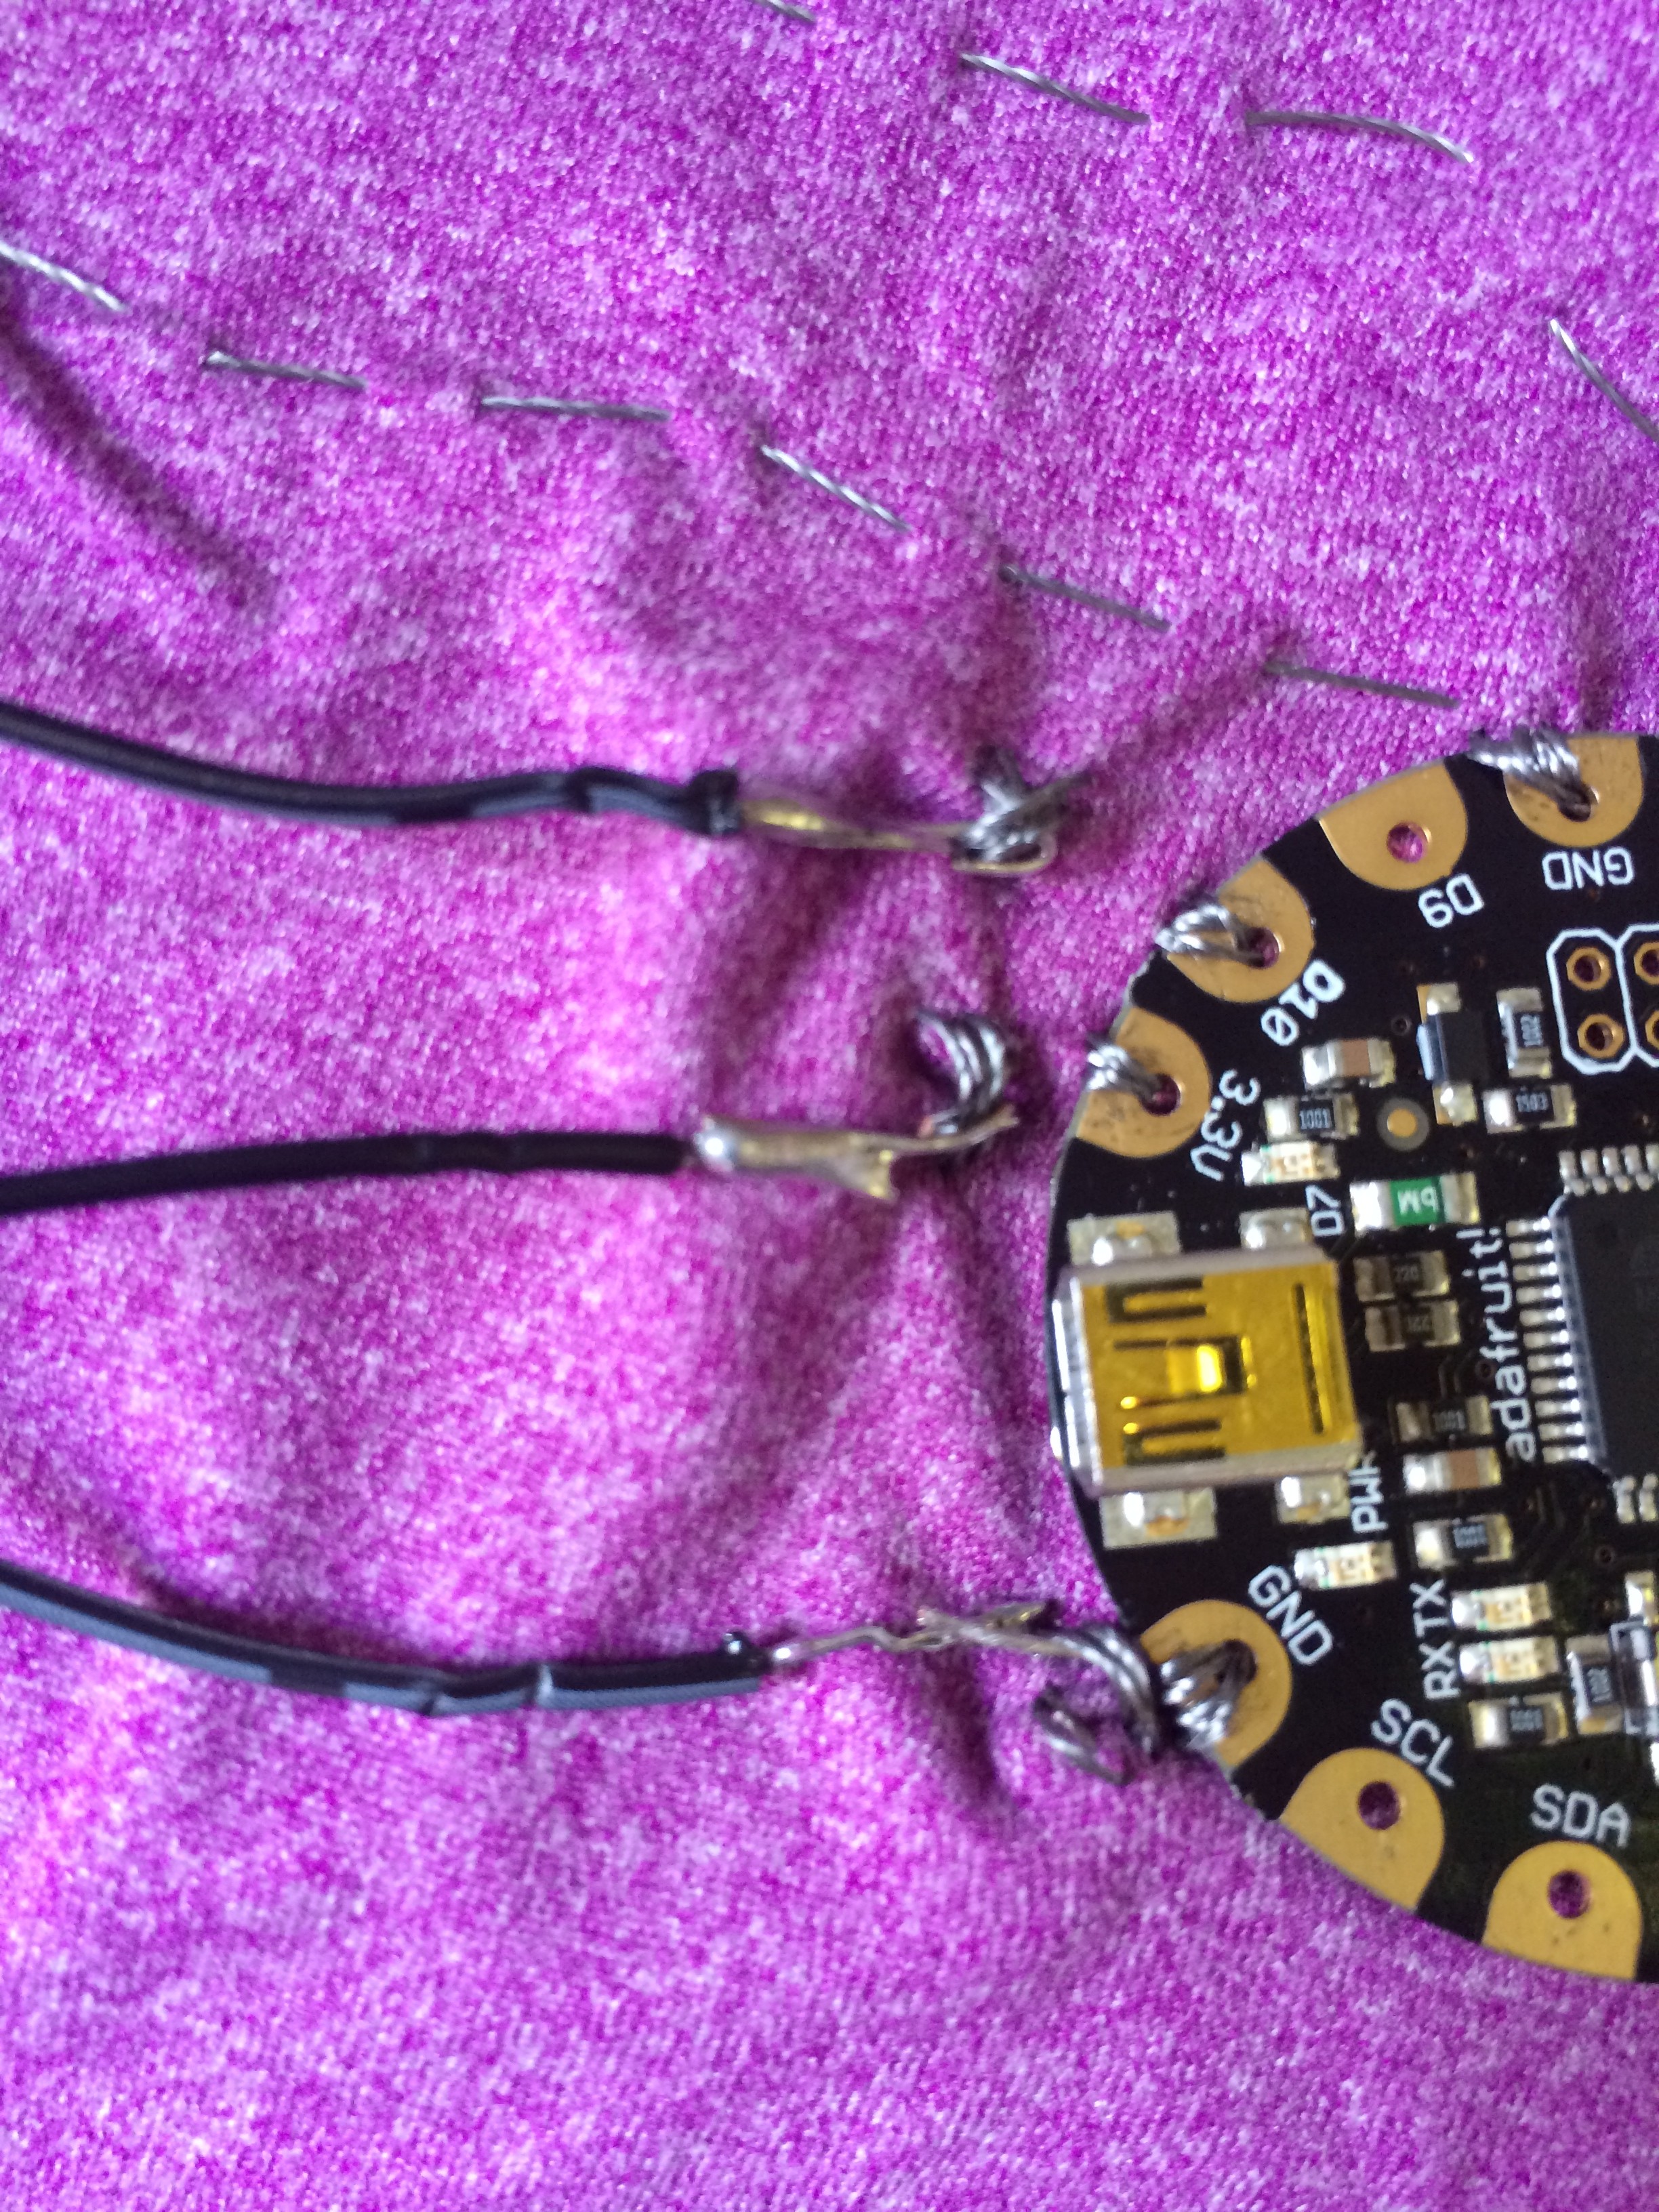
So now the short was working and I decided I wanted a more elegant look for the connection of the Pulse Sensor. It was still connected by the alligator clips. I connected the pulse sensor to some wires with female ends and used some stripped wires to create my own version of “hooks” I then stitched some fairly tight loops for the hooks to loop through and maintain a tight enough connection to be consistent. Unfortunately this idea was great, but the connection was not as stable as I would have liked for the Demo Night and continued to be unreliable all evening. I will have to work on this and come up with a better idea, which may include permanently connecting the Pulse Sensor to the Flora.
Overall, this was an incredibly fun project to to work on. It was incredibly rewarding to be exposed to the “maker” world. I don’t hunk I would have taken the initiative or had the courage to try tinkering with this on my own. Having the opportunity to explore this aspect of prototyping in an academic setting was idea for me, as the instructor and TAs were incredibly helpful and encouraging.
I think this may be my favorite class in HCDE so far. I found it mentally stimulating to problem solve and actually create a working prototype from the seed of an idea. I discovered I don’t like to code a lot, at least not in the traditional sense. However, this project was a fun way to apply my programming skills, and I could definitely envision myself becoming a novice maker/tinkerer. I would definitely like to continue working the Fit Shirt and develop the prototype further. I may explore this idea for my capstone project next year and see If I can incorporate some of Sean Munson’s research into the project for wellness and fitness tracking.
As far as my contribution to the class, I don’t know that I was very helpful. I did try to show an interest in others’ projects and share my relatively limited experience and help with components that I was working with. I learned a ton from my peers, and the biggest lesson was to have fun with the project and not get so frustrated or
I find wearables fun, and am definitely going to continue working with them in the future! Stay tuned for Fit Shirt 2.0, who knows this could turn into a Kickstarter campaign.